


              |  |
 |
 |
 |
 |
 |
 |
 |
 |
 |
 |
EDI Connect User's Guide
CHAPTER 3
As with all exteNd Composer components, the first step in creating an EDI component is to specify the XML templates needed. For more information, see the Chapter 2, Generating XML Template or Creating a New XML Template in the Composer User's Guide.
Once you've specified the XML templates, you can create a component, using the template's sample documents to represent the inputs and outputs processed by your component.
Also, as part of the process of creating an EDI component, you must first create Resources for Interchanges and Documents.
 To create a new EDI Component:
Select File>New> xObject. Open the Component tab and select EDI.
NOTE: Alternatively, under Component in the Composer window category pane you can highlight EDI, click the right mouse button, then select New.
Click Next. The XML Input/Output Property Info panel of the New EDI Component Wizard appears.
Specify the Input and Output templates as follows.
Type in a name for the template under Part if you wish the name to appear in the DOM as something other than "Input".
Select a Template Category if it is different than the default category.
Select a Template Name from the list of XML templates in the selected Template Category.
To add additional input XML templates, click Add and choose a Template Category and Template Name for each.
To remove an input XML template, select an entry and click Delete.
Select an XML template for use as an Output DOM using the same steps outlined above.
NOTE: You can specify an input or output XML template that contains no structure by selecting {System}{ANY} as the Input or Output template. For more information, see "Creating an Output DOM without Using a Template" in the User's Guide.
If desired, specify a template to be used as a scratchpad under the Temp Message pane of the dialog window. This can be useful if you need a place to hold values that will only be used temporarily during the execution of your component or are for reference only. Select a Template Category if it is different than the default category. Then select a Template Name from the list of XML templates in the selected Template Category.
Under the "Fault Message" pane, select an XML template to be used to pass back to clients when an error condition occurs.
As above, to add additional input XML templates, click Add and choose a Template Category and Template Name for each. Repeat as many times as desired. To remove an input XML template, select an entry and click Delete.
Click Next. Select an XML template type by clicking on the desired radio button. If you click on Inbound or Outbound, a generic set of Map Actions will be created for you. If you click on none, you will need to manually create the actions. In this example, select Inbound.
Click Finish. The following screen appears. As you can see in Map action pane, a series of generic actions have been automatically created for you. To customize each line, double-click on each action and a dialog will appear requiring you to input certain information. The actions that appear are the same as those created manually in Chapter 4 "Performing EDI Actions."
The EDI Component Editor includes all the functionality of the XML Map Component Editor. It contains mapping panes for Input and Output XML documents as well as an Action pane.
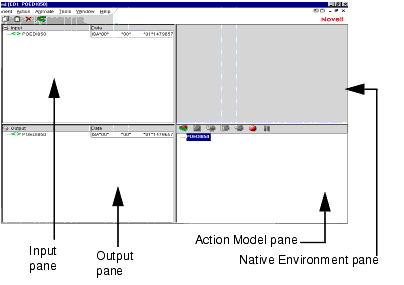
The EDI Native Environment pane shows the current Interchange Set in which the current area is highlighted.
For Inbound Processing, the Process Interchange set puts the entire EDI transaction set to the Native Environment pane and all the text is black. Proceeding to Get Next Interchange, text color of the current interchange turns to blue and the rest of the text is black. When you Get Next Document, the text changes to blue for the current document while the rest of the text remains black.
For Outbound Processing, Create EDI Interchange puts the interchange into the Native Environment Pane and the text is black. Proceeding to Transform EDI to XML, the text color of the current document turns to blue and the rest of the text remains black. When you Put EDI Interchange, the color of the current interchange text is blue while the rest of the text remains black.
 Making The EDI Action Detail DOM visible:
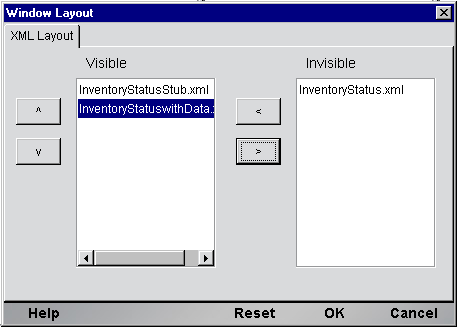
The Window Layout dialog appears and allows you to adjust the placement of the panels in the Window. Use the drop-down arrow in the four different fields, and select the placement of the Panes.
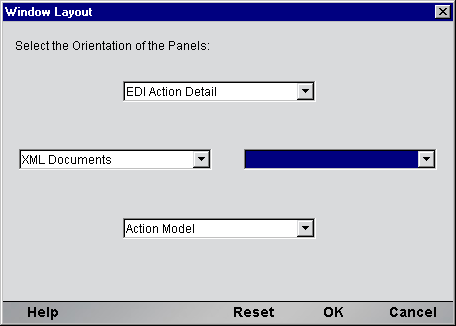
 To arrange the view of the XML documents in the component editor:
By using the directional buttons, you can move the Panes from the Invisible column to the Visible Column or vice versa. You can also choose the order in which visible selections appear on the screen.
Click OK to save your settings. Click Reset if you decide to change your settings.
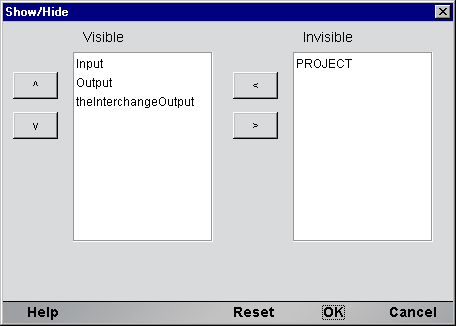
 To view the window layout in the Component Editor:
From the View Menu, select Window Layout.
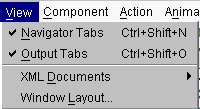
The Window Layout dialog allows you to adjust the placement of the panels in the Window. Use the drop-down arrow in the four different fields, and select the placement of the Panes.
The Functional Acknowledgement DOM contains an EDI message that is sent in response to the receipt of an EDI interchange or packet of interchanges to notify the sender of the original message that it was received. It acknowledges only the receipt of the interchange or interchange packet, and does not imply agreement with, or understanding of, its content.
Copyright © 2004 Novell, Inc. All rights reserved. Copyright © 1997, 1998, 1999, 2000, 2001, 2002, 2003 SilverStream Software, LLC. All rights reserved. more ...