Creating a Class of Service
-
In ConsoleOne®, right-click the Internet Agent object, then click Properties.
-
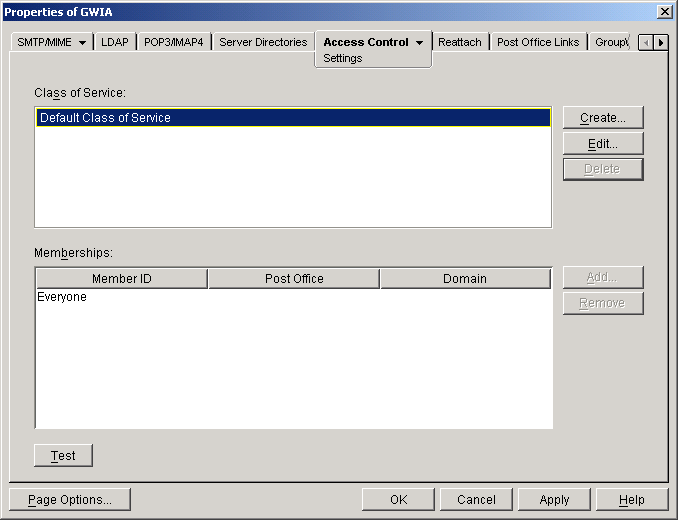
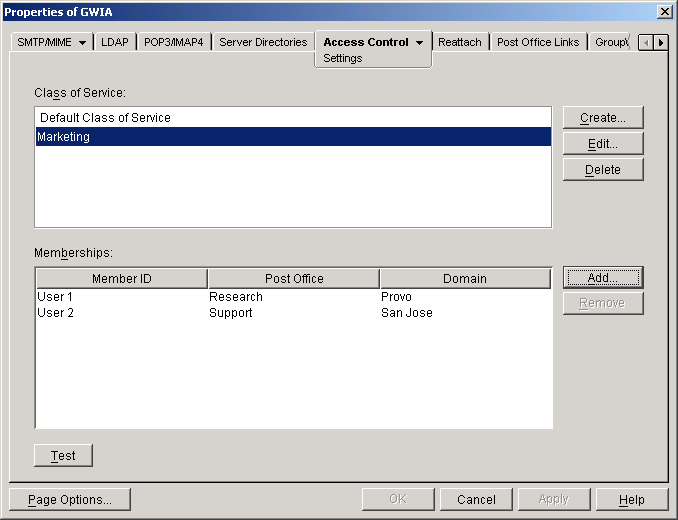
Click Access Control > Settings to display the Access Control Settings page.
-
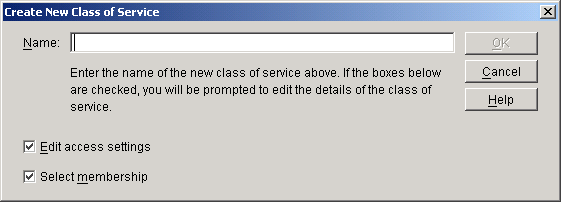
Click Create to display the Create New Class of Service dialog box.
-
Type a name for the class, then click OK to display the Edit Class of Service dialog box.
-
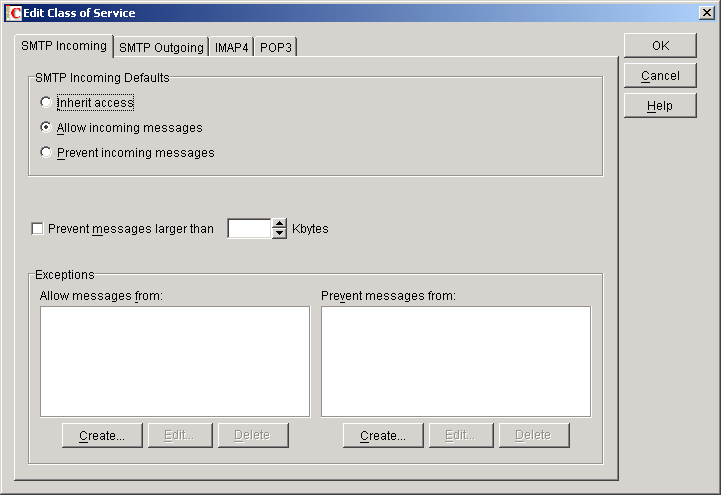
On the SMTP Incoming tab, choose from the following options:
Inherit Access: Select this option if you want members of this class of service to inherit their SMTP Incoming access from a class of service assigned at a higher level. For example, a post office would inherit the domain's access. If the domain was not a member of a class of service, the post office would inherit the default class of service.
Allow Incoming Messages: Select this option to allow members of the class of service to receive e-mail messages through the Internet Agent. You can use the Exceptions option to prevent messages from specific Internet sites.
Prevent Incoming Messages: Select this option to prevent e-mail messages coming from the Internet. You can use the Exceptions option to allow messages from specific Internet sites.
Prevent Messages Larger Than: This option is available only if you chose Allow Incoming Messages or Prevent Incoming Messages. In the case of Prevent Incoming Messages, this option only applies to messages received from Internet sites listed in the Allow Message From list.
If you want to set a size limit on incoming messages, select the limit.
Exceptions: This option is available only if you chose Allow Incoming Messages or Prevent Incoming Messages.
Prevent Messages From: If you've chosen to allow incoming messages but you want to prevent messages from specific Internet sites (IP addresses or DNS hostnames), add the sites to the Prevent Messages From list.
Allow Messages From: Conversely, if you've chosen to prevent incoming messages but you want to allow messages from specific Internet sites (IP addresses or DNS hostnames), add the sites to the Allow Messages From list.
If you want to allow messages where the username is blank, add Blank-Sender-User-ID to the Allow Message From list.
-
Click the SMTP Outgoing tab, then choose from the following options:
Inherit Access: Select this option if you want members of this class of service to inherit their SMTP Outgoing access from a class of service assigned at a higher level. For example, a post office would inherit the domain's access. If the domain was not a member of a class of service, the post office would inherit the default class of service.
Allow Outgoing Messages: Select this option to allow members of the class of service to send e-mail messages over the Internet. You can use the Exceptions option to prevent messages from being sent to specific Internet sites.
Prevent Outgoing Messages: Select this option to prevent members of the class of service from sending e-mail messages over the Internet. You can use the Exceptions option to allow messages to be sent to specific Internet sites.
Prevent Messages Larger Than: This option is available only if you chose Allow Outgoing Messages or Prevent Outgoing Messages.
If you want to set a size limit on outgoing messages, specify the limit.
If a user tries to send an Internet message that exceeds the specified size, the sender receives an e-mail message indicating that the message is undeliverable and including the following explanation:
Message exceeds maximum allowed size
Allow Rule-Generated Messages: This option is available only if you chose Allow Outgoing Messages or Prevent Outgoing Messages.
Turn on this option to allow the Internet Agent to send messages that were generated by a GroupWise rule.
Exceptions: This option is available only if you chose Allow Outgoing Messages or Prevent Outgoing Messages.
If you've chosen to allow outgoing messages but you want to prevent messages from being sent to specific Internet sites (IP addresses or DNS hostnames), add the sites to the Prevent Messages To list.
Conversely, if you've chosen to prevent outgoing messages but you want to allow messages to be sent to specific Internet sites (IP addresses or DNS hostnames), add the sites to the Allow Messages To list.
-
Click the IMAP4 tab, then choose from the following options:
Inherit Access: Select this option if you want members of this class of service to inherit their IMAP4 access from a class of service assigned at a higher level. For example, a post office would inherit the domain's access. If the domain was not a member of a class of service, the post office would inherit the default class of service.
Allow Access: Select this option to allow members of the class to send and receive messages with an IMAP4 client.
Prevent Access: Select this option to prevent members of the class from sending and receiving messages with an IMAP4 client.
-
Click the POP3 tab, then choose from the following options:
Inherit Access: Select this option if you want members of this class of service to inherit their POP3 access from a class of service assigned at a higher level. For example, a post office would inherit the domain's access. If the domain was not a member of a class of service, the post office would inherit the default class of service.
Allow Access: Select this option to allow members of the class to download their GroupWise messages to a POP3 client.
Prevent Access: Select this option to prevent downloading GroupWise messages to a POP3 client.
Delete Messages from GroupWise Mailbox after Download: This option applies only if you've selected Allow Access.
If you turn on this option, messages downloaded from a GroupWise Mailbox to a POP3 client will be moved to the Trash folder in the GroupWise Mailbox.
POP3 client users can enable this option by using the userID:d login option when initiating their POP session. For more information, see User ID Login Options.
Purge Messages from GroupWise Mailbox after Download: This option applies only if you've selected Allow Access.
If you turn on this option, messages downloaded from a GroupWise Mailbox will be moved to the Mailbox's Trash folder and then emptied, completely removing the messages from the Mailbox.
POP3 client users can enable this option by using the userID:p login option when initiating their POP session. For more information, see User ID Login Options.
Convert Messages to MIME Format When Downloading: This option applies only if you've selected Allow Access.
If you turn on this option, messages downloaded to a POP3 client will be converted to the MIME format.
POP3 client users can enable this option by using the userID:m login option when initiating their POP session. The can disable it by using the userID:n login option; this converts messages to RFC-822 format. For more information, see User ID Login Options.
High Performance on File Size Calculations: This option applies only if you've selected Allow Access.
POP3 clients calculate the size of each message file before downloading it. Turn on this option if you want to assign a size of 1KB to each message file. This eliminates the time associated with calculating a file's actual size.
POP3 client users can enable this option by using the userID:s login option when initiating their POP session. For more information, see User ID Login Options.
Number of Days Prior to Today to Get Messages From: This option applies only if you've selected Allow Access.
Select the number of days to go back to look for GroupWise Mailbox messages to download to the POP3 client. The default is 30 days.
POP3 client users can override this option by using the userID:t=x login option when initiating their POP session. For more information, see User ID Login Options.
Maximum Number of Messages to Download: This option applies only if you've selected Allow Access.
Select the maximum number of messages a user can download at one time from a GroupWise Mailbox to a POP3 client. The default is 100 messages.
POP3 client users can override this option by using the userID:l=x login option when initiating their POP session. For more information, see User ID Login Options.
-
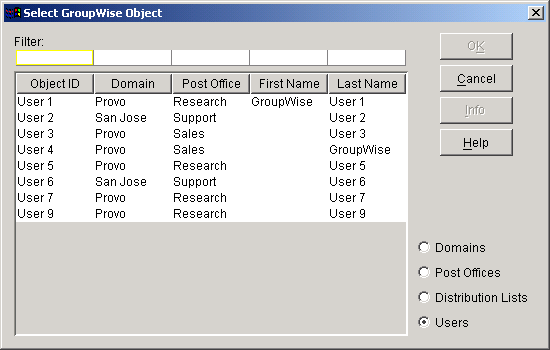
Click OK to display the Select GroupWise Object dialog box.
-
Click Domains, Post Offices, Distribution Lists, or Users to display the list you want.
-
In the list, select the domain, post office, distribution list, or user you want, then click Add to add the object as a member in the class. You can Control+click or Shift+click to select multiple users.
-
To add additional domains, post offices, distribution lists or users as members of the class of service, select the class of server, then click Add to display the Select GroupWise Object dialog box.
-
Click OK (on the Settings page) when finished adding members.