9.2 Using the Policy Simulator
The Policy Simulator allows you to select a point in the driver flow to test the policy with a specific operation. It allows you to edit the input and output documents while you are testing. If you want to keep the changes, select the icon to save the document as an XML file.
To use the Policy Simulator:
-
From the Simulation Point drop-down list, select the place in the driver flow that you want to test the policy.
You can select the any of the following items: Publisher Channel, Subscriber Channel, Input, Schema Mapping, Event, Sync Filter, Matching, Creation, Placement, Command and Notify Filter.
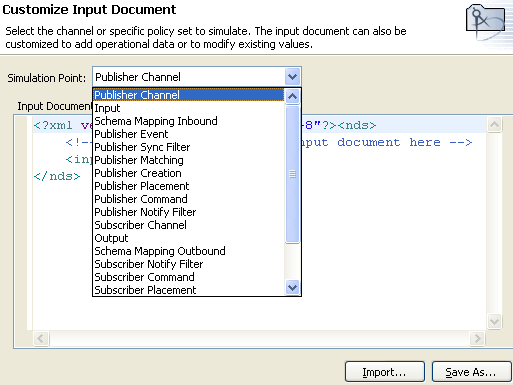
If you select a specific policy or rule to test, the Simulation Point option only shows or .
-
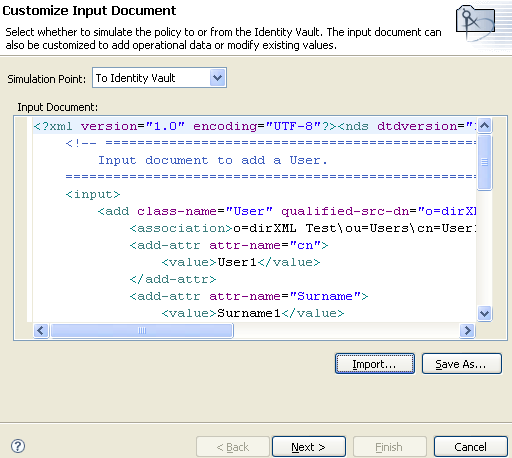
Select , then browse to and select a file to test.
Designer comes with sample event files you can use. The files are located in the plug-in com.novell.designer.idm.policy\simulation. The event are Add, Association, Delete, Instance, Modify, Move, Query, Rename, and Status.
-
Double-click a folder and to display the available events.
Each event has different files you can select. For example, if you select , you have three options: Organization.xml, OrganizationalUnit.xml, and User.xml. The file indicates the event. If you select User.xml, it is an Add event for a user object.
-
Select a file, then click to display the input document in the window.
-
Click to begin the simulation.
-
Select the tab to display the results of the Add event as you would through DSTRACE.
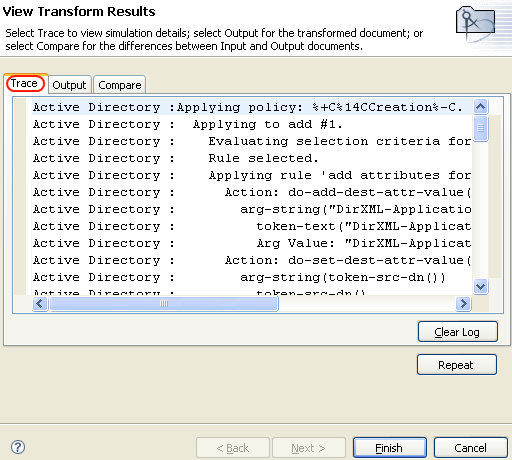
Click , then click to run the simulation again with the new trace log.
-
Select the tab to see the output document that is generated when the policy is executed against an input document. The input document is the user Add event.
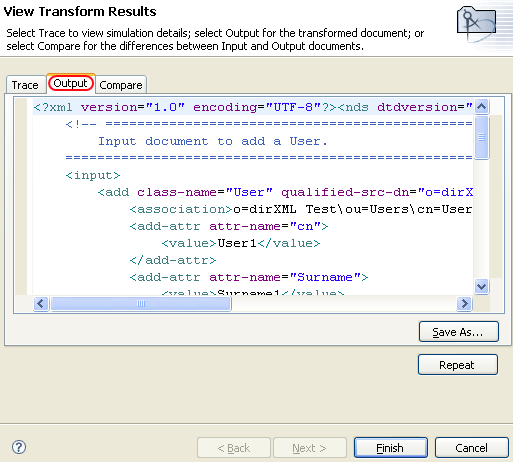
You can edit the input and output documents. If you want to keep the changes, click .
-
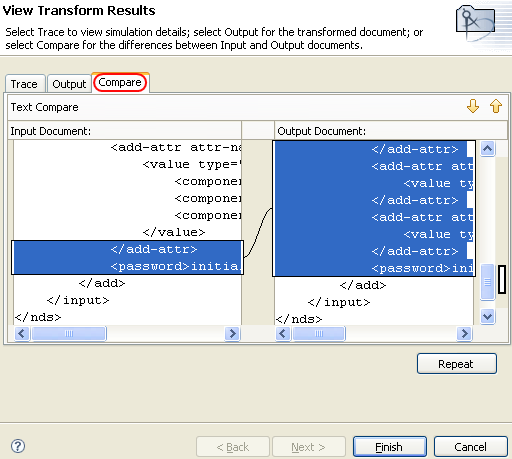
Select the tab to compare the output document to the input document.
-
Click to select a different input document and see the results of that event.
-
When you are finished testing, click to close the Policy Simulator.