4.1 Installing DST on a New OES 11 SP3 Server
You can install the Novell NCP Server / Dynamic Storage Technology pattern during the OES 11 SP3 installation. For general installation instructions for OES 11 SP3, see the OES 11 SP3: Installation Guide.
-
Start the YaST install For SUSE Linux Enterprise Server and continue to the Installation Mode page.
-
Select New Installation and Include Add-On Products from Separate Media, click Next, then continue with the installation as desired until you get to the Installation Settings page.
-
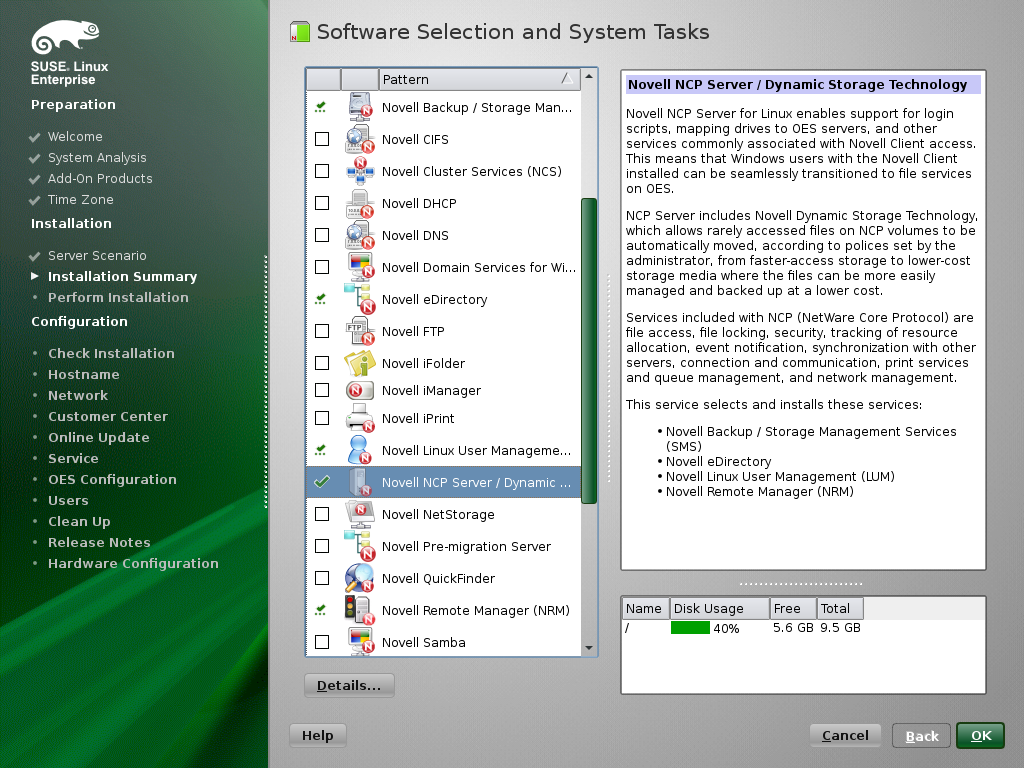
On the Install Settings page, click Software to open the Software Selection and System Tasks page.
-
Under Open Enterprise Server, select Novell NCP Server / Dynamic Storage Technology.

When you select Novell NCP Server / Dynamic Storage Technology, the following additional Open Enterprise Server patterns are automatically selected:
-
Novell Backup / Storage Management Services
-
NetIQ eDirectory
-
Novell Linux User Management
-
Novell Remote Manager (NRM) for Linux
-
-
Select Novell Storage Services from the Open Enterprise Server patterns.
NSS is required because DST shadow volume pairs are supported only for NSS volumes.
-
(Optional) Select Novell iManager from the Open Enterprise Server patterns.
You must install Novell iManager somewhere in your network, but it is not necessary to install it on every server.
-
(Optional) If you plan to configure shared DST shadow volumes in a cluster, select Novell Cluster Services (NCS) from the Open Enterprise Server patterns.
For detailed information about configuring Novell Cluster Services after the installation is complete, see
Configuring Novell Cluster Services
in the OES 11 SP3: Novell Cluster Services for Linux Administration Guide. -
(Optional) If you plan to provide access to DST shadow volumes for CIFS users, select one of the following from the Open Enterprise Server patterns:
-
Novell CIFS
-
Novell Samba
-
-
Click OK to accept the software choices and return to the Installation Settings page.
-
Continue with the installation.
When the installation is complete, NCP Server and Dynamic Storage Technology run automatically on system restart.
-
After the installation is completed, continue with Section 7.0, Configuring DST Global Policies.