5.4 Extending a Domain Boundary in a Name-Mapped Installation
DSfW enables you to map multiple partitions to a domain. You can extend the partition of a domain by adding existing partitions to it. When you add an existing partition to the domain, the associated users and groups become a part of the DSfW domain. You can map multiple partitions to a domain either during DSfW provisioning or after the provisioning. To map multiple partitions to a domain post provisioning, see Extending the Domain Post Provisioning.
IMPORTANT:Consider the following guidelines:
-
If you are extending the domain partition of a domain, ensure that all the domain controllers of the domain are running on OES 2015 or later.
-
If a DSfW forest has multiple domains and you want to extend the domain partition of a domain, you must ensure that all the domains of the DSfW forest are on OES 2015 or later. Otherwise, cross domain access and authentication will not work.
-
If you have already mapped a partition to a DSfW domain, then you cannot map the sibling partitions to create a new DSfW domain. However, this restriction is applicable only for the first domain or FRD in a forest.
5.4.1 Prerequisite
After completing the DSfW configuration and before initiating the provisioning process, you must ensure that the required replicas are present on the local server. However, for ADC installation, ensure that all replicas that are already part of the domain are present on the local server.
NOTE:The supported replica type is either read-write or master.
5.4.2 Use Case Scenario
Consider a scenario where you have an existing eDirectory tree with ou=example,o=organization as the partition and you want to map this partition to the example.com domain.
NOTE:The RDN of the mapped partition need not match the domain name. For instance, the partition ou=example,o=organization can be mapped to dsfw.com.
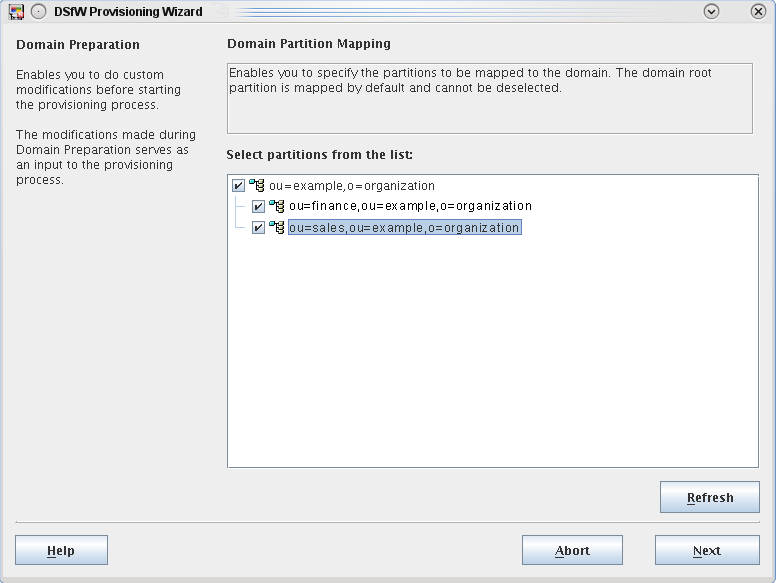
Along with the ou=example,o=organization partition, there are some additional partitions such as ou=finance,ou=example,o=organization and ou=sales, ou=example,o=organization, that need to be mapped to the example.com domain. To add these partitions to the domain:
-
After the DSfW configuration is complete, launch the Provisioning Wizard by selecting the DSfW Provisioning Wizard option from YaST. Alternatively, you can execute the following script at the command prompt: /opt/novell/xad/sbin/provision_dsfw.sh.
-
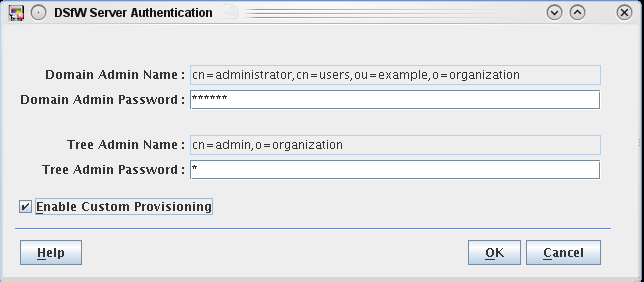
Enter the authentication details in the login dialog box, depending on the scenario in which you are provisioning.
-
To customize provisioning, select the Enable Custom Provisioning check box, then click OK.

-
Select the partitions that you want to map to the domain. When you select a partition, validation checks are performed on the partition before mapping it to the domain. In this example, select the partitions ou=finance, ou=example,o=organization and ou=sales, ou=example,o=organization.

-
Click Next to continue with the DSfW provisioning process.
5.4.3 Caveat
While selecting the partitions, you must ensure that there is no gap between the partitions. If you select partitions that introduce gaps, partitions in between will also be selected automatically.