3.3 Viewing Communities
To view existing communities use the tab, then select the or select the tool.
3.3.1 To Show All Communities
Use the link to display all of the communities on the system. If more communities exist in the system than can be displayed on a page, use the and buttons to scan the list of communities.
3.3.2 To Find a Community by Name
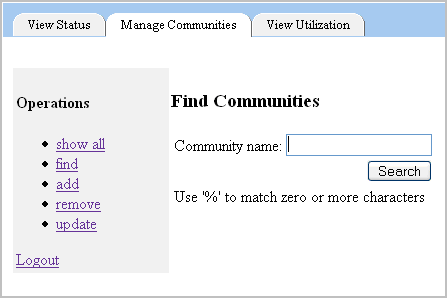
Use the link to display an entry field for the community name and a button:
Figure 3-2 Community Search

You can enter the entire community name, or use thewildcard character to find a community. When a community that matches your search parameter is found, the table displays the matching communities.
For example:
Figure 3-3 Find Communities Table

The table contains the following values for each community returned in the search:
Operations Tools that allow you to update, remove or enable/disable a community. The users of a disabled community cannot log into the system.
Community ID: – The ID of the community that has been assigned by the database.
Community Name: The community name.
Account Number: The account number for the community, which can be used for billing/cost center purposes.
Contact Name: The primary contact for the community.
Contact Email: The e-mail address of the primary contact.
Contact Phone: The phone number of the primary contact.
User Name: The full name of the initial user of the community. Generally, the initial user is the community administrator.
User Password: The password for the initial user of the community.
Bridge Phone: The phone number for the voice bridge assigned to the community.
System URL: The URL that is used for community meeting invitation.
Account Type: The account type for the initial user. The account type can be either normal or admin.
Account Status: Indicates whether the community is enabled or disabled. A disabled community is not accessible by any of the community members.