10.0 Performing an Advanced Teaming Installation
You should already have reviewed Section 3.0, Planning a Basic Teaming Installation and filled out the Basic Teaming Installation Summary Sheet. You should also have reviewed Section 9.0, Planning an Advanced Teaming Installation and filled out the Advanced Teaming Installation Summary Sheet for those aspects of an Advanced installation that you want to implement for your Novell® Teaming site.
-
Follow the Basic installation instructions provided in Section 4.0, Setting Up a Basic Teaming Site for the platform where you are installing Teaming.
-
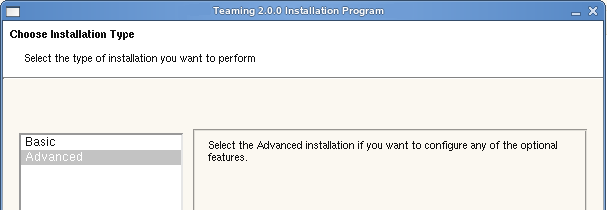
In the Choose Installation Type page, select .

-
Use the information that you have gathered on the Basic Teaming Installation Summary Sheet and the Advanced Teaming Installation Summary Sheet to provide the information that the Teaming Installation program prompts you for:
Basic Installation Pages:
- Installation Locations
- Location of TrueType Fonts for Stellent Converters
- Default Locale for Novell Teaming
- User ID for Novell Teaming (Linux only)
- Network Information
- Database Selection
- Java JDK Location
- Outbound E-Mail Configuration
- Inbound E-Mail Configuration
Some Basic installation pages have additional options available when you perform an Advanced installation.
Advanced Installation Pages:
- Web Services
- Lucene Configuration
- RSS Configuration
- Presence Configuration
- Reverse Proxy Configuration
- Mirrored Folder Resource Driver Configuration
- Teaming Cluster Configuration
The Installation program stores the information it gathers in the installer.xml file in the same directory where you started the Installation program.
-
After you have provided all the requested information, click to begin the Advanced installation.
-
When the installation is completed, click to exit the Teaming Installation program.
Information about the installation process is written to the installer.log file in the same directory where you ran the Installation program. If a problem arises during the installation, the installer.log file provides information that can help you resolve the problem.
-
After you complete the Advanced installation, continue setting up your Teaming site, as described in Section 5.0, Adding Users to Your Teaming Site.