15.7 Enrolling Android Devices to Samsung Knox Portal
You can enroll an android device to the Knox Enrollment portal and set up the Enterprise Mobility Management (EMM) configuration. The Knox security system protects the mobile data by securing the OS of mobile devices through data protection.
ZENworks provides you the option to enroll Samsung Knox devices into Mobile Device Management (MDM) solutions. This enrollment method enables administrators to set up Samsung devices right out of the box with a one-time configuration.
NOTE:Only the Samsung devices that are purchased from authorized resellers are eligible for enrollment using Samsung Knox Mobile Enrollment.
To enroll the android device to the Samsung Knox Enrollment portal, perform the following steps:
-
Create a Samsung Knox Account. To set up a Samsung Knox account, perform the steps mentioned on the Samsung Knox portal.
-
Upload the device/(s) to the Knox portal. For more information, see Uploading Devices.
-
Create a new profile and configure the settings on the Samsung Knox Admin Portal. This allows you to manage the uploaded devices and to link the devices to the profile.
To create a profile, perform the following steps on the Knox Admin Portal:
-
On the Profiles page, click Create profile.
-
Select Android Enterprise as the profile type. This profile contains the MDM server URL and the play store application link. This step ensures that the devices enrolled using Knox Enrollment are automatically provisioned as Device Owner.
-
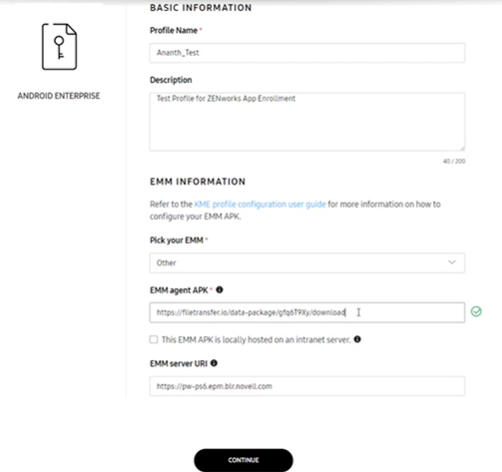
Enter a profile name, and (Optional) add a description for this profile.
-
Enter the required details in the EMM Information section:
-
Pick your EMM: Select as Others
-
EMM agent APK: Enter the Playstore link from where you can download the ZENworks APK. Enter the APK url value as https://play.google.com/managed/downloadManagingApp?identifier=zenworks
-
EMM server URL: Enter the ZENworks server URL. For example, https://server.epm.blr.novell.com
-
-
Click Continue.
-
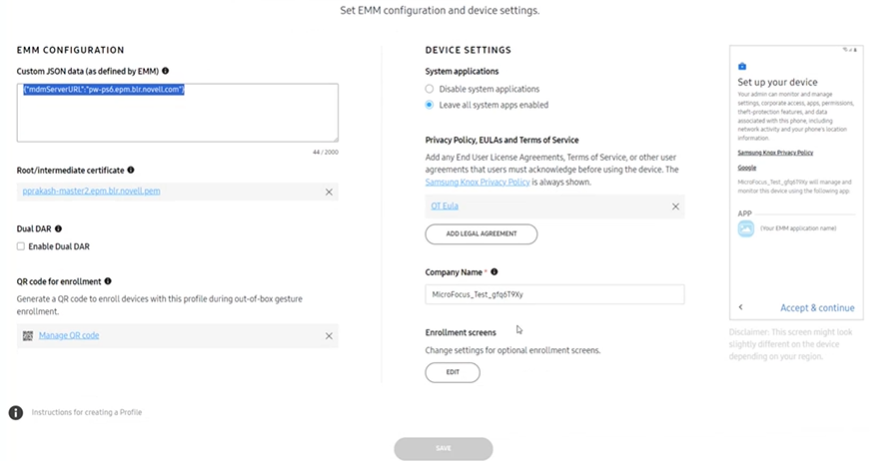
On the EMM Configuration and device settings page, enter the required details:
-
Custom json Data (as defined by EMM): Enter the custom json value as {"mdmServerURL":"your-mdm-server-url"}
You need to enter the ZENworks MDM server URL in the Custom Json Data. For example, {\"mdmServerURL\":\"server.epm.blr.novell.com\"}
-
Add/ update the Private Policy/ EULA by clicking Add Legal Agreement
-
Enter the company name
-
-
Click Save. The profile is created.
For more information on creating a new profile, see Android Enterprise Profiles.
-
-
Assign the newly created profile to a device that you want to manage through ZENworks. To assign the profile to one or more devices, perform the following steps:
-
On the Knox Admin Portal, click Knox Mobile Enrollment and then click Devices.
-
Select one or more devices to assign the profile to.
-
Click Actions and then click Configure devices.
-
Edit the profile for the selected devices.
-
Click Save.
The profile is assigned to one or more selected devices.
Once you create the new profile and link this profile to the selected device, the Knox account saves the details of newly created profile and the device linked to this profile
-
-
Enroll the android device as a work-managed device to Samsung Knox Enrollment portal.
NOTE:The ZENworks server communicates with the Android device using the ZENworks Agent application. Therefore, to enroll Android devices in either the work-profile or the work-managed device mode, you need to have the ZENworks Agent application installed on the device.
To enroll the android device to the Knox Enrollment portal, perform the following steps:
-
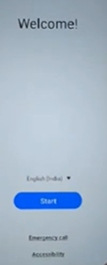
Boot the android device and then click Start on the Welcome screen.
-
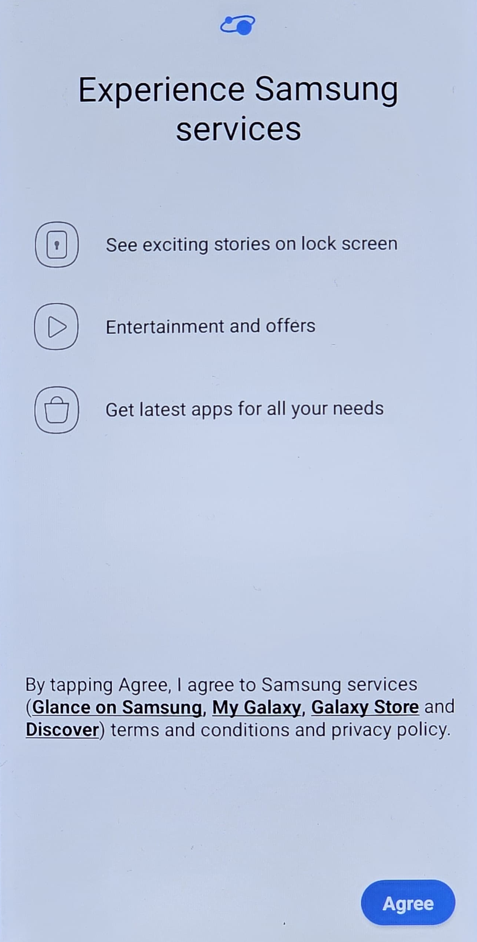
Click Agree to accept the privacy policy and agreements.
-
Connect to a wi-fi network and then click Next on the Work-managed device Setup screen.
-
Click Next in the Android for Work page to proceed with the ZENworks installation.

-
Click Continue to install the application on the device and follow the prompts to complete setting up the device.
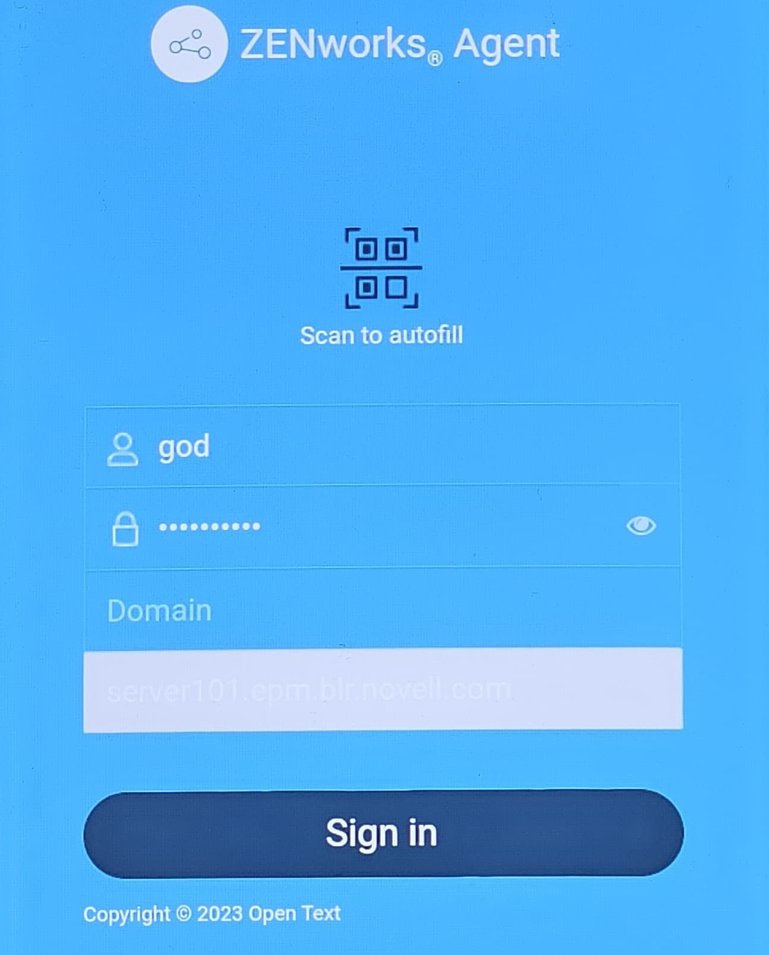
NOTE:
-
For Knox android devices, you cannot edit the Server URL or the Scan to autofill options while enrolling the device. This is to ensure that the device gets enrolled to the server that an Administrator has configured.
-
The back button displayed at the bottom of the ZENworks Agent login page, is disabled for Knox devices. This ensures that the Knox device enrollment is complete without exiting the application.
Once the Knox device enrollment is complete, the back button is enabled.
-
-
Follow the prompts appearing on the remaining screens to set up a work-managed device for Knox enrollment.
-
-
The android device is enrolled on the Knox Admin portal.