Service Selector Panel
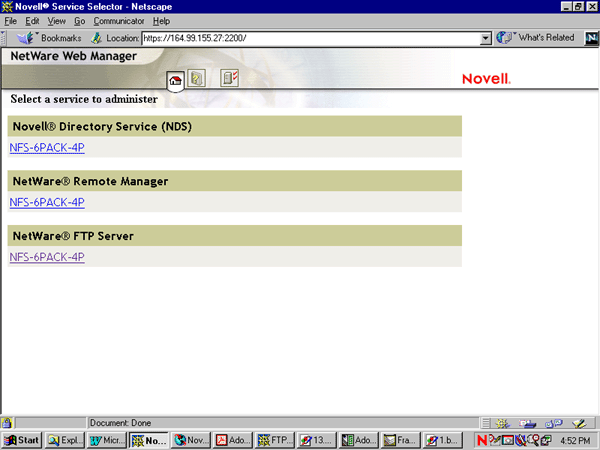
You can use the NetWare Web Manager for administering FTP Service from client- side.To do this, enter the following URL to display the Service Selector panel (the default port number is 2200):
https://remote_server_name : port_number
Figure 1
Service Selector Panel
In the Service Selector panel, select NetWare FTP Server to display the Service Manager panel.
Figure 2
Service Manger Panel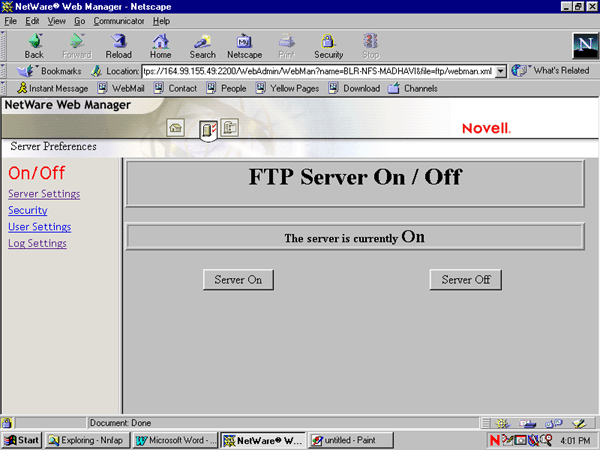
In the Service Manager panel you can view the Server Preferences menu, which provides links to the configuration pages of FTP Server by clicking the Server Preferences icon at the top of the panel.
When you click this icon, the initial main panel displays FTP Server On/off Panel. You can start or stop NetWare FTP Service from the client side by clicking either of the buttons.
In the Server Preferences menu, click Server Settings.
Figure 3
Server Settings Panel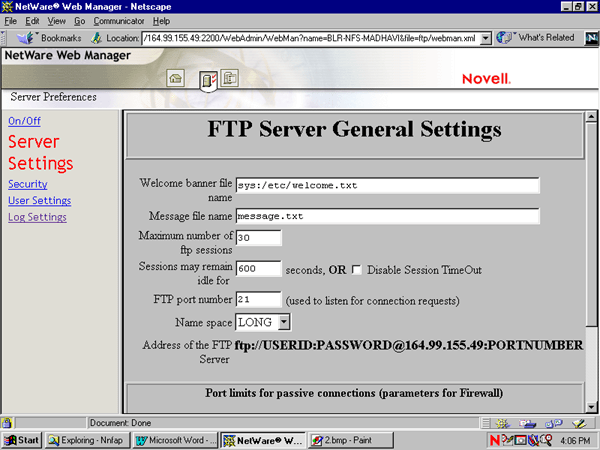
Specify the FTP Server settings. For specific information about each parameter, refer the online help.
Click Save to save your settings or click Reset to retain the previous settings.
In the Server Preferences menu, click Security.
Figure 4
Security Panel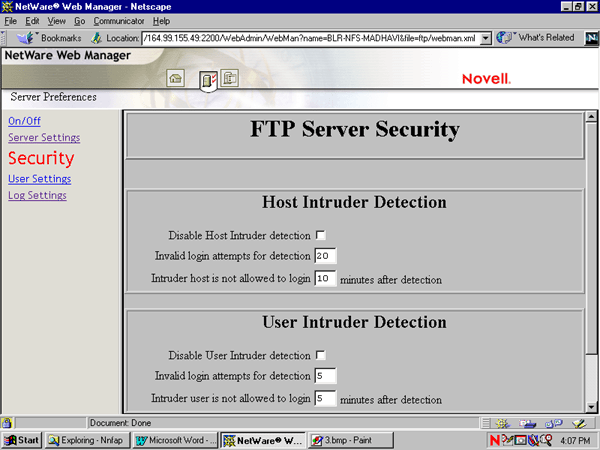
Specify the FTP Server Security settings. For specific information about each parameter, refer the online help.
Click Save to save your settings or click Reset to clear your settings.
In the Server Preferences menu, click User Settings.
Figure 5
User Settings Panel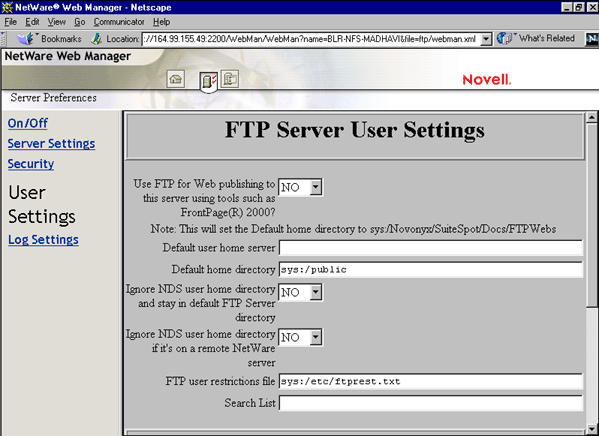
Specify the FTP Server User Settings. For specific information about each parameter, refer the online help.
Click Save to save your settings or click Reset to clear your settings.
In the Server Preferences menu, click Log Settings.
Figure 6
Log Settings Panel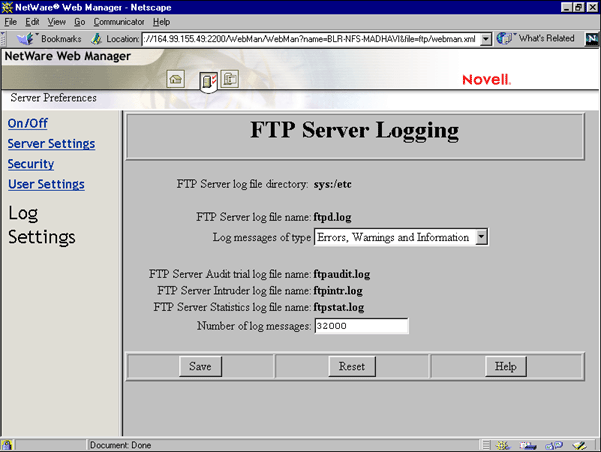
Select the type of log messages from the Log Messages of Type drop down list, and enter the Number of Log messages. For specific information about each parameter, refer the online help.
Click Save to save your settings or click Reset to retain previous settings.