4.5 Customizing General Connector Configuration Settings
Some connector configuration settings are the same for all connectors.
4.5.1 Controlling Connector Startup
By default, connectors start automatically whenever you restart the Synchronizer services. You can change this behavior if necessary
-
In Synchronizer Web Admin, click the connector that you want to change the startup setting for.
-
(Conditional) If necessary for the selected connector, scroll down to the section.

-
Select so that the connector does not start automatically.
-
Click .
-
Click on the menu bar to return to the main Synchronizer Web Admin page.
-
In the column for the selected connector, click
 to stop the connector, then click
  to start the connector with the new startup setting.
4.5.2 Configuring Connector Filters
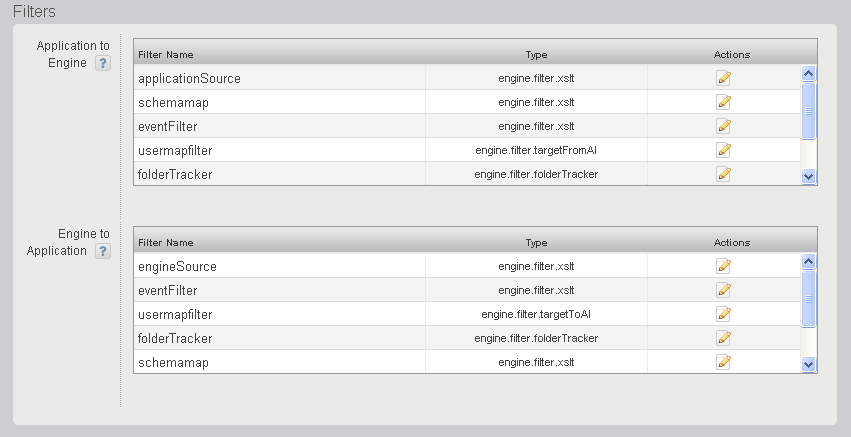
The connector filters are the mechanism by which data formatted for one application is transformed into application-neutral format for processing by the Sync Engine, then customized for use by a different connector. The default filters are appropriate for typical Synchronizer systems, but they can be edited if necessary.
NOTE:Changing the connector filters is not recommended unless you are a developer who is providing a customized implementation of a connector.
-
In Synchronizer Web Admin, click the connector that you want to edit the filters for.
-
(Conditional) If necessary for the selected connector, scroll down to the section.

-
Click
 () for the filter that you want to modify to open the XSLT file for the filter.
-
Edit the XSLT file as needed to change the behavior of the filter, then click to save the modified filter file.
Modifying filters requires developer-level knowledge of XSLT and is beyond the scope of the Novell Data Synchronizer Administration Guide.
-
Click on the menu bar to return to the main Synchronizer Web Admin page.
-
In the column for the selected connector, click
 to stop the connector, then click
  to start the connector with the modified filter.
4.5.3 Controlling Connector Logging
Each connector writes useful information to two log files, the connector application interface log file and the connector pipeline log file. You can control the amount of information that is written to the connector log file.
Selecting a Log Level
Each connector writes useful information to its connector log file (default.pipeline1.connector_name.log) You can control the amount of information that is written to the connector log file.
-
In Synchronizer Web Admin, click the connector in the section, then scroll to the section

-
Select a log level.
-
Debug: Logs large quantities of developer-level data. This log level is appropriate for troubleshooting purposes. It puts a heavy load on the connector and should be used only until the troubleshooting activities are completed.
-
Info: Logs informational messages about normal connector processing. This log level is suitable for a Synchronizer administrator who wants to observe the functioning of the connector. However, it puts a heaver load on the connector than the Warning and Error log levels.
-
Warning: Logs problems that should not adversely affect connector processing but should be investigated and resolved for optimum performance. This log level is appropriate for a smoothly running connector where you only want to be notified of warnings and errors.
-
Error: Logs error messages that indicate critical errors in connector processing. This log level puts the least load on the connector because it logs only critical errors.
-
-
(Optional) Select .
You can select for any log level. Selecting adds event data to the messages regularly logged at the selected log level.
-
(Optional) Select .
You can select for any log level. Logging failed events to disk saves failed events (typically as XML files) in the following directory:
/var/lib/datasync/errors
Each event file is named using the event ID for the failed event, so that you can correlate messages about specific events with their associated event files. Information about failed events is helpful when you need to contact Support for assistance.
-
In the File field, specify the name of the connector log file.
By default, the name of the connector log file is default.pipeline1.connector_name.log.
-
Click .
-
Click on the menu bar to return to the main Synchronizer Web Admin page.
-
In the column for the selected connector, click
 to stop the connector, then click
  to start the connector with the selected logging level.
Using the Connector Application Interface Log File
The connector application interface log file for each connector (default.pipeline1.connector_name-AppInterface.log) reports on problems that occur during event processing by the connector.
Using the Connector Pipeline Log File
The connector pipeline log file for each connector (default.pipeline1.connector_name.log) reports on problems with the event XML files that transfer back and forth between the Sync Engine and the connector. It logs the results as events pass through filters and transformations.