21.4 Checking Your Projects
Designer provides a Project Checker tool to check your project. The project can be checked at any time, but you should run the Project Checker before deploying your project. The Project Checker checks for proper design, contexts, server associations, policies, missing user data, and dependency problems that would cause the deployment of project into the Identity Vault to fail. It only checks the objects in Designer; it does not check the current objects in the Identity Vault.
21.4.1 How to Check Your Project
-
Select the project in the Modeler or in the Project view.
-
Select
-
Expand Designer for Identity Manager, then double-click .
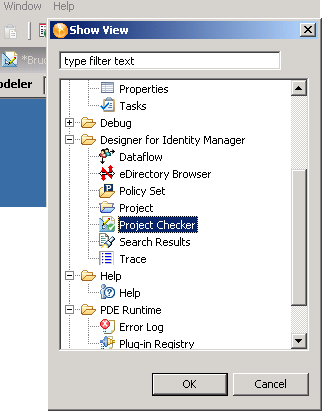
You can also click the Project Checker icon
 at the top of Designer to bring up the Project Checker view.
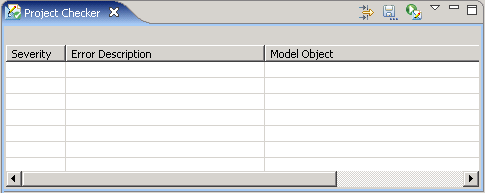
The Project Checker is displayed in a new view.
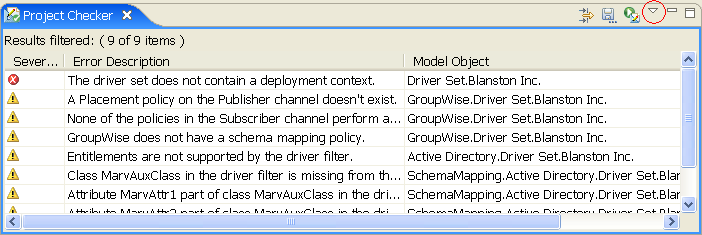
Figure 21-2 Project Checker
-
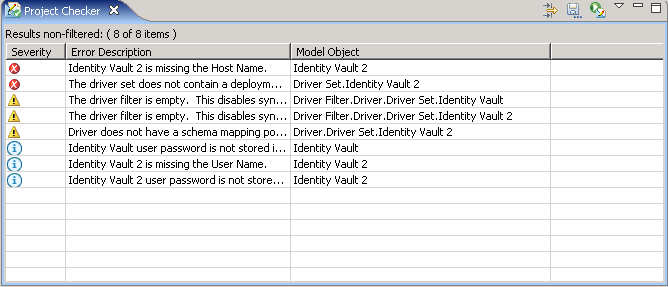
Click the r icon.

If you haven’t saved the project, Project Checker prompts you to save it.
The Project Checker displays versioning conflicts, errors, warnings, and information messages about the project.
Figure 21-3 Errors Listed in the Project Checker View
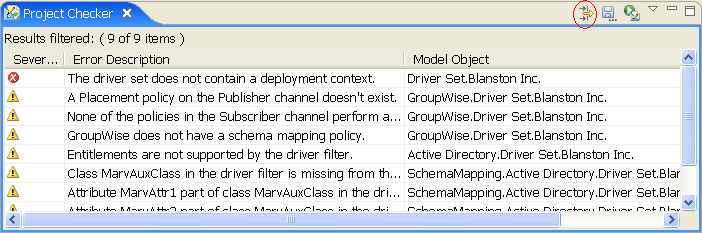
To see more information, double-click an item.
Figure 21-4 Details of an Item

The expanded view lists a description of the message, the severity of the message, and which object caused the error. If there is a line number, it lists the line number where the problem occurred. If there is a known solution for the message, it is also listed.
You can use the icon to customize which object types are checked. For more information, see Customizing the Project Checker.
Figure 21-5 The Configure Filters Icon
You can save the results to a file. Browse to a location and specify a filename and file type, then click .
Figure 21-6 Saving the Results of the Project Checker

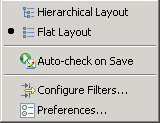
The Project Checker allows you to view the messages in a hierarchical format or in a flat format. It allows you to limit the object-specific messages that are displayed. Click the icon for more choices.
Figure 21-7 Changing the View
The drop-down menu has the following options:
-
Hierarchical Layout: Displays the messages under Identity Manager and Provisioning headings.
-
Flat Layout: Displays all messages without the hierarchical structure.
-
Auto-check on Save: Automatically runs the Project Checker every time you save a project.
-
Configure Filters: Allows you to customize which objects are checked.
-
Preferences: Limits the number of messages that are visible. The default is 100 items.
Figure 21-8 Views
21.4.2 Customizing the Project Checker
You can customize the Project Checker by creating and editing filters. The filters allow you to receive messages about the items you want to verify. You can create multiple filters, but only one filter can be used at a time.
Figure 21-9 Customizing the Project Checker
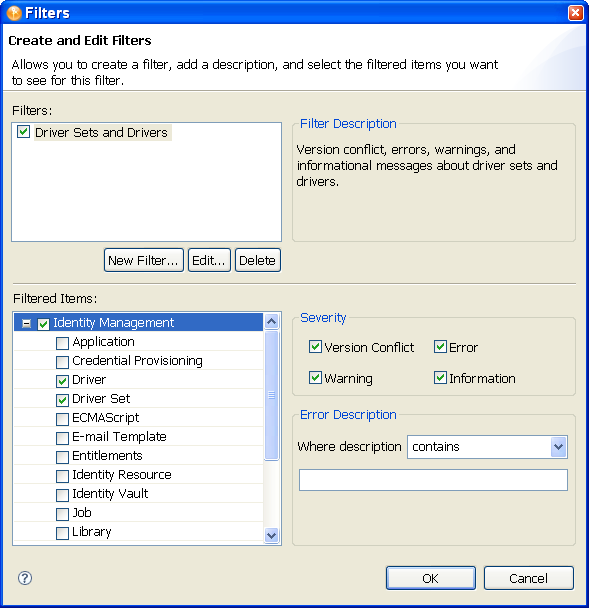
To create a filter:
-
In the Project Checker, click the icon
 .
.
-
Click .
-
Specify a name and description for the filter.
You can select which items are checked, what types of messages are returned about the items, and use key words to limit the messages returned. For example, you can search for all messages about the Driver Set and Driver objects that contain the word “attribute”.
-
Click .
To edit the name and description of the filter:
-
Select the filter, then click .
-
After you have completed the changes, click .
To delete a filter:
-
Select the filter.
-
Click .
21.4.3 Items That Are Checked
The Project Checker looks at specific items in the project. It checks the items in the User Application as well as the rest of Identity Manager.
The following table describes the specific items that are checked. The list will increase with each release of Designer.
Table 21-1 Identity Manager Items That Are Checked
Table 21-2 Provisioning Items That Are Checked