16.5 Checking Your Projects
Designer provides the Project Checker so you can check your project. The Project Checker checks for proper design, contexts, server associations, policies, missing user data, and dependency problems that can cause a project deployment into the Identity Vault to fail. You can check a project at any time, but you should definitely run the Project Checker before deploying it.
NOTE:Project Checker only checks the objects in Designer; it does not check the current objects in the Identity Vault.
16.5.1 Checking a Project
-
In the Project or Outline view, select the project, then select the icon
 in the Designer toolbar.
The Project Checker is also available from the > menu.
-
Click the r icon
 .
.
If you haven’t saved the project, Designer prompts you to save it.

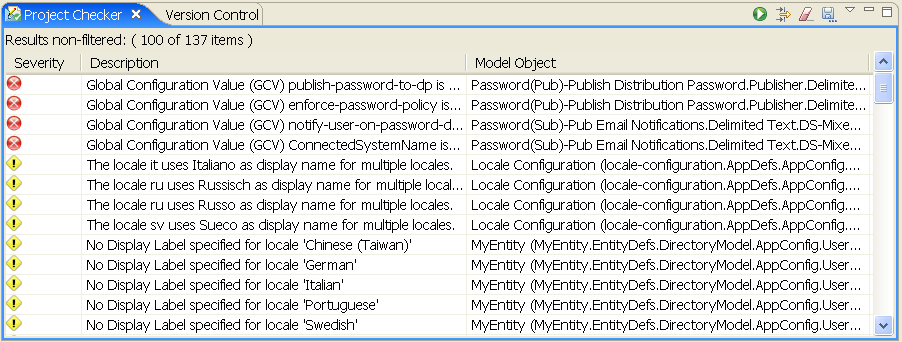
The Project Checker displays a list of versioning conflicts, errors, warnings, and information messages about the project. In the Project Checker view, you can do the following:
|
Action |
Description |
|---|---|
|
See detailed information about a list item |
Double-click a list entry to open a properties page that displays the following information about the entry:
|
|
Sort the list |
Click on any header in the Project Checker to sort the entry list on that parameter: Severity, Description, and Model Object. By default, Project Checker sorts entries by severity in descending order (most current at the top of the list.) |
|
Filter the list |
Click the Configure Filters icon |
|
Clear the list |
Click the Clear Results icon |
|
Save the list |
Click the Save Project Checker Results to a File icon |
|
Menu options |
Click the Menu icon to select one of the following:
|
For more information about the icons in the Project Checker view taskbar, located in the upper-right corner of the Project Checker view, see Section 16.5, Checking Your Projects.
16.5.2 Customizing the Project Checker
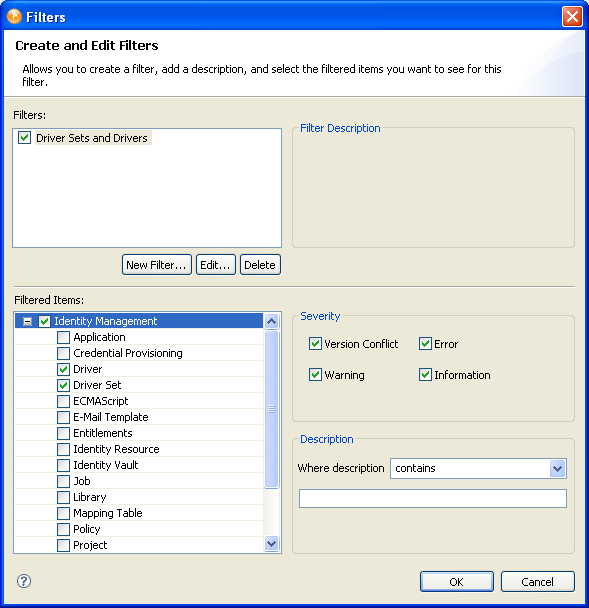
You can customize the Project Checker by creating and editing filters. The filters allow you to receive messages about the items you want to verify. You can create multiple filters, but only one filter can be used at a time.
Figure 16-1 Customizing the Project Checker

To create a filter:
-
In the Project Checker, click the icon
 .
.
-
Click .
-
Specify a name and description for the filter.
You can select which items are checked, what types of messages are returned about the items, and use key words to limit the messages returned. For example, you can search for all messages about the Driver Set and Driver objects that contain the word “attribute.”

-
Click .
To edit the name and description of the filter:
-
Select the filter, then click .
-
After you have completed the changes, click .
To delete a filter:
-
Select the filter.
-
Click .
16.5.3 Items That Are Checked
The Project Checker looks at specific items in the project. It checks the items in the User Application as well as the rest of Identity Manager.
The following table describes the specific items that are checked. The list increases with each release of Designer.
Table 16-1 Identity Manager Items That Are Checked
Table 16-2 Provisioning Items That Are Checked
 to customize the Project Checker. For more information, see
  to clear the Project Checker entry list.
 to save the current Project Checker entry list to a text file so you can review it off-line.