7.4 Editing Items
7.4.1 Editing within the Dataflow Editor
As a convenience, you can edit many items within the Dataflow editor. This capability turns the Dataflow editor into a full project editor that allows you to have all the tools you need in one place. You can edit Identity Vault properties, classes, attributes, drivers, and applications.
Identity Vault Properties
Access the Identity Vault’s properties pages by doing one of the following:
-
Double-click the Identity Vault.
-
Select the Identity Vault, then press Enter.
-
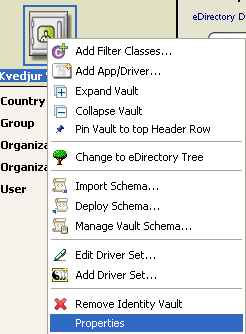
Right-click the Identity Vault, then select .
Figure 7-22 The Properties Option
Classes and Attributes
Launch the Manage Schema tool by doing one of the following:
-
Double-click the class or attribute.
-
Select the class or attribute, then press Enter.
-
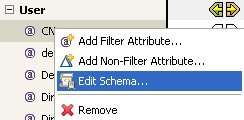
Right-click the class or attribute, then select .
This tool enables you to modify classes and attributes. For more information, see Section 6.0, Managing the Schema.
Figure 7-23 The Edit Schema Option
Drivers
To access the driver’s property pages, click the driver name below the application name.
Figure 7-24 Location of a Driver Name

Applications
Access the properties pages for the application by doing one of the following:
-
Double-click the application.
-
Select the application, then press Enter.
-
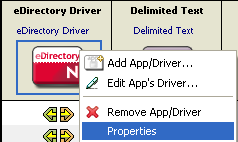
Right-click the application, then select .
Figure 7-25 The Properties Option for an Application
7.4.2 Editing Non-Filter Attributes
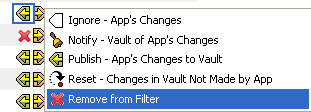
The directional flow of these attributes is edited in the same way as other attributes. Right-click the arrows and select , , , , or.
means that you have the value reset under certain conditions. The attribute might be in a policy filter, but in addition, you might have some manual logic that resets the value. Occasionally, resets by manual logic occur in production environments.
7.4.3 Managing Schema
To import, deploy, and edit the schema in the Dataflow editor, right-click an Identity Vault. All schema changes made outside of this editor are synchronized. For more information, see Section 6.0, Managing the Schema.
Figure 7-26 The Manage Schema Option

7.4.4 Removing a Flow
If a particular flow (Publisher or Subscriber channel) is not defined in the policy filter’s XML, a red X replaces the Publisher or Subscriber channel arrow. This means that it’s not in the policy and there will be no flow. This scenario is essentially the same as an icon, which is an empty white arrow. However, the distinction is useful so that you know what is actually in your policy’s XML.
To remove the flow from the XML:
-
Right-click the Publisher or Subscriber channel icon.
-
Select .
If a class or attribute is marked to be removed on both channels and nothing references it, Designer removes it from the Dataflow editor’s table.
7.4.5 Changing How Data Flows
To change the way data flows, right-click the arrow that displays the dataflow, then select the option that you want.
When you right-click the arrow that displays the dataflow for an attribute, you are presented with five options, as shown below:
-
Ignore
-
Notify
-
Subscribe/Publish
-
Reset
-
Remove from Filter
The functionality for these options changes depending on whether you have selected the left (Publisher) channel or the right (Subscriber channel).
For the Publisher Channel:
-
instructs the Identity Vault to ignore changes made in the application.
-
notifies the Identity Vault about changes made in the application.
-
transfers the changes made to the application into the Identity Vault.
-
resets the changes in the Identity Vault that were not made by the application.
-
removes the flow from the XML.
For the Subscriber Channel:
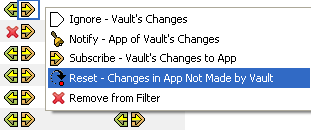
Figure 7-27 Subscriber Channel Options
-
instructs the application to ignore changes made in the Identity Vault.
-
notifies the application about changes made in the Identity Vault.
-
transfers the changes made to the Identity Vault into the application.
-
resets the changes in the application that were not made by the Identity Vault.
-
removes the flow from the XML.
When you right-click the arrow that displays the dataflow for a class, you are presented with three options, as shown below:
Figure 7-28 Changing the Publisher Flow
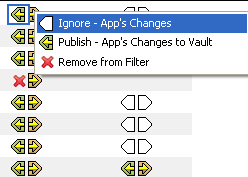
The and options are only available when you select an application.