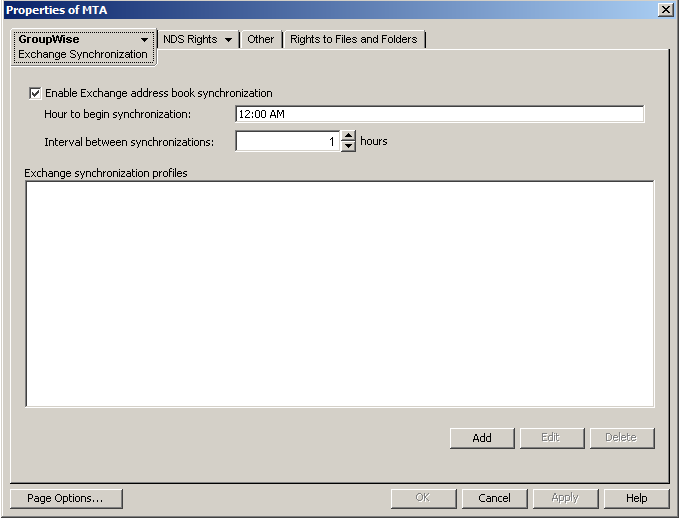
2.6 Configuring the MTA for Address Book Synchronization
After you have completed the tasks listed in Section 2.5, Preparing for Address Book Synchronization, you are ready to configure the MTA for address book synchronization.
-
In ConsoleOne, browse to and right-click the MTA object that you want to configure for address book synchronization, then click .
-
Click .
You receive the following notification:
Exchange address book synchronization requires its own license.
If you enable Exchange address book synchronization,
your GroupWise system might be subject to additional licensing fees.

We invite you to contact your Novell representative, reseller, or partner
to learn more about this feature or for pricing and licensing information.
-
Click to confirm your acceptance of licensing terms for the Exchange synchronization feature.

is selected by default.
-
Fill in the following fields to configure address book synchronization for this MTA:
-
Create an Exchange synchronization profile:
-
Under the list, click .

-
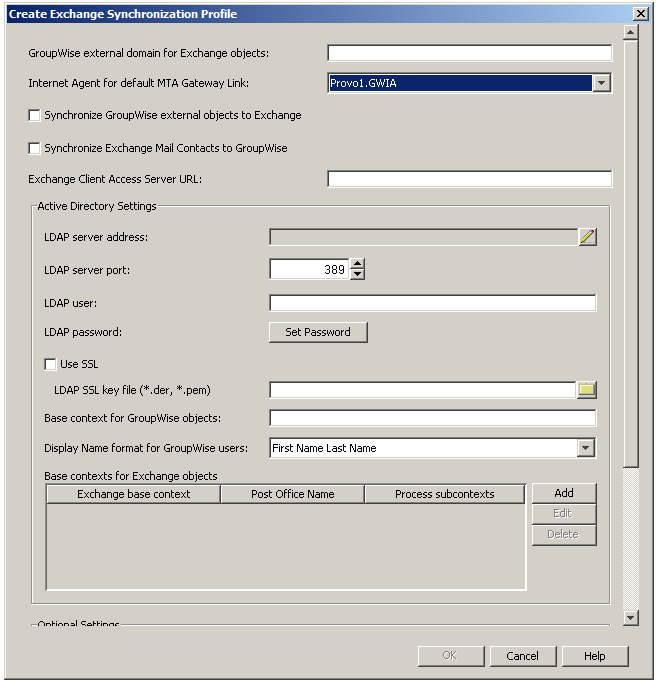
Fill in the following fields:
- GroupWise external domain for Exchange objects
- Internet Agent for default MTA gateway link
- Synchronize GroupWise external objects to Exchange
- Synchronize Exchange Mail Contacts to GroupWise
- Exchange Client Access Server URL
- LDAP server address
- LDAP server port
- LDAP user
- LDAP password
- Use SSL
- LDAP SSL key file
- Base context for GroupWise objects
- Display name format for GroupWise users
- Base contexts of Exchange objects
- Synchronize only members of GroupWise distribution list
- Synchronize only members of Exchange distribution group
- Exchange Global Address List DN
-
Click to save the Exchange synchronization profile.
The Exchange synchronization profile is added to the list of profiles for the MTA.
-
Repeat Step 5 to create additional Exchange synchronization profiles as needed.
-
-
Click to save the synchronization settings.
-
Restart the MTA to put the address book synchronization settings into effect.
When you enable address book synchronization, it causes all MTAs in your GroupWise system to restart. This is not a noticeable process unless notifications are automatically sent to administrators whenever MTAs restart.
The first automatic address book synchronization takes place according to the synchronization settings that you established in Step 4.
-
Continue with Performing the Initial Address Book Synchronization.