7.1 Selecting a Post Office to Migrate
-
Start the Server Migration Utility and provide system information, as described in Section 6.0, Running the Server Migration Utility.
-
(Conditional) If you are migrating a post office on a NetWare server:
-
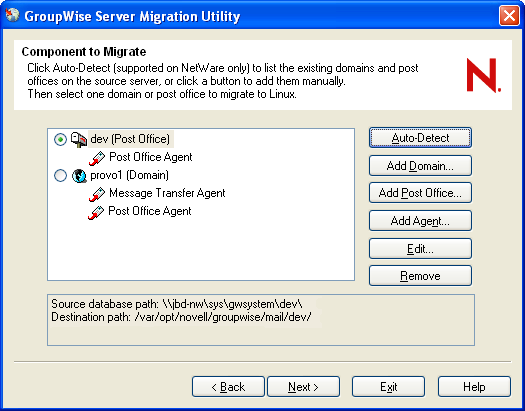
On the Component to Migrate page, click to list identifiable post offices and domains.

-
(Conditional) If you want to change the post office destination from the default of /var/opt/novell/groupwise/mail:
-
Select the post office, then click .
-
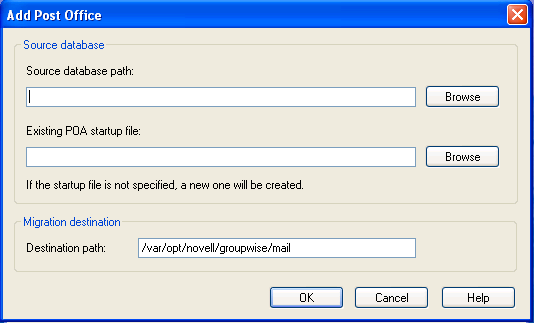
In the field, specify the full path to the post office directory (worksheet item 8).
-
Click to return to the Component to Migrate page.
-
-
-
(Conditional) If you are migrating a post office on a Windows server, or if the feature did not identify any post offices on your NetWare server:
-
Click .

-
Provide the requested information about the post office and its POA (worksheet item 8).
-
Click to return to the Component to Migrate page.
The post office and POA that you identified are now listed.
If you receive an error indicating that the startup path does not match the database source path, edit the POA startup file (post_office.poa) and modify the /home switch to use a UNC path (\\server\volume\path) instead of a mapped drive path (drive:\path).
-
Select the post office to migrate,
-
-
Click .
-
(Conditional) If the post office has remote document storage areas, continue with Section 7.2, Verifying Remote Document Storage Areas.
or
(Conditional) If you use SSL to secure the connections between agents, skip to Section 7.3, Transferring SSL Certificate and Key Files.
or
Skip to Section 7.4, Performing the First Stage of Post Office Data Migration.