4.7 Sharing a Personal Calendar
A shared calendar is like any other calendar, except other people have access to it and it also appears in their calendar lists. You can share existing personal calendars in your calendar list. You choose whom to share the calendar with, and what rights to grant each user. Then, users can post calendar entries to the shared calendar. You can’t share your main calendar.
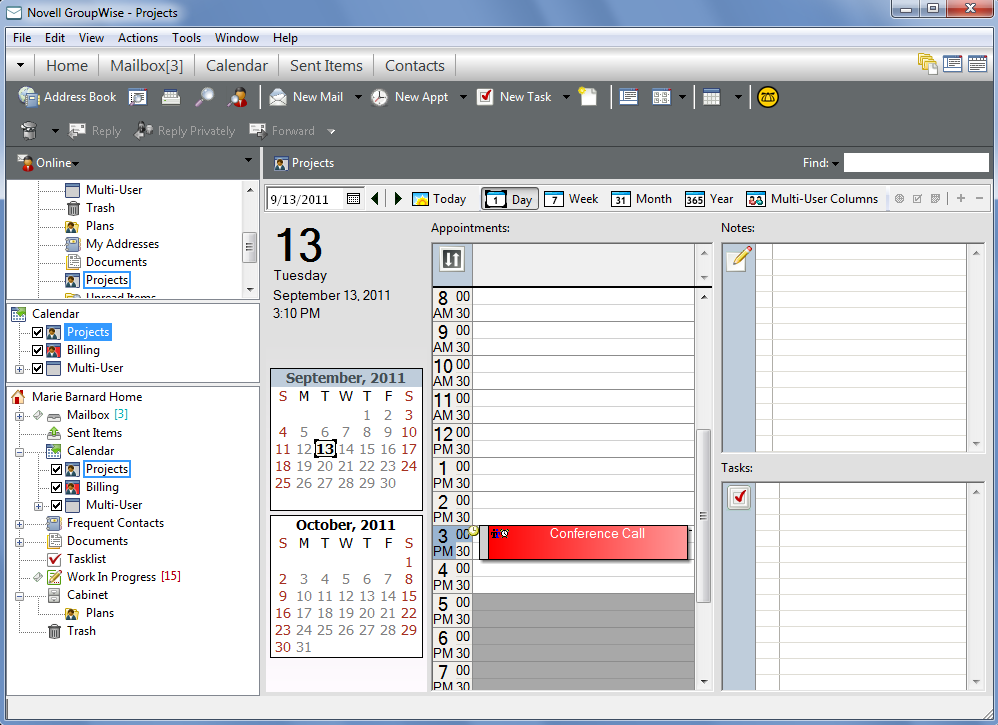
This is what the contents of a typical shared calendar look like:
Figure 4-9 Shared Calendar View

In Remote and Caching modes, changes in a shared calendar are updated whenever you connect to the master GroupWise system.
4.7.1 Sharing an Existing Calendar with Other Users
-
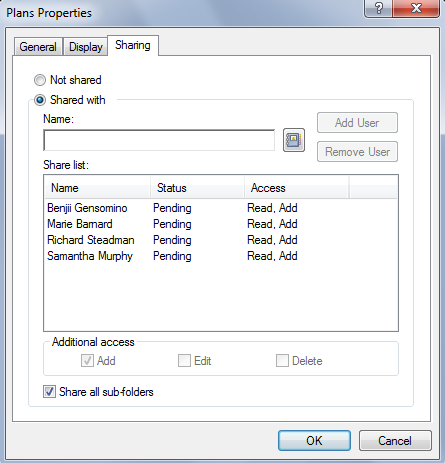
In the Folder List, right-click the calendar you want to share, then click .

-
Click .
-
In the field, start typing the name of a user, or click the button to select the user from the dialog box.
-
When the user’s name appears in the field, click to move the user into the.
-
Click the user’s name in the .
-
Select the access options you want for the user.
-
Repeat Step 3 through Step 6 for each user you want to share the folder with.
-
Click .
If you want the calendar to have a specific function, you can create a new display setting. Right-click the calendar, click , then click .
4.7.2 Posting a Calendar Entry to a Shared Calendar
-
In the shared calendar, open a view with an Appointments List, click a date, then double-click a time in the Appointments List.
-
(Optional) Type a subject and a place if necessary.
-
Specify the start date.
or
Click
 to specify a date or auto-date for your appointment. To create a recurring appointment, see Section 4.4.4, Scheduling Recurring Items.
or
Select for an all day event.
-
Specify a start time and duration. Duration can be in minutes, hours, or days.
-
Specify how you want the appointment to appear as. Appointments can appear as Free, Tentative, Busy, or Out of the Office.
-
(Optional) Type a message.
You can specify many options, such as making this appointment a high priority and more, by clicking the tab.
-
(Optional) Specify a Show Appointment As type by clicking > , then clicking a type.
-
Click on the toolbar.