1.4 Getting to Know the GroupWise Interface
1.4.1 Understanding the Main GroupWise Window
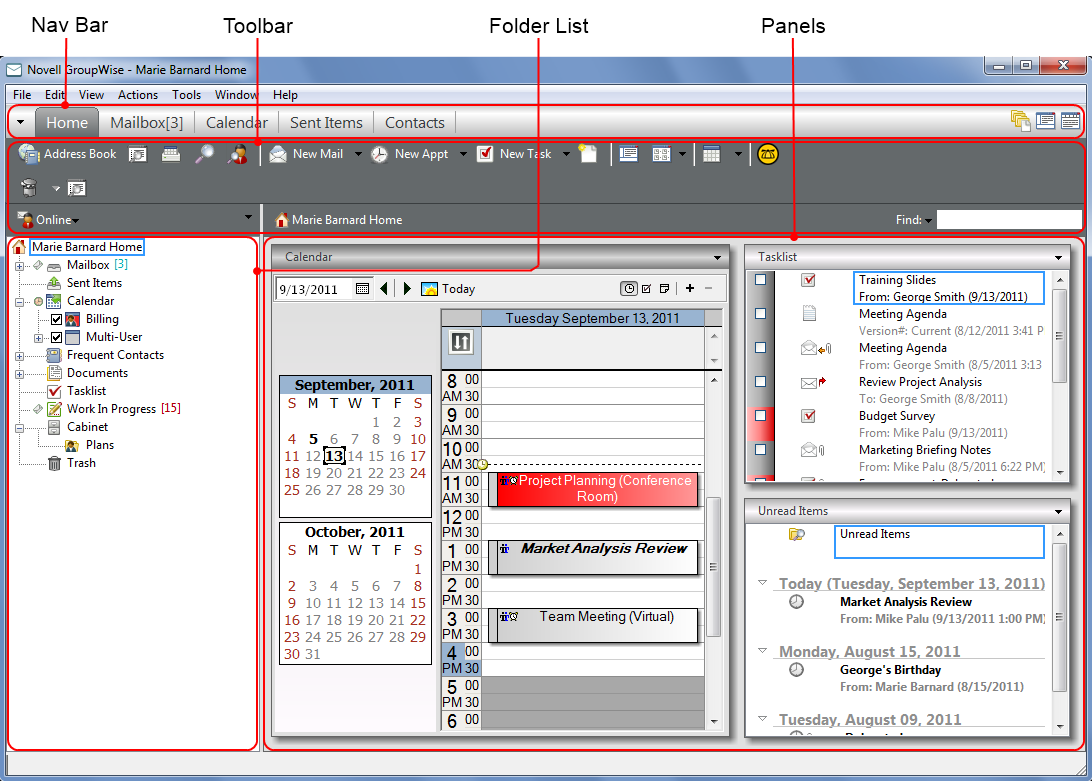
Your main work area in GroupWise is called the Main Window. From the Main Window of GroupWise, you can read your messages, schedule appointments, view your Calendar, manage contacts, change the mode of GroupWise you’re running in, open folders, open documents, and much more.
For an interactive tutorial about the Home View, click > .
Figure 1-1 The Main Window

You can open more than one Main Window by clicking , then clicking . You can open as many Main Windows as your computer’s memory allows.
This is useful if you proxy for another user. You can look at your own Main Window and the Main Window belonging to the person you are proxying for. For more information about accessing other users’ mailboxes, see Section 10.0, Mailbox/Calendar Access for Proxy Users.
1.4.3 Understanding the Nav Bar
The Nav Bar is located at the top of the GroupWise window. It is designed for quick access to the folders you use the most.

By default the Nav Bar contains the Home, Mailbox, Calendar, Sent Items, and Contacts folders. However, the Nav Bar is customizable, so you can add the folders you use the most.
Customizing the Nav Bar
-
Right-click the , then click .
-
Select the folders you want to display on the Nav Bar.
-
Select a color scheme for the Nav Bar.
-
Click .
1.4.4 Understanding the Main Toolbar
The Main toolbar provides single-click access to the most common GroupWise features, such as sending a message or appointment, performing a search, and so on.

Turning the Main Toolbar On and Off
-
Click .
-
Select or deselect .
When a toolbar is displayed, a check mark is displayed next to the toolbar name in the Main Menu.
For more information, see Section 2.1.3, Customizing the Main Toolbar.
1.4.5 Understanding Item Lists
The most common way to display information is in an Item List. For example, the Item List for your Mailbox is the list of messages you have received. The Item List header displays the name of the folder whose contents are being listed. It also provides the field for quickly finding items in the folder.

Item lists are organized into columns, which help you display the items in the order most useful for you. You can drag a column to a new position in the column header. You can resize a column by dragging the edge of the column heading. You can sort by columns and add new columns. For complete instructions on customizing Item Lists, see Section 2.3.4, Managing Item Lists in Folders and Section 2.3.5, Customizing Folder Display Settings.
The right-click menus provide different options, depending on which column you click in. In the item type icon column, you can select a category for the item. In the first text column (for example, ), you can select an item action (, , and so on). In the other text columns (for example, , , and so on), you can select a display setting (for example, , , and so on).
