8.5 Using Groups to Address Items
A group is a list of users or resources you can send messages to. Use groups to send a message to several users or resources by typing the group name in the , , or fields. There are two types of groups: public and personal.
A public group is a list of users created by the system administrator, and it is available for use by each GroupWise user. For example, there might be a public group for the Accounting Department. Each employee in Accounting is included in the group. Public groups are listed in the system address book.
A personal group is a group created by you. For example, if you often send an appointment to your work group, you can include each co-worker’s address or name and a meeting place (a resource) in a personal group.
Groups are marked with the ![]() icon, and are displayed in both the left and right panes of the open address book.
icon, and are displayed in both the left and right panes of the open address book.
This section contains the following topics:
8.5.1 Creating and Saving a Personal Group
-
In the Main Window, click
 on the toolbar.
-
Click the personal address book you want to add this group to.
-
Click on the toolbar, click , then click .

-
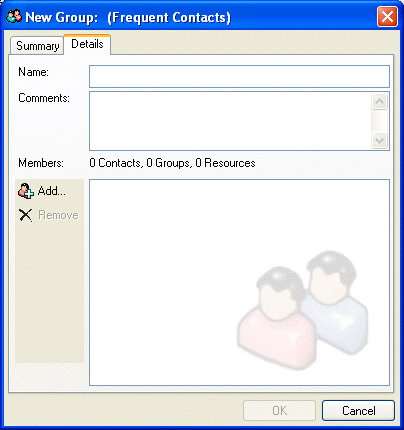
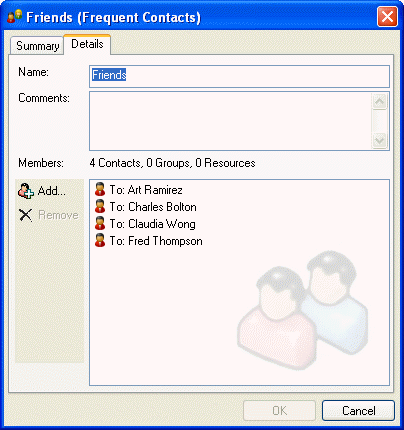
Type a name for the group.
-
Type comments, such as a description of the group.
-
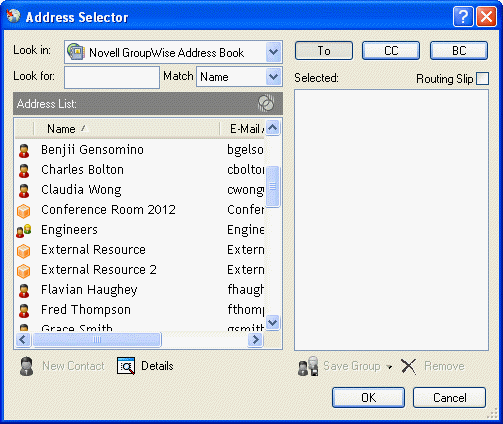
Click to open the Address Selector dialog box and display the address list.
-
Click , , or , double-click or Ctrl+click and drag the users and resources for your group.
If the users you want to add are in a different address book, click the address book on the drop-down list.
To filter the list of entries by contacts, groups, or resources, click an option on the
 drop-down list.
-
To add an entry that is not in an existing address book, click , fill in the information, click , then double-click the entry.
-
Click twice to save the group in the personal address book.
You can also create and save a personal group from the Address Selector when you are addressing a message or other item:
-
In an item view, click
 on the toolbar.

-
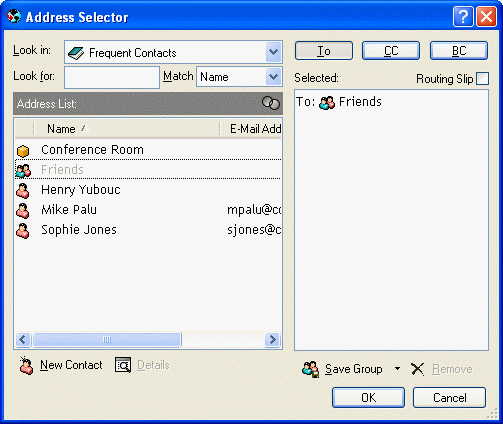
Double-click contacts to add them to the right pane.
If the users you want to add are in a different address book, click the address book on the drop-down list.
To filter the list of entries by contacts, groups, or resources, click an option on the
 drop-down list.
-
To add an entry that is not in an existing address book, click , fill in the information, click , then double-click the entry.
-
Click .
or
If you want to save the group to a different address book than the one that is displayed, click the arrow on the right of Save Group, then select the address book.

-
Type a name for the group.
-
Type comments, such as a description of the group.
-
Click twice.
8.5.2 Addressing Items to a Group
-
In an item view, click
 on the toolbar.

-
Select a group, then click , , or .
-
Repeat as necessary.
-
To show all the members of the group, right-click the group, then click .
-
To see more information about the group, right-click the group, then click .
-
Click to return to the item view.
8.5.3 Adding and Removing Contacts from a Personal Group or Corporate Distribution List
If you are adding for removing contacts from a corporate distribution list, you must have the proper rights granted to you by the system administrator.
-
In the Main Window, click
 on the toolbar. In the left pane, click + to expand the address book the group is located in, then click the name of the address book.
or
Click
 on the toolbar in an item you are composing.
-
Right-click the group, then click .
Groups are marked by the
 icon and display in the right and left panes of the Address Book.
-
On the tab, click to open the Address Selector dialog box and display the address list.
Click the
 drop-down list to filter the list by contacts, groups, or resources.
-
To add a contact, click the drop-down list, then click the address book the contact is in.
-
Click the drop-down list, then click the way you want to locate the contact (by first name, last name, or full name).
-
In the field, type the contact you want to add.
The address list scrolls to the nearest match.
-
Double-click the contact in the list so that it is added to the list.
-
To delete a contact, click the name in the list, then click .
-
Click twice to save the group.
8.5.4 Viewing Group Information
-
In the Main Window, click
 on the toolbar. In the left pane, click the address book where the group is located. Click to expand the address book.
or
Click
 on the toolbar in an item you are composing.
or
Click the folder
 in the Folder list.
-
Right-click the group, then click . Groups are marked with the
 icon.
icon.
-
Click the tab.

8.5.5 Deleting a Group from a Personal Address Book
-
In the Main Window, click
 on the toolbar. In the left pane, click the address book where the group is located. Click to expand the address book.
-
Right-click the group, then click .
Groups are marked with the
 icon.
icon.
-
Click to confirm the deletion of the group.