3.3 Using Routing Slip
Use Routing Slip to send a mail message or task to several users consecutively. You determine the order of the route. When a user marks the routed item Completed, it is sent to the next user on the route.
If there are attachments to the routed item, each user on the route can view and add comments to them. When comments are added to an attachment, all subsequent users on the route see the comments. The final user on the route sees all the comments that were added.
You can track the status of a routed item you have sent by checking the item’s Properties. When you send a routed item to an external address, the item is automatically marked Completed (because the external recipient will not be able to mark it) and sent to the next user on the route.
If you want to prevent a proxy from marking routed items Completed, you can require a password to complete a routed item.
This section contains the following topics:
3.3.1 Creating a Routed Item
-
Open a mail message or task.
-
Click > .

-
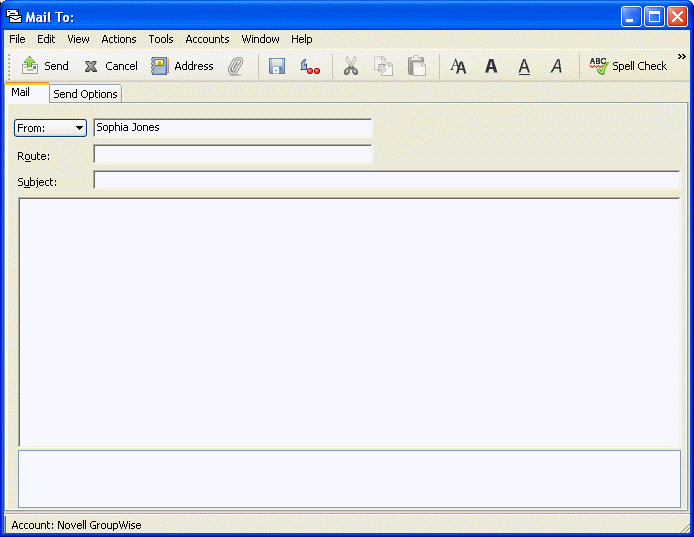
In the Route box, type a username, then press Enter. Repeat for each user included in the route.
or
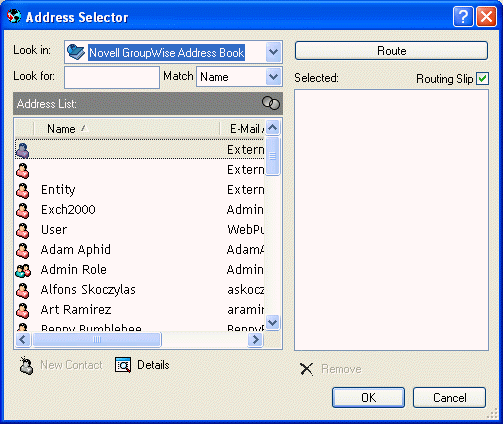
Click on the toolbar to select usernames from the Address Selector dialog box.
You can also specify personal groups as recipients of a routed item. When you use the Address Selector dialog box, the group is expanded into its members so that you can specify the order of the users in the route.
-
Type a subject and message.
-
If you want to prevent a proxy from marking routed items Completed, you can require the recipient’s GroupWise password to mark the item Completed. Click the tab, click , then select .
-
Click on the toolbar.
3.3.2 Requiring a Password before Marking a Routed Item Completed
To require a password for all routed items you create:
-
Click > .
-
Double-click , then click the tab.
-
Select .
-
Click .
For information on GroupWise passwords, see Section 2.2, Assigning Passwords to Your Mailbox.
3.3.3 Completing a Routed Item
-
When you are finished with the assignment or instructions in the routed item, open the item.
-
If you need to view and edit an attachment to the routed item, open the attachment in its associated application, make your changes, then save the file.
The file is saved to your computer’s temporary files directory. Do not change the path, or your changes are not included when the routed item is sent to the next recipient. Close the application.
IMPORTANT:To be able to edit attachments in a routed item, you must have the GroupWise 5.5 Enhancement Pack or higher installed.
-
In the item, select > , then click .
You can also select the check box in the item header.
-
If the sender has required a password to complete the item, type your GroupWise password, then click .
The item is sent to the next user on the route.
-
Click .
3.3.4 Addressing a Routed Item with an Address Book
-
In a mail message or task, click on the toolbar.
-
Select the check box.

-
Ctrl+click names in the order you want to route the item, then click .
or
Double-click names in the order you want to route the item.
Use drag and drop to change the order of names in the list of addresses.
-
Click .