5.3 Using Tasks
A task is an item to be completed by a specified date and time. When you assign a task to a user, the user can accept or decline the task, but until it is declined or completed, the task appears in the user’s Tasklist folder and on the user’s Calendar each day.
5.3.1 Assigning a Task
When you create a task, you can assign it to yourself (a posted task) or assign it to multiple people.
Assigning a Task to Other Users
-
On the main WebAccess page, click the arrow next to , then click .
-
In the field, type a username, then press Enter. Repeat for additional users. If necessary, type usernames in the and fields.
or
To select usernames from a list, click on the toolbar, search for and select each user, then click .
-
Type the date you want the task to begin and the date you want the task to be completed. You can type the same date in both fields.
or
Click
 to specify dates for your task.
-
Type the subject.
-
(Optional) Type a priority for the task.
The task priority can consist of a character followed by a number, such as A1, C2, B, or 3.
-
Type a description of the task.
-
(Optional) Click the tab to specify other options, such as making this task a high priority, requesting a reply from recipients, and more.
-
Click on the toolbar.
Assigning a Task to Yourself
-
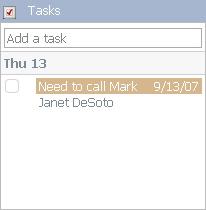
In your Calendar, open the Day view, then select a date.
If you try to post a task to a date earlier than today, the task is posted to today’s date.
-
In the Tasks section, click the field.

-
Type a subject.
-
Press Enter.
Your task is immediately posted to the date you selected. GroupWise uses the date you selected as the starting and ending date for your task.
-
(Optional) To change the starting date, ending date, description or to add a priority to your task, double-click the task in the section.
-
Click on the toolbar.
Posted tasks are placed in your Calendar and in your Tasklist folder. They are not placed in your Mailbox, or in any other user’s Mailbox.
HINT:You can also create a Tasklist that is not associated with your Calendar. In this type of list, any item type (mail, appointment, task, reminder note, phone message) can be used. For information, see Using the Tasklist Folder.
5.3.2 Tracking Task Completion
When you finish a task, you can mark it as complete. Tasks you mark as complete are not carried over to the next day on your Calendar. Completed tasks are distinguished by a check mark in your Calendar. Overdue tasks display in the section of your Tasklist.
If you mark a task as complete, then realize you left some part of it incomplete, you can unmark it. Unmarked tasks display on the current day in your Calendar.
Marking an Item As Complete
-
Click on the Nav Bar.
Tasks can also be marked as complete in the Tasklist folder. See Section 5.3.2, Tracking Task Completion for more information.
-
In your section, select the check box next to the task.
To unmark a task that has been marked as complete, deselect the marked check box next to the task.
Checking the Completion Status of a Task You Sent
-
Click the folder in the Nav Bar.
If you also assigned the task to yourself, you can find it in the Calendar or in the Tasklist folder.
-
Right-click the task you want to check, then click .