6.1 Filter Tasks in Designer
This section contains instructions on performing common filter-related tasks in Designer:
6.1.1 Accessing the Filter Editor
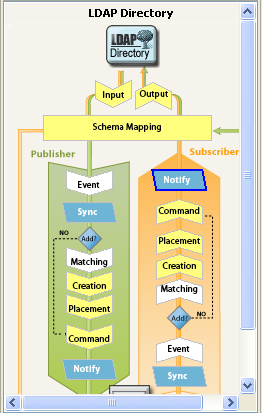
The Filter editor allows you to edit the filter. There are three different ways to access the Filter editor: through the model outline, through the policy flow, and through the Policy Set view.
Model Outline View
-
In an open project, click the tab.
-
Click the icon.

-
Select the driver you want to manage the filter for, then click the plus sign to the right.
-
Double-click the icon and to launch the Filter editor.
or
Right-click and select .
Policy Flow View
-
In an open project, click the tab.
-
Select the icon.

-
Double-click the icon or icon to launch the Filter editor.
or
Right-click and select .
Policy Set View
-
Double-click the filter policy in the Policy Set view.
Keyboard Support
Table 6-1 Filter Editor Keyboard Support
6.1.2 Editing the Filter
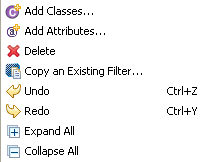
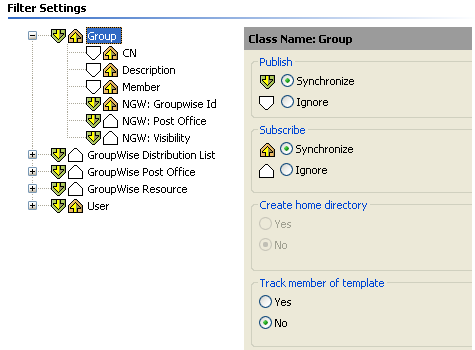
The Filter editor allows you to create and edit the filter. To display a context menu, right-click an item.
Figure 6-1 Filter Options
Removing or Adding Classes and Attributes
By removing or adding classes and attributes, you determine the objects that synchronize between the connected data store and the Identity Vault.
Removing a Class or Attribute
If you do not want a class or an attribute to synchronize, the best practice is to completely remove the class or the attribute completely from the filter. There are two different ways to add or remove attributes and classes from the filter:
-
Right-click the class or attribute you want to remove, then select .
-
Select the class or attribute you want to remove, then click the icon
 in the upper right corner.
Adding a Class
-
Right-click in the Filter editor, then click .
or
Click the icon
 in the upper right corner
-
Browse and select the class you want to add, then click .
-
Change the options to synchronize the information.
-
To save the changes, click .
Adding an Attribute
-
Right-click in the Filter editor, then click .
or
Click the attribute icon
 in the upper-right corner.
-
Browse and select the attribute you want to add, then click .
-
Change the options to synchronize the information.
-
To save the changes, click .
Modifying Multiple Attributes
The Filter editor allows you to modify more than one attribute at a time. Press the Ctrl key and select multiple attributes; when the option changes, it is changed for all of the selected attributes.
Copying an Existing Filter
You can copy an existing filter from another driver and use it in the driver you are currently working with.
-
Click the

Or
Right-click in the Filter editor, then click .
-
Browse to and select the filter object you want to copy, then click .
If you have more than one Identity Vault in your project, you can copy filters from the other Identity Vaults. When you are browsing to select the other object, you can browse to the other Identity Vault and use a filter stored there.

Setting Default Values for Attributes
You can define the default values for new attributes when they are added to the filter.
-
Click the icon
 in the upper right corner.
-
Select the options you want new attributes to have, then click .
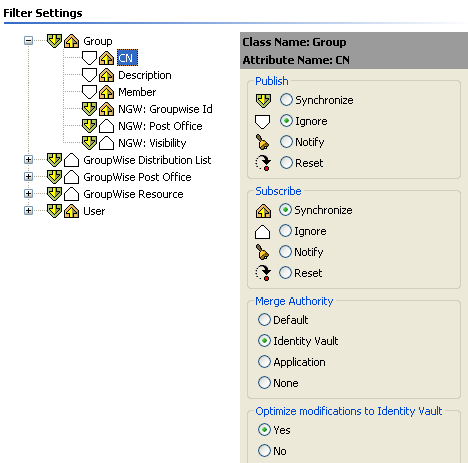
Changing the Filter Settings
The Filter editor gives you the option of changing how information is synchronized between the Identity Vault and the connected system. The filter has different settings for classes and attributes.
-
In the Filter editor, select a class.
-
Change the filter settings for the selected class.
-
Select an attribute.
-
Change the filter settings for the selected attribute.
-
Click the icon
 to save the changes.
6.1.3 Testing Filters
Designer comes with a tool called the Policy Simulator, which allows you to test your policies without implementing them in a production environment. You can launch the Policy Simulator through the Filter editor to test your policy after you have modified it.
-
Click the icon
in the toolbar.
-
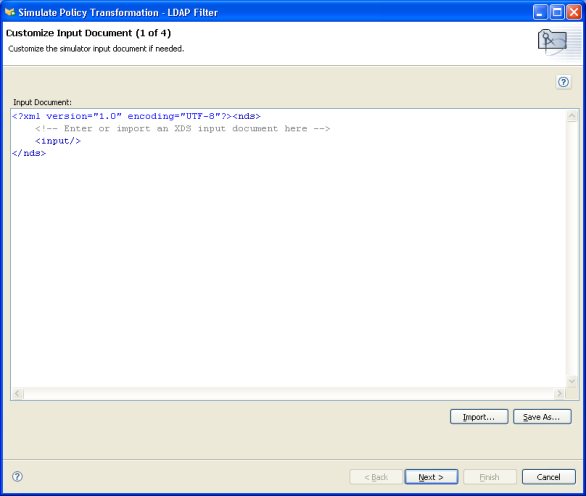
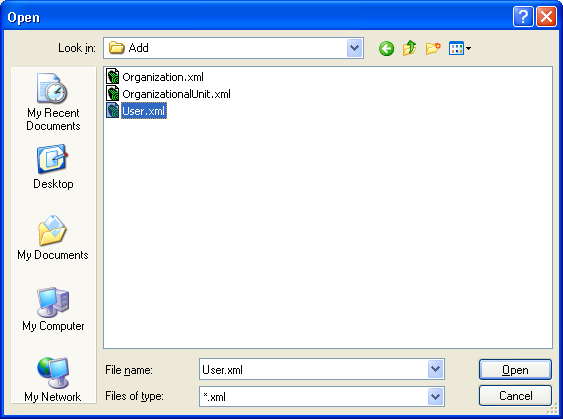
Select to browse to a file that simulates an event.
-
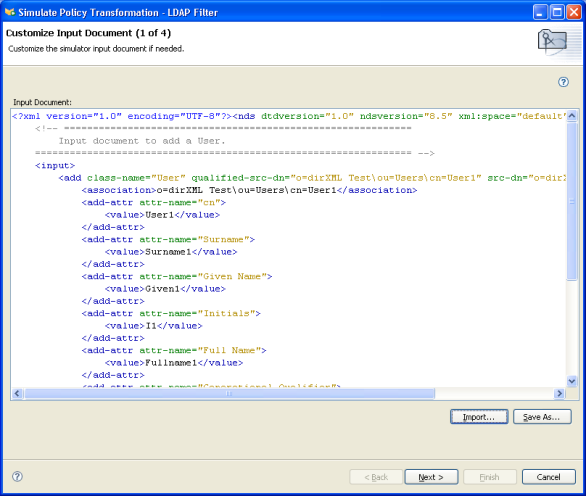
Select the file, then click . This example uses the com.novell.designer.idm.policy\simulation\add\User.xml file, which simulates an Add event for a User object.
The Policy Simulator displays the input document of the user Add event.
-
Click to begin the simulation.
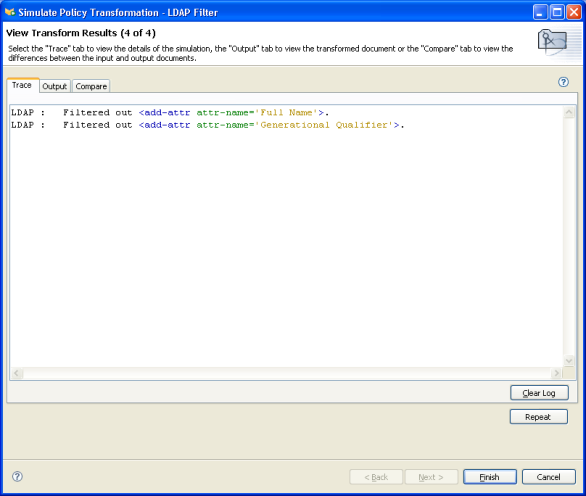
The Policy Simulator displays the log of the Add event, the output document, and a comparison of the Input document to the Output document that is generated.
-
Select the tab display the results of the Add event as you see them in DSTRACE.
-
Select the tab to see the output document that is generated when the filter is executed against an input document. The input document is the user Add event.
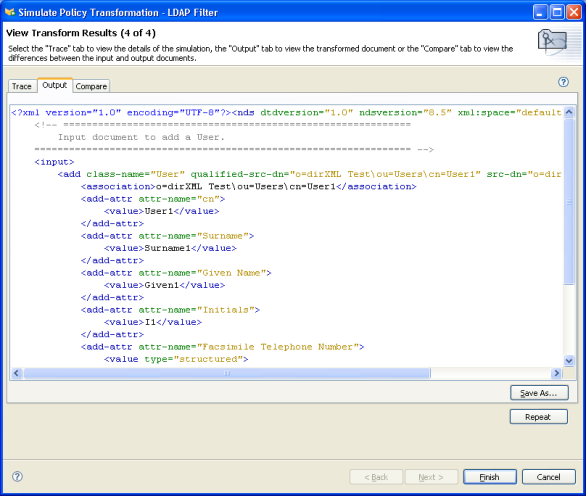
You can edit the input and output documents. If you want to keep the changes, click .
-
Select the tab to compare the text of the input document to the output document that is generated.

-
Click to select a different input document and see the results of that event.
-
When you have finished testing the filter, click to close the Policy Simulator.
6.1.4 Viewing the Filter XML Source
Designer enables you to view, edit, and validate the XML by using an XML editor or text editor.
Viewing the XML Source
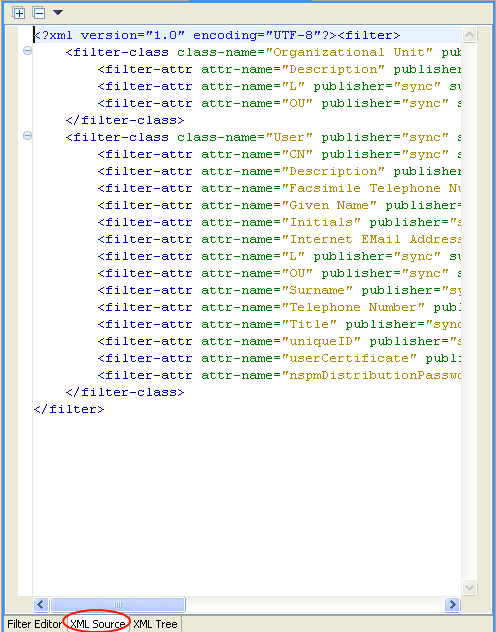
You can view the XML Source in XML or in the XML tree format.
To open the XML Source view:
-
Click at the bottom of the Filter editor's workspace.
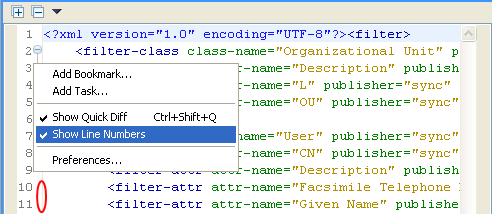
The XML editor displays line numbers. To see the line number, right-click in the left margin, then select .
Figure 6-2 Filter Show Line Numbers
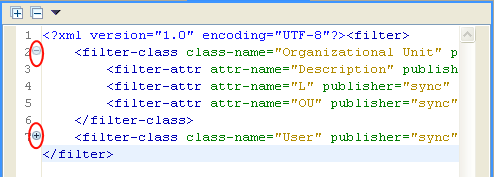
The XML editor expands or collapses the XML by function. If there are functions that contain a large amount of XML, you can collapse the XML by clicking the minus icon in the top left corner. To expand all of the XML functions, click the plus icon in the top left corner.
Each element has its own plus or minus icon in the left margin.
Figure 6-3 Filter XML Plus or Minus
To view the XML in the tree format:
-
Click at the bottom of the Filter editor's workspace.

To see the entire tree view, expand each item listed.
Editing the XML Source
You can edit the XML through the XML editor. You can make changes here as well as through the GUI interface.
Figure 6-4 Editing the XML Source of the Filter
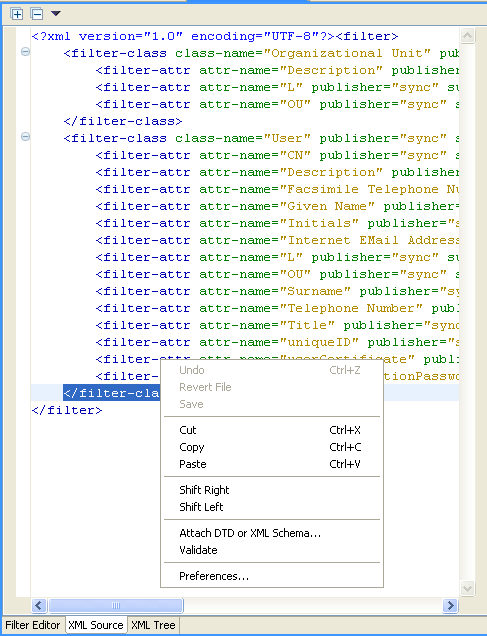
The default editor that is loaded is associated to . xml file types. If a default editor can't be found, the system text editor is loaded. The functionality of the XML Source view is based on the editor that loads.
Right-click to display the list of the functions the XML editor contains.
-
Undo: Undoes the last action.
-
Revert File: Reverts the file to the last version that was saved.
-
Save: Saves the file.
-
Cut: Cuts the selected information.
-
Copy: Copies the selected information to the Clipboard.
-
Paste: Pastes the information into the document.
-
Shift Right: Indents the line to the right.
-
Shift Left: Indents the line to the left.
-
Attache DTD or XML Schema: Attaches a DTD or XML schema file for validation of the policy.
-
Validate: Validates the XML code.
-
Preferences: Sets the preferences for the XML editor.
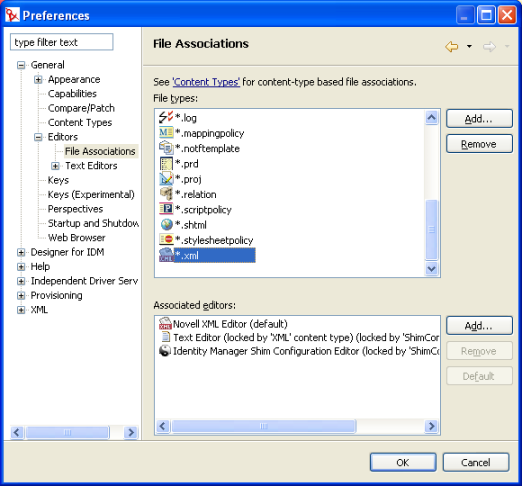
To choose a different XML editor for your XML Source view:
-
From the Main menu, click .
-
Click .
-
Select from the list of file types.
-
Select the editor you want (for example, ) from the Associated editors. (If the editor you want isn't in the list, you can click , then add it to the list.)
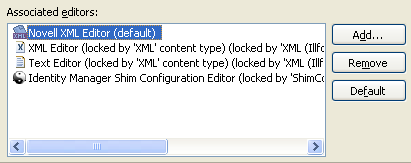
-
Click .
-
Close and reopen the Filter editor. The default editor should be loaded in the view.
Validating the XML Source
The XML editor validates the XML code. Right-click, then select . If there are errors, a red x is displayed on the line where the error occurs. An explanation at the bottom of the window gives more information about the problem.
Figure 6-5 Validate Filter
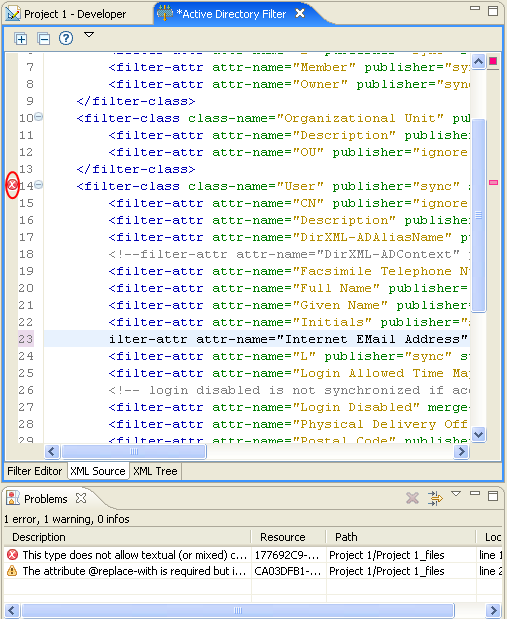
In this example, the beginning tag and the first letter of the <filter-attr> are missing.
6.1.5 Additional Filter Options
When you right-click on a filter object, there are multiple options presented in the Outline view, the Policy Flow view, and the Policy Set view.
Outline View Additional Options
-
Right-click the filter object in the Outline view.
-
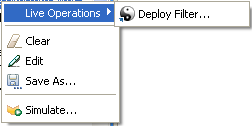
Live Operations > Deploy Filter: Deploys the filter into the Identity Vault.
-
Clear: Deletes all content from the filter policy, but leaves the object.
-
Edit: Launches the Filter editor. For more information, see Section 6.1.2, Editing the Filter.
-
Save As: Saves the Filter as a .xml file.
-
Simulate: Launches the Policy Simulator. For more information, see Section 6.1.3, Testing Filters.
-
Policy Flow View Additional Options
-
Right-click the filter object in the Policy Flow view.

-
Edit Policy > Filter: Launches the Filter editor. For more information, see Section 6.1.2, Editing the Filter.
-
Simulate: Launches the Policy Simulator. For more information, see Section 6.1.3, Testing Filters.
-
Policy Set View Additional Options
-
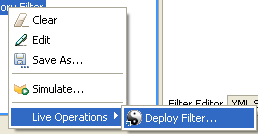
Right-click the filter object in the Policy Set view.
-
Clear: Deletes all content from the filter policy, but leaves the object.
-
Edit: Launches the Filter editor. For more information, see Section 6.2.2, Editing the Filter.
-
Save: Saves the filter as a Xml file.
-
Simulate: Launches the Policy Simulator. For more information, see Section 6.1.3, Testing Filters.
-
Live Operations > Deploy Filter: Allows you to deploy the filter into the Identity Vault.
-