5.2 Working with the Import and Export Tools
You can use the Tools page to export or import portal content (pages and portlets) used in the Identity Manager User Application. This content is also known as the portal configuration state and it includes:
-
Container and shared pages (including each page’s assigned portlets, and each portlet’s preferences and settings)
-
Portlet registrations
Table 5-5 Portal Data Export and Import Tools
The Export and Import tools enable you to move the portal configuration state from one portal (User Application) to another, as needed. Table 5-5 describes how these tools work.
You can use the Portal Data Export and Import tools to:
-
Move your portal configuration state from a test (source) environment to a production (target) environment
-
Update the configuration state of a portal incrementally
-
Clone a portal
-
Optionally, overwrite the configuration state on the target portal
5.2.1 Requirements
To use the Portal Data Export and Import tools, make sure that the Identity Manager User Application (portal) is deployed and running on your source and target application servers.
It is not required that your source and target servers access the same Identity Vault; they can access different ones, if appropriate. The users, groups, and containers in those Identity Vaults are not required to be the same.
5.2.2 Restrictions
You cannot use the Portal Data Export and Import tools to:
-
Export or import portal configuration state when a server is currently servicing user requests
-
Export or import portal classes and resources
-
Export or import portlet classes and resources
-
Export or import the identity and provisioning data used in a portal
-
Export or import administration settings other than for pages and portlets
-
Migrate configuration state from an earlier portal version to a later version (the portals must be the same version)
5.2.3 Exporting Portal Data
This section describes how to export a portal’s configuration state to a portal data export ZIP file.
-
If you are performing an incremental update, back up the target portal.
-
On the Application Configuration page, select from the navigation menu on the left.
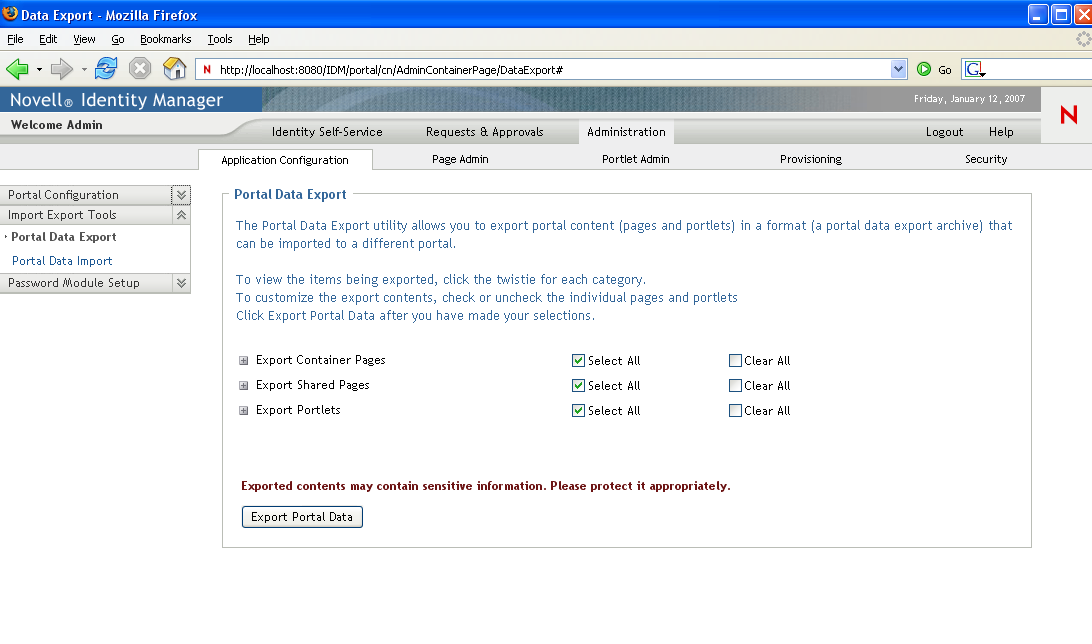
The Portal Data Export panel displays:
-
Follow the on-screen instructions to select the portal pages and portlets that you want to export.
Some portlets that you have not selected for export might still be exported. If you export a page that contains a portlet, but do not select that portlet for export, the portlet is still exported (to ensure that a runtime error does not occur for the exported page).
-
When you are done making selections, click .
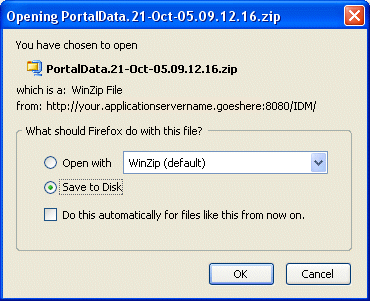
Your new portal data export ZIP file is generated, with a default name that includes the current date and time. For example:
PortalData.21-Oct-05.09.12.16.zip
You are then prompted to save this ZIP file locally (or to open it in an appropriate archive utility). For example:
-
Save the portal data export ZIP file to an appropriate location.
5.2.4 Importing Portal Data
This section describes how to import a portal data export ZIP file to a portal.
NOTE:Remember that, during the import, your target application server must be running but not currently servicing user requests.
-
If you are performing an incremental update, back up the target portal.
-
On the Tools page, select from the navigation menu on the left.
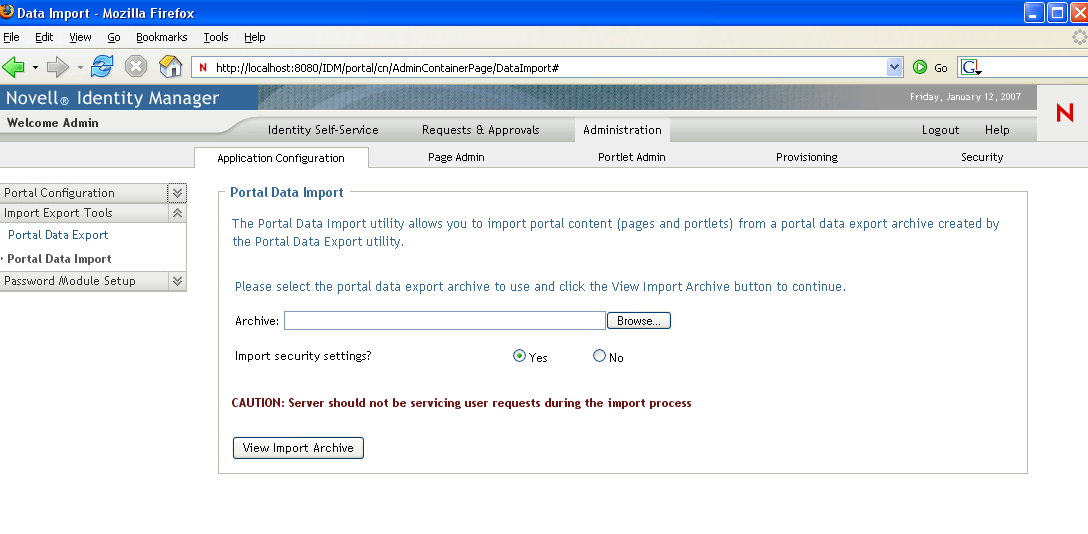
The Portal Data Import panel displays:
-
Specify the following general import settings:
-
Click .
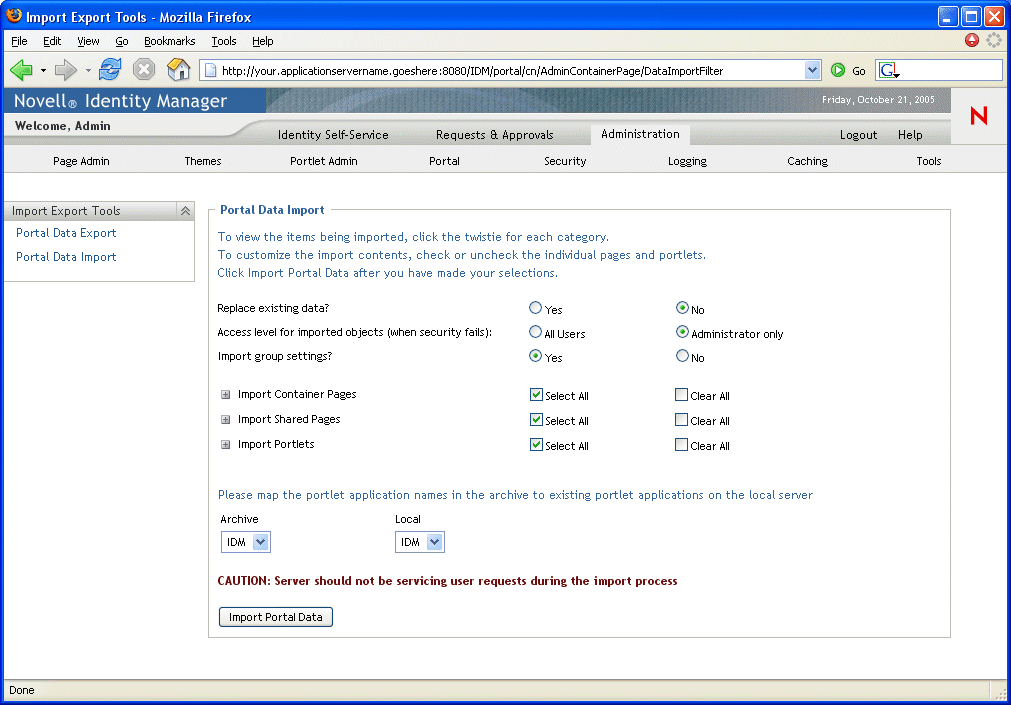
The panel displays more specifics about your selected portal data export ZIP file and how you want to import it:
-
Specify the following detailed import settings:
-
When you’re ready to begin the import, click .
When the import completes, the Portal Data Import Results panel displays:
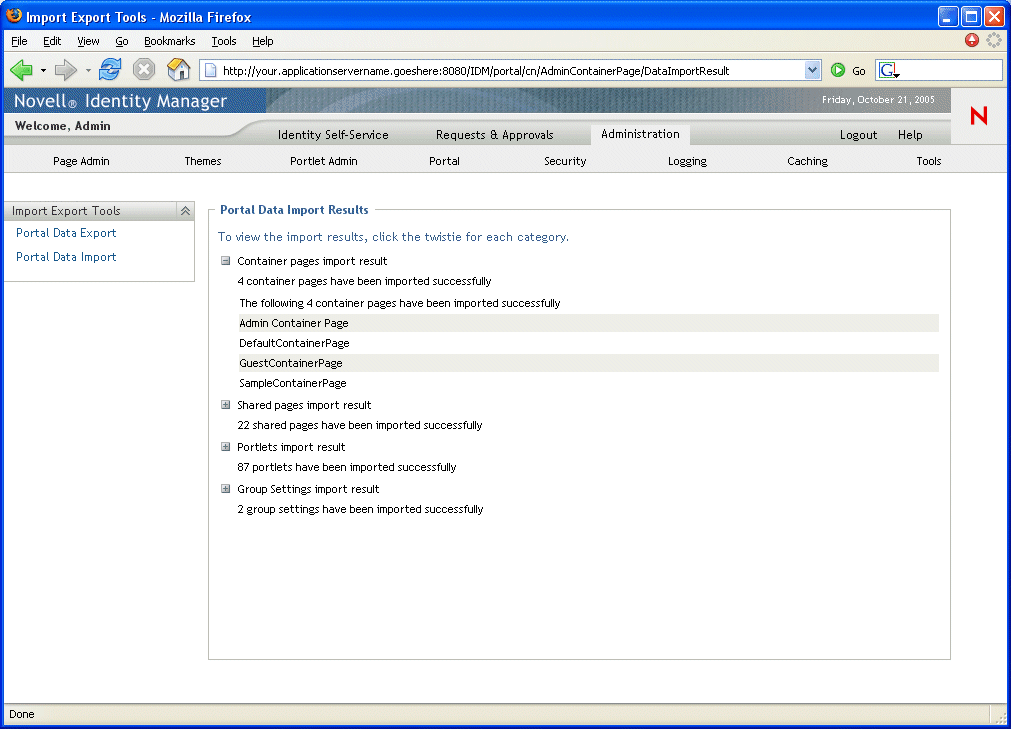
Unsuccessful imports display in red. To troubleshoot import or export problems, look at your application server’s system console or log file (such as jboss/server/IDM/log/server.log) for messages from the following User Application log:
com.novell.afw.portal.util
-
Test the target portal to ensure that you imported the data that you expected.