6.4 Working with Search Results
This section tells you how to work with the results that display after a successful search:
6.4.1 About Search Results
The content of your search results depends on the type of search you perform:
On any search results page, you can select
-
View My Saved Searches
-
Save Search
-
Revise Search
-
Export Results
-
Start a New Search
For a User Search
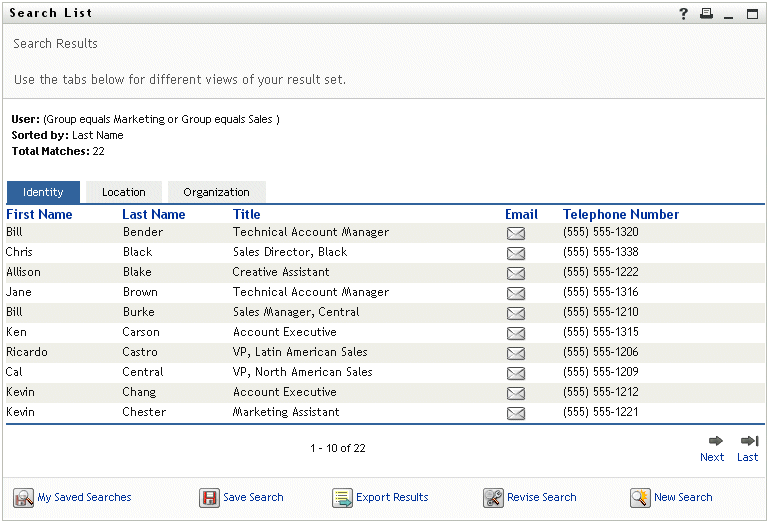
In the results of a user search, the list of users provides tabs for three views of the information:
-
Identity (contact information)
-
Location (geographical information)
-
Organization (organizational information)
Figure 6-8 User Search Results
For a Group Search
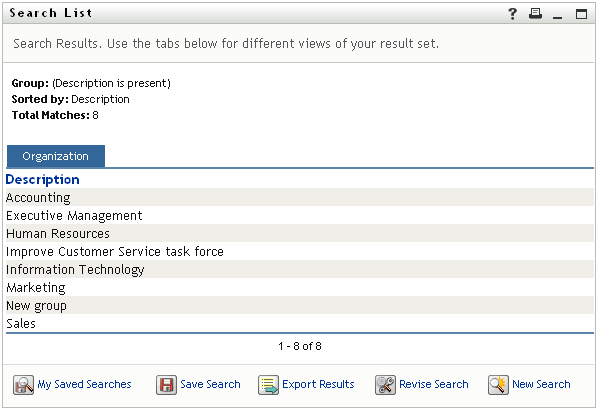
The results of a group search provide only the Organization view of the information:
Figure 6-9 Group Search Results
6.4.2 Using the Search List
You can do the following with the list of rows that displays to represent your results:
To Switch to a Another View
-
Click the tab for the view you want to display.
To Sort the Rows of Information
-
Click the heading of the column that you want to sort.
The initial sort is in ascending order.
-
You can toggle between ascending and descending order by clicking the column heading again (as often as you like).
To Display Details for a User or Group
-
Click the row for the user or group whose details you want to see (but don’t click directly on an e-mail icon unless you want to send a message instead).
The Profile page displays, showing detailed information about your chosen user or group:
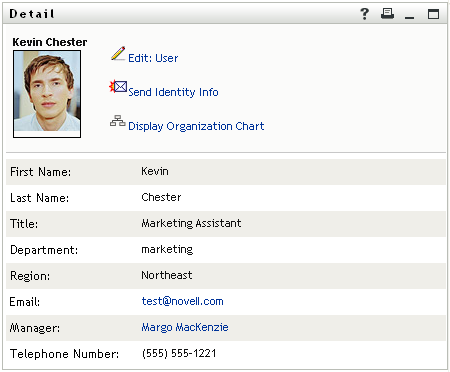
This page is just like the My Profile page on the tab. The only difference is that, when you are viewing details about another user or group (instead of yourself), you might not be authorized to see some of the data or perform some of the actions on the page. Consult your system administrator for assistance.
To learn about using the features of the Profile page, see Section 5.0, Using My Profile.
-
When you’re done with the Profile page, you can close its window.
To Send E-Mail to a User in the Search List
-
Find the row of a user to whom you want to send e-mail.
-
Click
 in that user’s row:
A new message is created in your default e-mail client. The message is blank except for the list, which specifies your chosen user as a recipient.
-
Fill in the message contents.
-
Send the message.
6.4.3 Other Actions You Can Perform
While displaying search results, you can also:
Save a Search
To save the current set of search criteria for future reuse:
-
Click (at the bottom of the page).
-
When prompted, specify a name for this search.
If you’re viewing the results of an existing saved search, that search name displays as the default. This enables you to update a saved search with any criteria changes you’ve made.
Otherwise, if you type a search name that conflicts with the name of an existing saved search, a version number is automatically added to the end of the name when your new search is saved.
-
Click to save the search.
The Search List page displays a list of My Saved Searches.
To learn more about working with saved searches, see Section 6.5, Using Saved Searches.
Export Search Results
To export search results to a text file:
-
Click (at the bottom of the page).
The Export page displays:
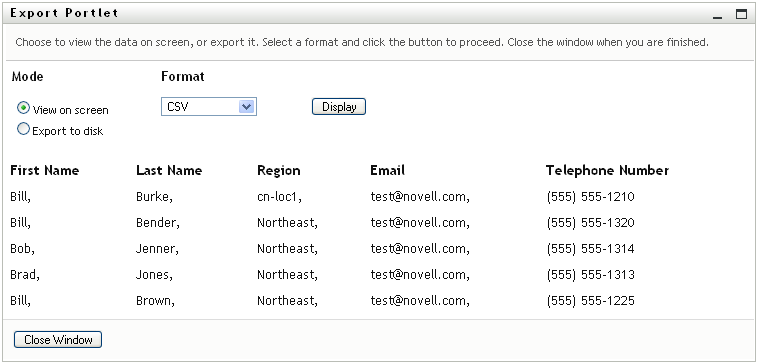
By default, is selected, and is chosen in the format drop-down list. Consequently, the Export page shows your current search results in CSV (Comma Separated Value) format.
-
If you want to see what those search results look like in Tab Delimited format instead, select in the drop-down list, then click .
-
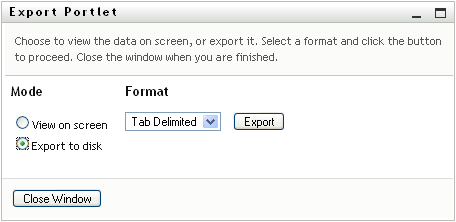
When you’re ready to export your current search results to a text file, check .
The Export page displays:
-
Use the drop-down list to select an export format for the search results:
-
Click .
-
When prompted, specify where to save the file of exported search results.
-
When you’re finished exporting, click .
Revise Search Criteria
-
Click (at the bottom of the page).
This returns you to your previous search page to edit your search criteria.
-
Make your revisions to the search criteria according to the instructions in these sections: