19.6 Common Compliance Actions
The Compliance tab provides a consistent user interface with common tools for accessing and displaying data. This section describes several of the common user interface elements and includes instructions for:
19.6.1 Specifying the Label and Description for a Request
You need to define a display label and description for all attestation request types. The tab provides a consistent interface for doing this.
To define the display label and request description:
-
In the left-navigation menu on the tab, select the action you want to perform under .
-
Type a label in the field.
The Display Label appears in the My Tasks list, the list of saved requests, and other display lists as the name of the attestation process.
To provide localized text for the label, click the button. Then, type the localized text to the right of the target language, and click .
-
Type a description in the field.
When you review the request status on the View Attestation Request Status page, the Request Description appears in the details for the request.
To provide localized text for the description, click the button. Then, type the localized text to the right of the target language, and click .
19.6.2 Defining the Attesters
The , , and actions provide a consistent interface for defining attesters.
To define the attesters for an SoD, role assignment, or user assignment attestation process:
-
In the left-navigation menu on the tab, select the action you want to perform under .
-
In the field, specify which users, groups, and roles will be attesters for the attestation process:
-
To add one or more users to the list, select in the drop-down list.

Use the to select the users. In the , you can include multiple users by clicking the checkbox for each item, and clicking .
For details on using the , see Section 1.4.4, Common User Actions.
-
To add one or more groups to the list, select in the drop-down list.
Use the to select the groups. In the , you can include multiple users by clicking the checkbox for each item, and clicking .
-
To add one or more roles to the list, select in the drop-down list.
Use the to select the roles. In the , you can include multiple roles by clicking the checkbox for each item, and clicking .
-
To delete an item, select it and click the button. You can select multiple items before clicking the button.
-
For group(s) and role(s) attesters, specify whether all members must attest to the data or only a single member in each group and role by selecting one of the following buttons:
In the case of a user profile attestation process, every member of a selected group or role must attest.
-
-
19.6.3 Specifying the Deadline
Each attestation process has a deadline associated with it. The deadline indicates how long you want the process to continue running.
The deadline is required to launch an attestation process, but is not required for a saved request.
To specify the deadline for an attestation process:
-
In the left-navigation menu on the tab, select the action you want to perform under .
-
In the field, indicate how long you want the attestation process to continue running. If you want to specify the duration for the process in weeks, days, or hours, type a number in the field, and select , , or as the unit of measure. If you would prefer to define an expiration date, select and use the Calendar control to select the date and time. If the process will run indefinitely, select .
The value specified in the Deadline field is not stored with the details for a saved request.
19.6.4 Defining the Attestation Form
You need to define an attestation form for all attestation types. The tab provides a consistent interface for doing this.
To define the form for an attestation process:
-
In the left-navigation menu on the tab, select the action you want to perform under .
-
Define the details of the attestation form, as follows:
-
Click the button.

-
Type the attestation question in the field.

The attestation question is a required question for any attestation process. This question gives the attester an opportunity to attest to or invalidate the data. The question must have a simple yes or no answer. You must define an attestation question when initiating an attestation process, and each attester must answer this question to complete their response.
To provide localized text for the attestation question, click the button. Then, type the localized text to the right of the target language, and click .
-
For a user profile attestation process, you need to indicate which user attributes you want to verify. In the field, select each attribute you want to include.
The list of attributes to choose from includes all attributes marked as viewable in the directory abstraction layer, except for those that are binary or calculated.
-
In the field, you can optionally include one or more questions that an attester can answer during the execution of an attestation process. An attestation process is not required to include survey questions. However, if they are included, they may optionally be answered by the attester.
Follow these steps to define and organize the list of survey questions:
-
Click the button to add a survey question.

Type the localized text for the question to the right of the target language, and click .
-
To move a question up in the list, select the question and click the button.
-
To move a question down in the list, select the question and click the button.
-
To delete a question, select it and click the button.
-
To edit the localized text for an existing question, select the question and click the button. Then, type the localized text to the right of the target language, and click .
-
-
When you have finished making changes to the form, click the button.
-
You can switch back and forth between the read only and editable views by clicking the or button.
19.6.5 Submitting an Attestation Request
After you have defined the details for an attestation request, you need to submit the request to initiate the process. When you submit a request, the User Application displays a confirmation number for your request.
The following fields are required to launch a request:
Table 19-4 Fields Required to Launch a Request
To submit an attestation request:
-
In the left-navigation menu on the tab, select the action you want to perform under .
-
Click to initiate the attestation process.
The confirmation number for your request is displayed at the top of the page. Record this number so you can easily track the progress of your request on the View Attestation Request Status page. If you do not record this number, you can always track the request by using the Display Label.
19.6.6 Saving Request Details
When you’re defining the details for an attestation request, you have the option to save these details for later use. For example, you might want to save the parameter and form values you specify so you can use them again in a future request.
When you click , the name you specify for the saved request appears in the list of saved requests, along with the display label.
The following fields are required for a saved request:
Table 19-5 Fields Required for a Saved Request
To save request details:
-
In the left-navigation menu on the tab, select the action you want to perform under .
-
Click .
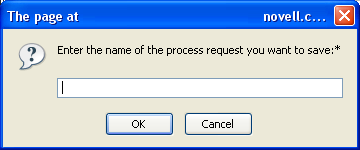
Type the name you would like to use to identify the saved process request and click .

The following characters are not allowed in the name for a saved request: < > , ; \ " + # = / | & *
Spaces at the beginning or the end of the name are automatically stripped out.
If the process request already exists, the User Application prompts you to overwrite the existing definition.
19.6.7 Using a Saved Request
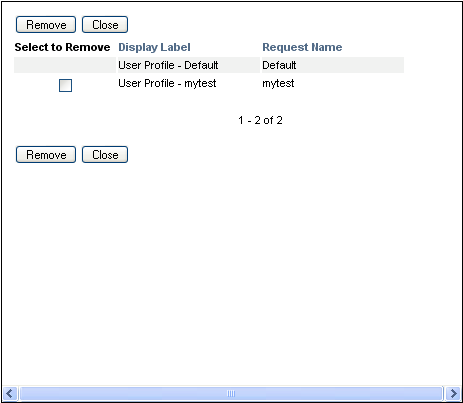
When you’re making an attestation request, you have the option to use details from a previously saved request as the basis for the new request. The saved requests that are available for selection vary depending on the type of attestation process you are requesting. For example, if you are making a user profile attestation request (as shown below), you will see only those saved requests that apply to user profile attestation processes.
To use a saved request:
-
In the left-navigation menu on the tab, select the action you want to perform under .
-
Click .
The User Application displays a pop-in window to allow you to select the saved request.

-
To select a request, click the display label or the request name. The request name is the common name (CN) for the saved request definition.
-
To remove a saved request, click the checkbox to the left of the display label, and click . You can remove multiple saved requests with a single click.
You cannot remove any of the default request definitions that are installed with the product. Therefore, the default request definitions do not show a checkbox.
When you click the button, the User Application displays a confirmation window before removing the saved request.
-