20.2 Configuring Client Integrity Check Policy to Protect the Internal Network
Novell SSL VPN has a set of client integrity check policies to protect your network and applications from clients that are using insufficient security restraints. You can configure a client integrity check policy to run on the client workstations before establishing a tunnel to the SSL VPN gateway. The check ensures that the users have specified software installed and running in their systems.
20.2.1 Overview of Client Integrity Check Policies
You can configure the client integrity check policy to check for application categories such as Firewall, Antivirus, and Mail clients depending on your requirements. The client integrity check policy is configured in the following stages:
-
Configure Category: A category is a group of similar software. For example, a firewall category can contain a list of firewall such as Windows Firewall and Zone alarm firewall. You can configure multiple software categories in the client integrity check policy. The client workstation is checked to see if the software specified under these categories is installed in the workstation, before the SSL VPN connection is established.
-
Configure Applications Names for a Category: After you have created a category, you must add application names to that category. An application name is the name of the software configured under a particular category. You can add more than one software item under a category. A client workstation is checked for the presence of any one of the software items in the category. If none of the software specified in the category is present, then the client integrity check fails and the tunnel to the SSL VPN gateway is not established.
-
Configure Application Details: After you have added an application to a category, you must configure the attributes of that particular application. The following table lists the attributes for applications on different operating systems:
20.2.2 Configuring the Client Integrity Check Policy
To configure a client integrity check policy for SSL VPN:
-
In Administration Console, click > .
-
Select from the section. The Client Integrity Check Policies page is displayed.

You can perform the following actions in this page:
New: To add a new category, click .
Delete: To delete a category, select the category, then click .
Enable: To enable a category, select the check box next to category, then click . The newly added category is enabled by default.
Disable: To disable a category, select the check box next to category, then click .
-
Select the operating system from the drop-down list.
-
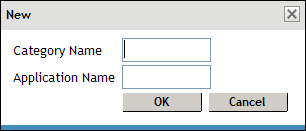
Click to enter a new software category. The New dialog box is displayed.
-
Specify a and an , then click .
-
Click the newly added category to add applications to it. The Client Integrity Check - Category page is displayed.

You can perform the following actions on this page:
New: To add a new application to the category, click .
Delete: To delete an application, select the application, then click .
Enable: To enable an application, select the check box next to application, then click .
Disable: To disable an application, select the check box next to application, then click .
-
Click to add a new application to the category. The new dialog box is displayed.

-
Specify an application name, then click .
-
Click the newly added application to add application details and attributes to it. The Application Details and Attributes page is displayed.

This page specifies the operating system, application category and name and details of the application. The following application details are listed in this page:
-
Attribute Type: Specifies whether the attribute is a Process, Package, AbsoluteFile, Registry Key, or an RPM, based on the type of operating system you select.
-
Attribute Name: Specifies attribute names for different attribute types. For more information, see Overview of Client Integrity Check Policies.
-
Attribute Value: Specifies the value of each attribute name.
-
-
Click to add an attribute to the application, add an attribute name, then click .
-
Click to save your modifications, then click on the Configuration page.