7.4 Hardware and Machine Resource Issues
7.4.1 Error: novell-vmc-chroot Failed to Start
You might see the following error message displayed:
novell-vmc-chroot Failed to Start.Please refer to the online guide for troubleshooting.
This error usually occurs when the disk is full, which prevents novell-vmc from starting. To work around this problem, free some disk space before proceeding with any other configuration changes.
7.4.2 Mismatched SSL Certificates in a Cluster of Access Gateways
Sometimes a newly added server in a cluster does not receive the certificate that the rest of the cluster is using for SSL.
To fix this problem:
-
In the Administration Console, click > > > .
-
For the server certificate, click the icon, then select a different certificate, such as the test-connector certificate.
-
Click to ignore the warnings that the certificate CN does not match the reverse proxy.
-
Click .
-
Click .
This must be the same reverse proxy that you selected in Step 1.
-
For the server certificate, click the icon, select the certificate whose CN matches the published DNS name of the parent proxy service, then click .
-
Click .
When you click OK, the correct certificate is added to the keystore.
-
Repeat Step 1 through Step 7 for each reverse proxy that uses a unique certificate. If all of the reverse proxies use the same certificate, continue with Step 9.
-
On the Access Gateways page, click > .
The configuration changes are pushed to the Access Gateway, and the Access Gateway loads and uses the new certificate.
7.4.3 Recovering from a Hardware Failure on an Access Gateway Machine
If an Access Gateway machine experiences a hardware failure, such as a failed hard disk, you can preserve its configuration and have it applied to the replacement machine. For information about this procedure, see Restoring an Access Gateway
in the Novell Access Manager 3.1 SP2 Administration Console Guide.
7.4.4 Reinstalling a Failed Access Gateway
If the hardware of your Access Gateway fails and the Access Gateway is not a member of a cluster, you might receive the following message when you reinstall it:
Start unsuccessful. Reason: Unable to read keystore: /opt/novell/devman/jcc/certs/esp/signing.keystore.
If you receive this message, use the following process to solve the problem:
-
Add the failed Access Gateway to a cluster.
For instructions, see Section 6.4.1, Creating a New Cluster.
Ignore the pending status of this command.
-
Reinstall the Access Gateway with a new IP address.
-
Add the new Access Gateway to the cluster and make it the primary cluster server.
-
Delete the failed Access Gateway from the cluster and from the Administration Console.
-
(Optional) If you want the Access Gateway to use the old IP address:
-
Reinstall the Access Gateway by using the old IP address.
-
Add it to the cluster.
-
Make it the primary cluster server.
-
Delete the Access Gateway that is using the new IP address from the cluster and from the Administration Console.
-
7.4.5 COS Related Issues
The following sections explain how to troubleshoot COS (cache object store) partition issues:
Viewing COS Partition Details
You can view COS partition details either through YaST or through the nash prompt.
Using YaST
-
Log in as the root user.
-
At command prompt, enter the following command:
fdisk -l
The partition details are displayed. Check for COS partition details. Make sure that a partition is created with a partition ID of 68 and that the file system is created as type unknown.
Using nash
-
At the command prompt, enter the following command:
nash
-
At the nash shell prompt, enter the following command:
configure .current
-
Enter the following command:
vm scan
If the COS partition is already created, the details are displayed.
Checking if the COS Partition Is Mounted
-
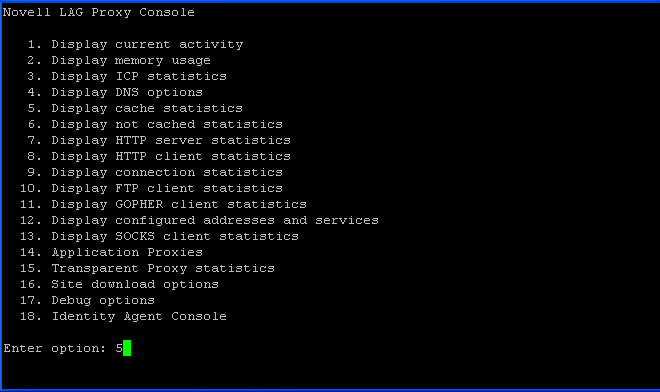
Access the Access Gateway main screen.
For more information on how to access the Access Gateway main screen, see Section 7.1.3, Using the Access Gateway Appliance Console.
-
Enter the option number at the prompt.
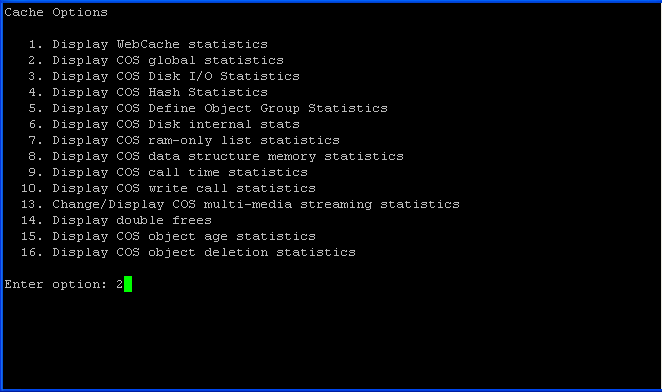
The Access Gateway Console screen is displayed.
-
Enter the option number at the prompt.

-
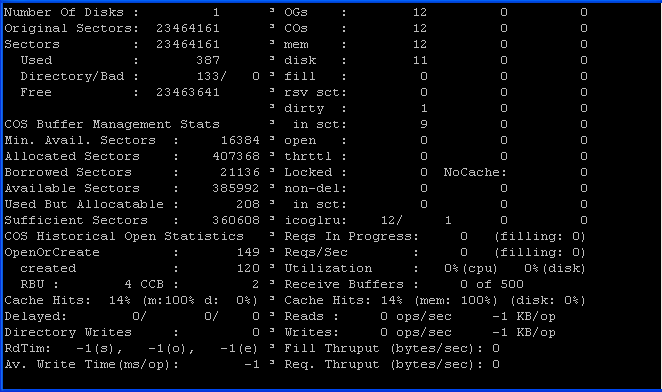
Enter the option number at the prompt.

The following details are displayed if the COS partition is mounted:

7.4.6 Memory Issues
The following sections explain how to troubleshoot memory issues:
Checking Memory Details and Related Information
Most of the information, including the memory details, can be accessed by entering the following command at the bash prompt:
top
Ensure that the Access Gateway does not occupy more than the percentage of the memory requirements you set.The ics_dyn process occupies approximately 20 to 25 percent of the total memory by default.
Checking Available Memory
As the root user, enter the following command at the bash prompt:
cat /proc/meminfo | grep MemTotal