6.3 Using Novell IPv6 to Connect to 6Bone
6.3.1 Getting an IPv6 Address Space
The Telecom lab sets up new connections within the backbone to provide access to new leaf sites. The lab provides an IPv6 prefix that is a pTLA (pseudo-Top Level Aggregator) and a 6Bone connection. If you want to connect to 6Bone, you must fill in a registration form and agree on the IPv4/IPv6 addresses to be used on the two sides. When this is done, you can connect to 6Bone.
6.3.2 Connecting to 6Bone
In contrast to the classic IPv6-over-IPv4 tunnel setup, you do not register at a 6Bone gateway or get forwarded to any IPv6 traffic (encapsulated in IPv4). Because your IPv6 address is provided from a source that already has a 6Bone connection, the tunnel establishment and maintenance are done by a Tunnel Broker where you got the IPv6 address.
Tunnel Broker is a mechanism to automatically manage tunnel requests coming from remote users. Standalone remote IPv6 users can register on a dedicated Web site, then obtain a script that will build an automatic tunnel to the IPv6 network.
To send IPv6 packets, the host takes the IPv6 packet and encapsulates it into an IPv4 packet. You still need a 6Bone-connected gateway that will decapsulate your packets and forward them to 6Bone.
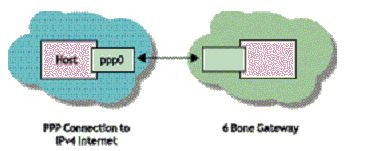
The following figure illustrates this.
Figure 6-1 Connecting through Novell IPv6

Example
Your private network is uplinked through an IPv4-connected PPP link to a 6over4 gateway machine that is connected to 6Bone.
To connect to 6Bone the following sequence of events must occur:
-
Assume that 202.169.139.51 is your IPv4 address.
-
After becoming a registered user in one of the organizations that provide this service, you provide the IPv4 address at your end.
-
Within a few minutes you receive an e-mail containing all the details needed to connect to 6Bone:
-
Enter the following command to start pinging to the remote IPv6 address with IPv6 loaded:
Tun6bind tunnel_name 3ff2:1001:0001:b000::2489 3ffe:1001:0001:b000::2489 202.169.139.51 163.162.170.170
If you are able to get the response from pinging, you know you are connected to 6Bone.