7.1 Using Novell iManager for Linux User Management
Novell iManager is a management utility that runs in an Internet browser.
-
Section 7.1.2, Creating a New Group Object for Linux User Management Users
-
Section 7.1.3, Enabling an Existing Group Object for Linux User Management
-
Section 7.1.4, Creating a User Object for Linux User Management
-
Section 7.1.5, Enabling an Existing User Object for Linux User Management
-
Section 7.1.6, Enabling Multiple Users for Linux in a LUM Group
-
Section 7.1.7, Enabling Multiple Users for Linux in a Container
7.1.1 Running iManager
-
Open a browser.
-
Enter the domain name or IP address of the server followed by /nps/. For example, if the server address is 10.10.1.1, specify the address as http://10.10.1.1/nps/
-
When prompted, provide the administrator name and password.
-
Click Linux User Management.
If you do not see the Linux User Management category of Roles and Tasks, the Linux User Management plug-in to iManager is not installed. You can download the Linux User Management plug-in for iManager from the Novell Download Web site.
7.1.2 Creating a New Group Object for Linux User Management Users
-
In iManager, click Roles and Tasks, then select Groups > Create Group.
-
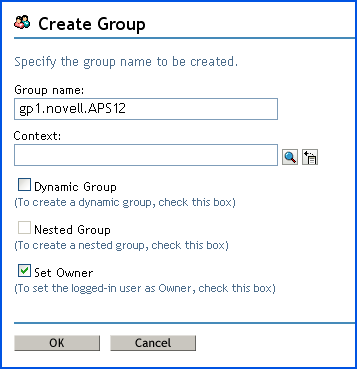
On the Create Group page, specify the Group name and the Context for the group.
-
Select the group type.
-
Select Dynamic Group to make the new group a dynamic group, of the dynamic Group class. Otherwise, the group is created as a static group, or as the Group class.
-
Select Nested Group to make the new group a nested group so that the group is created with the auxiliary class nestedGroupAux.
-
Select Set Owner to make the creator of a group object the group owner. The group’s Owner attribute is set to the DN of iManager’s logged-in user. Deselect Set Owner to leave the Owner attribute undefined.
-
-
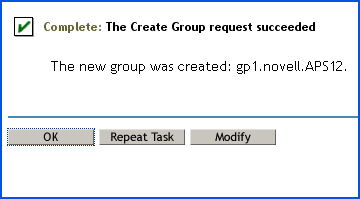
Click OK. A message confirming that a new group object is successfully created is displayed.
7.1.3 Enabling an Existing Group Object for Linux User Management
-
In iManager, click Roles and Tasks, then select Linux User Management > Enable Groups for Linux.
-
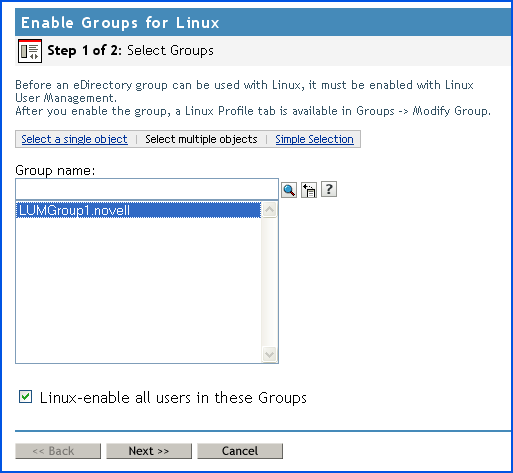
Select a group to be enabled for Linux User Management.
-
(Optional) Select Linux-enable all users in these Groups to enable all users in the group for Linux User Management.
-
Click Next.
-
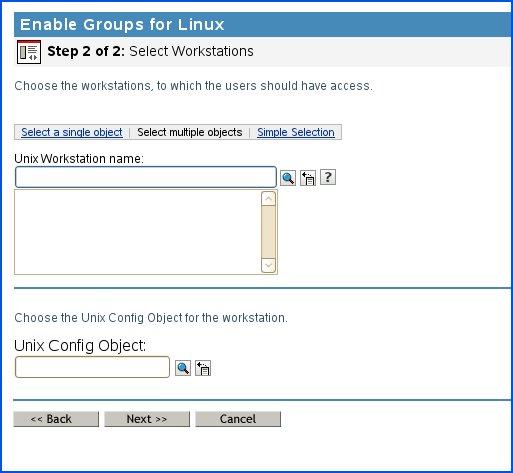
Select a UNIX workstation to which the user has access and select the Unix Config object for the workstation.
-
Click Next.
-
Select an UNIX workstation to which the user has access.
-
Select the UNIX Config Object for this workstation.
-
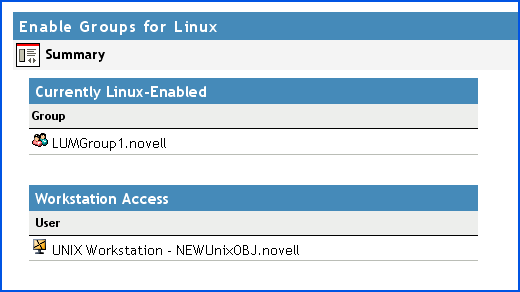
Click Next. A summary of the selected object and workstation is displayed.
-
Click Finish.
7.1.4 Creating a User Object for Linux User Management
-
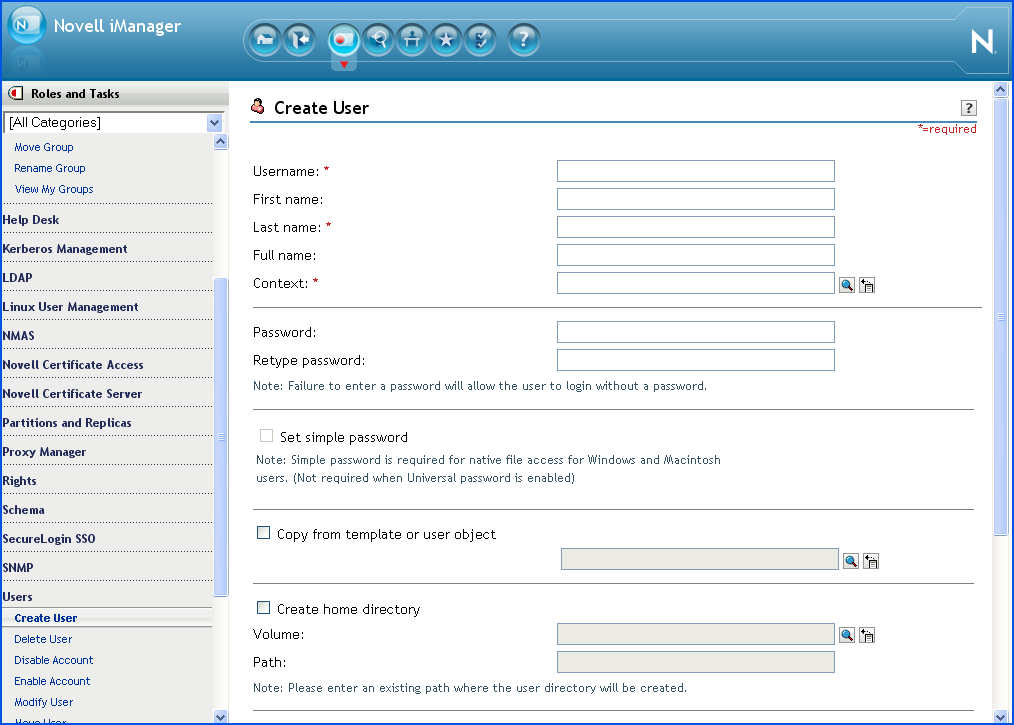
In iManager, click Roles and Tasks, then select User > Create User.
-
On the Create User page, provide the username, first name, last name, full name, context, and password for the user object.
If you fail to specify a password, you are prompted to either allow the user to log in without a password, which is not recommended, or require a password for login.
Select Set simple password to define a simple password, which is required for native file access for Windows and Macintosh users. It is not necessary when Universal Password is enabled.
-
Select Copy from template or user object to create a user based on an existing template or user object. When copying from a user object, iManager allows only a copy of the new object’s eDirectory rights instead of a copy of all eDirectory rights, to prevent users from receiving the same rights as the administrator.
-
Select Create home directory to specify a location for the user’s home directory, which is created when the user object is created. If you specify a path that doesn't exist, a message appears stating that the user's home directory has not been created.
-
(Optional) Add more details such as title, location, department, telephone, fascimile number, e-mail address, and a description.
-
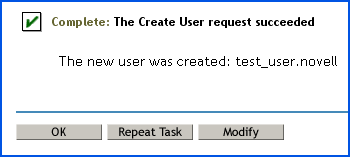
Click OK. A message confirming that a new user object is created is displayed.
7.1.5 Enabling an Existing User Object for Linux User Management
Before an eDirectory user can be used with Linux, it must be enabled with Linux User Management.
-
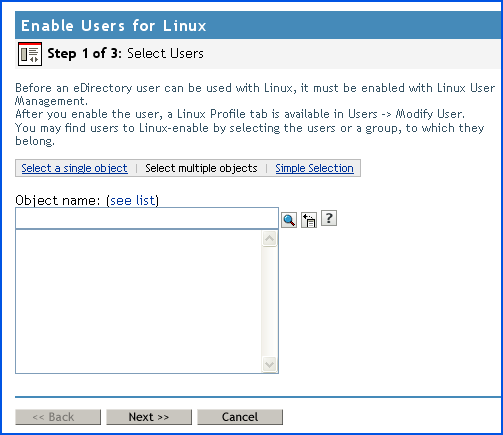
In iManger, click Roles and Tasks, then select Linux user Manager > Enable Users for Linux.
-
Specify the users to be enabled.
You might be prompted to confirm if you want to enable users in the group for Linux User Management.
-
Click Next.
-
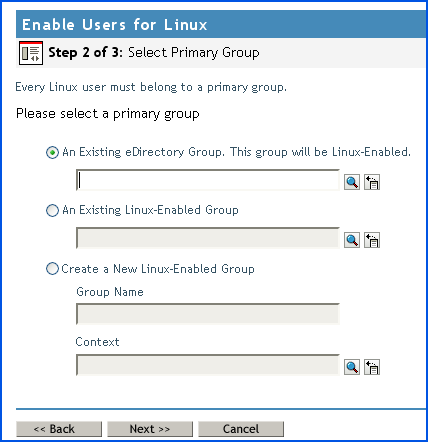
Select a primary group to which the Linux user belongs. You have three options:
-
Select an existing eDirectory group.
-
Select an existing Linux-enabled group.
-
Create a new Linux-enabled group. If you choose this option, specify the group name and the context.
-
-
Click Next.
-
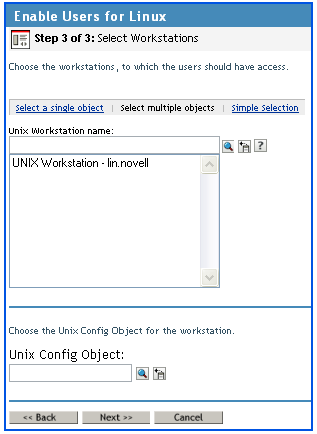
Select a UNIX workstation to which the user has access.
-
Click Next. A summary of the users who are enabled for Linux is displayed.
-
Click Finish.
7.1.6 Enabling Multiple Users for Linux in a LUM Group
You can Linux-enable all members of a Linux User Management (LUM) group. Users that are enabled for the first time receive the group ID (GID) as their primary ID and users previously enabled for Linux receive the group ID as a secondary GID. Users not enabled for Linux cannot log in to a Linux computer even if they belong to a Linux-enabled group.
To Linux-enable multiple users in a LUM group, follow the steps given below:
Select a LUM-Enabled Group
-
In iManager, click Roles and Tasks, then select Linux User Management > Bulk Enable Users in LUM Group.
-
In the posixGroup name field, specify a group whose users you want to Linux-enable.
-
Specify the Unix Config object to allocate the UIDs.
-
Click Next.
Confirm Selected Users
-
Select and confirm the users to be enabled as part of the group. If a selected user is a member of multiple groups, a primary group conflict resolution page is displayed. You can use this page to specify the primary group for each user.
-
Click Finish.
Primary Group Conflict Resolution
This page is displayed only if there are conflicts in the Confirm Selected Users page.
-
For each user in the Primary Group Conflicts section, use the Primary Group list to specify the primary group.
-
Click Next.
7.1.7 Enabling Multiple Users for Linux in a Container
You can Linux-enable multiple users in a container at the same time. All the users in the subtree beneath the container will be LUM-enabled.
NOTE:You can bulk-enable up to 9000 users.
To Linux-enable multiple users in a container, follow the steps given below:
Select a Container
-
Specify an object for which users are to be LUM-enabled.
-
Specify the Unix Config object to allocate the UIDs.
-
Specify the Primary Group name to be associated with the users. This group should be LUM-enabled.
-
Click Next.
Confirm Selected Users
-
Select and confirm the users to be enabled in the container.
-
Click Finish.
7.1.8 Modifying a UNIX Config Object
-
In iManager, click Roles and Tasks, then select Linux User Management > Modify Unix Config Object.
-
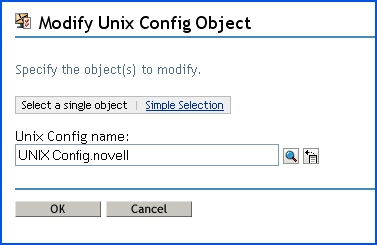
Specify the name of the object to modify.
-
Click OK.
-
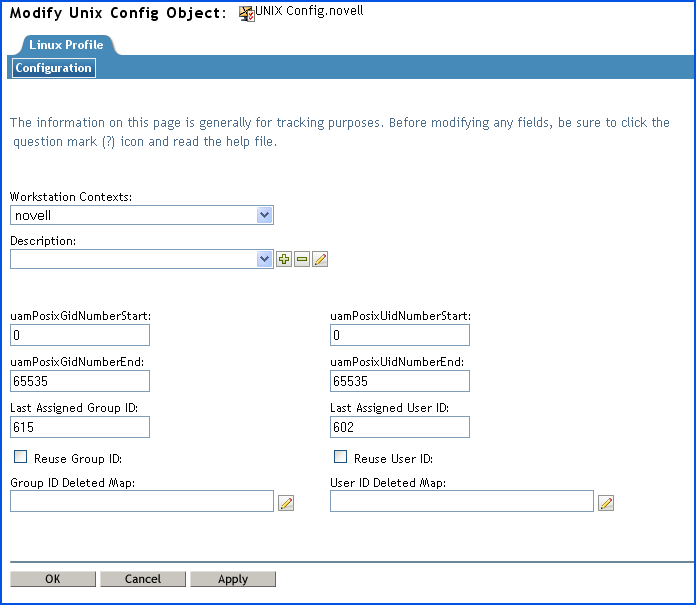
Make required configuration changes.
-
Click Apply to apply the changes.
-
Click OK to save and exit.
7.1.9 Modifying a UNIX Workstation Object
-
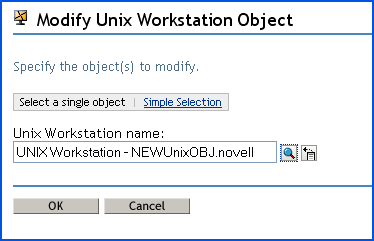
In iManager, click Roles and Tasks, then select Linux User Management > Modify Unix Workstation Object.
-
Specify the name of the object to modify.
-
Click OK.
-
Make the required changes.
-
Click OK.
7.1.10 Disabling LUM
To LUM-Disable a user, you must remove the posixAccount objectclass from the user object using iManager. This will remove the gidNumber, homeDirectory, loginShell, and uidNumber posix attributes of the user. If these posix attributes persist, then you need to manually remove them from the user object. Follow the steps given below to remove the posixAccount objectclass from the user object:
-
Open a browser.
-
Enter the domain name or IP address of the server followed by /nps/. For example, if the server address is 10.10.1.1, specify the address as http://10.10.1.1/nps/.
-
When prompted, provide the administrator name and password.
-
In Roles and Tasks, select Directory Administration > Modify Object.
-
Specify the user object in the Object name field and click OK.
-
Click the Other tab.
-
Select Object Class from the Valued Attributes list and click Edit.
-
Select posixAccount from the Object Class drop-down list and click delete.
-
After you remove the posixAccount objectclass refresh the namcd cache by running the namconfig cache_refresh command.
To LUM-Disable a group, you must repeat the above process to remove the posixGroup objectclass from the group object. This will automatically remove the gidNumber posix attribute of the group. If this posix attribute persists, then you need to manually remove it from the group object.