10.4 Adding Access Controls
Novell Teaming enables you to set access controls on workflows that you create. You can set access controls on an entire workflow, or on the individual states of a workflow.
10.4.1 Setting Access Controls on an Entire Workflow
-
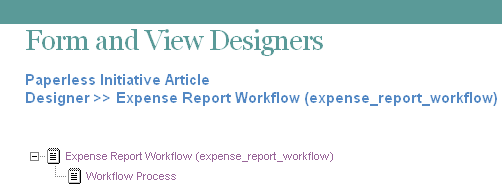
In the Designer page, expand the workflow definition that you created in Section 10.2.1, Creating the Workflow Definition.
-
Click .
-
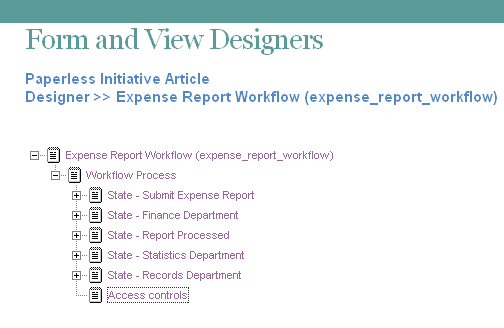
Click > .
-
Click .
-
Expand , then click .
-
Click .
-
Click the access control setting that you want to add.
Delete Access: Enables you to grant specific users rights to delete entries as they transition through the workflow process.
Modify Access: Enables you to grant specific users rights to modify entries as they transition through the workflow process.
Read Access: Enables you to grant specific users rights to read entries as they transition through the workflow process.
Transition Into This State: Enables you to grant specific users rights to transition entries into any state in the workflow.
Transition Out of This State: Enables you to grant specific users rights to transition entries out of any state in the workflow.
-
Define the access control setting that you added in Step 7 by specifying the following information in the provided form:
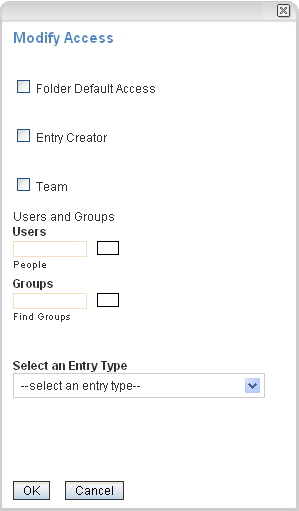
Folder Default Access: Select this option to grant access to all users who have access to the folder.
Entry Creator: Select this option to grant access to the user who created the entry.
Team: Select this option to grant access to the team.
Users: Use the provided field to specify individual users to whom you want to grant access.
Groups: Use the provided field to specify individual groups to whom you want to grant access.
Select an Entry Type: Use the drop-down list to select the type of entry that most closely represents the type of entry that is going through the workflow.
Select Elements within the Entry: Enables you to select elements that are contained in the entry. Users associated with that element are granted access.
For example, if you select in the drop-down list, the options that you can select in the are: , , .
-
Click .
10.4.2 Setting Access Controls on Individual States of a Workflow
-
In the Designer page, expand the workflow definition that you created in Section 10.2.1, Creating the Workflow Definition.
-
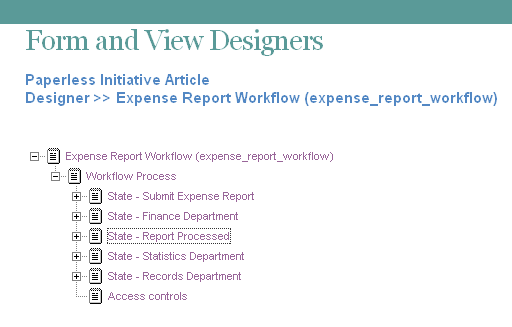
Expand , then click the state where you want to add the access controls.
-
Click > .
-
Click .
-
Expand the state where you just added the access controls, then click .
-
Click .
-
Click the access control setting that you want to add.
Following are the types of access control settings that you can add.
Delete Access: Enables you to grant specific users rights to delete entries when they are in this workflow state.
Modify Access: Enables you to grant specific users rights to modify entries when they are in this workflow state.
Read Access: Enables you to grant specific users rights to read entries when they are in this workflow state.
Transition Into This State: Enables you to grant specific users rights to transition entries into this state.
Transition Out of This State: Enables you to grant specific users rights to transition entries out of this state.
-
Define the access control setting that you added in Step 7 by specifying the following information in the provided form:
Folder Default Access: Select this option to grant access to users who have access to the folder.
Entry Creator: Select this option to grant access to the user who created the entry.
Team: Select this option to grant access to the team.
Users: Use the provided field to specify individual users to whom you want to grant access.
Groups: Use the provided field to specify individual groups to whom you want to grant access.
Select an Entry Type: Use the drop-down list to select the type of entry that most closely represents the type of entry that is going through the workflow.
Select Elements within the Entry:
-
Click .