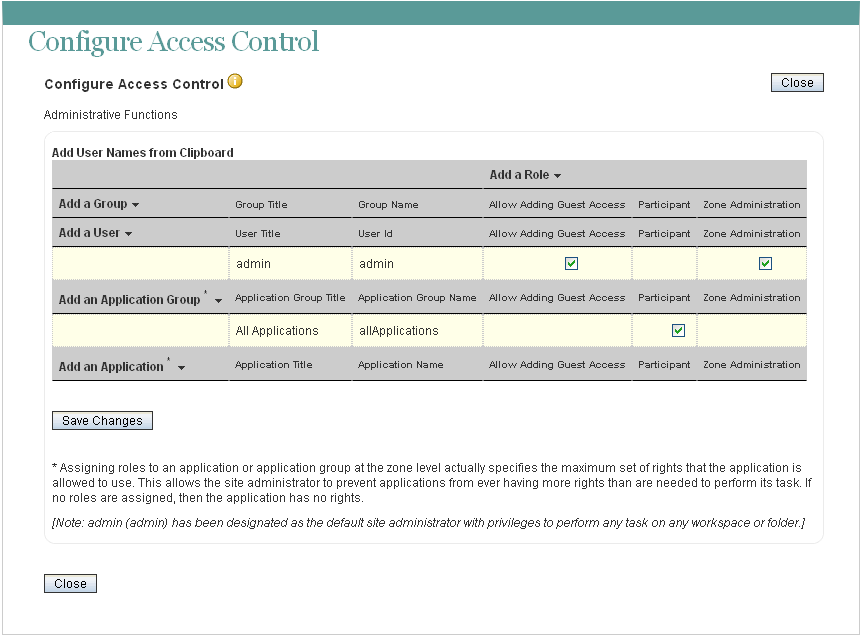
2.4 Controlling User Access throughout the Teaming Site
By assigning users to access control roles for the Teaming site, you can give users additional rights, or restrict current rights.
2.4.1 Understanding Default Roles
By default, you can assign users to various roles in the Teaming site.
Table 2-1 Default Access Control Roles
|
Role |
Description |
|---|---|
|
Participant |
Can create entries and modify those entries, plus perform tasks associated with the Visitor role. |
|
Allow Adding Guest Access |
Can make Teaming workspaces and folders available to Guest users in Teaming. By default, Guest users can access only the Guest user personal workspace, as well as any workspace or folder that the Teaming administrator has granted them rights to access. For more information, see Section 5.3.3, Enabling Individual Users to Grant Guest Access throughout the Teaming Site. |
|
Can Only See Members Of Groups I Am In |
Removes a user’s ability to view other Teaming users who are not members of a group that he or she belongs to. |
|
Guest Participant |
Can read entries, create entries, and add comments. |
|
Override “Can Only See Members Of Groups I Am In” |
Overrides the role. This can simplify the administration of the role. For example, you might assign the role to a group, but at the same time you want to allow certain members of the group to retain their ability to see users that belong to groups outside of their own. In this circumstance, you can assign the role to the members who you want to retain their ability to see users outside of their own groups. |
|
Team Member |
Has all the rights of a Participant. In addition, can add folders, modify any entry, and has some additional administrator privileges. |
|
Token Requester |
Can make Web service calls on behalf of another Teaming user. This functionality can enable administrators to perform proxy functions for individual Teaming users without logging in as the Teaming user. This means that the Web services application does not cache individual users’ credentials in order to perform operations. This role should not be assigned to a Teaming user, but rather to a system-level (agent) account that you want to be responsible for executing Web service operations on behalf of one or more regular Teaming users. For more information about the Web services operations that support the Token Requester role, see |
|
Visitor |
Has read-only and comment-only access. |
|
Workspace and Folder Administrator |
Can create, modify, or delete workspaces or folders; moderate participation (modify or delete the entries of others); design entries and workflows; and can perform tasks associated with the Participant role. |
|
Workspace Creator |
Can create sub-workspaces. In Team Workspace Root workspaces, this role allows users to create their own team workspaces. |
|
Zone Administration |
Has all rights associated with access control. |
2.4.2 Assigning a User to a Role
To assign a user to a particular role for every place on the Novell Teaming site:
-
In the Folder or Workspace toolbar, click > , then click .

A basic Teaming site consists of a single zone. Novell Teaming allows you to set up multiple zones in a single Teaming site. This feature is not available in Kablink Teaming. For more information about creating multiple zones, see Section 12.0, Setting Up Zones (Virtual Teaming Sites).
-
Add the user to whom you want to grant the site-wide role to the Access Control table.
For information on how to add users to the Access Control table, see
Adding Users to the Access Control Table
in the Novell Teaming 2.1 Advanced User Guide. -
Add the role that you want to grant to the Access Control table.
For information on how to add roles to the Access Control table, see
Adding Roles to the Access Control Table
in the Novell Teaming 2.1 Advanced User Guide. -
Click , then click .