2.3 Controlling User Access in Workspaces
The access control settings on each Novell Teaming workspace determine who can see the workspace and how different types of users can participate in each workspace.
2.3.1 Controlling User Access to Personal Workspaces
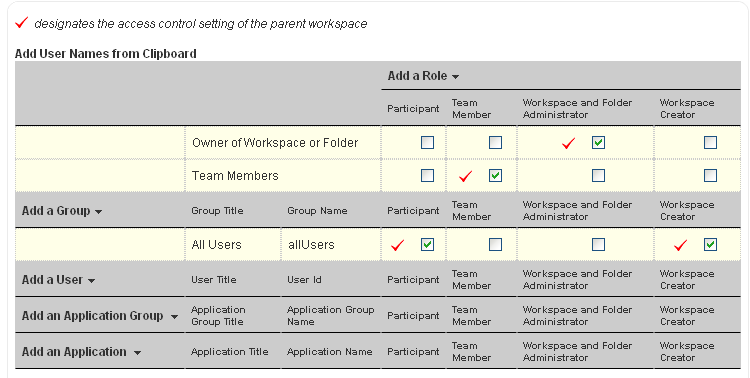
Default Access Controls
By default, personal workspaces are created with the following access:
Restricting Access to Personal Workspaces throughout the Teaming Site
You might want to set up your Teaming site so entries in users’ personal workspaces remain hidden and confidential.
-
Navigate to the Personal Workspaces page by clicking in the Workspace tree.
-
Click > .
-
In the column of the access control table, ensure that no check boxes are selected.
-
Click .
Teaming users can adjust the access control for their personal workspaces, as described in Controlling User Access
in the Novell Teaming 2.1 Advanced User Guide.
2.3.2 Controlling User Access to Team Workspaces
By default, new team workspaces created under the main Team Workspace are visible only to members of the team workspace. Following are some of the default access control options:
After you create a new team workspace, you can configure different access control settings for it.
-
Select the new team workspace, then click .
-
Select in the Inheritance box.

-
Click to activate the Access Control table:

-
Adjust the access control settings for the new team workspace as needed, as described in
Controlling User Access
in the Novell Teaming 2.1 Advanced User Guide.
2.3.3 Controlling User Access to Global Workspaces
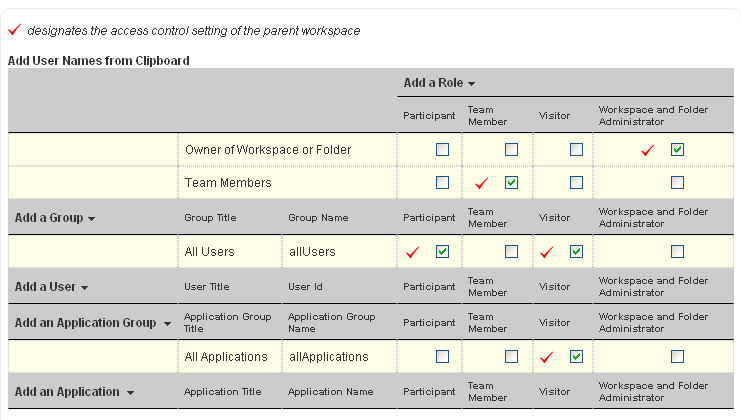
By default, the Global Workspace immediately under the Home Workspace inherits the access control settings of the Home Workspace, which are:
|
User or Group |
Access Role |
Role Description |
|---|---|---|
|
Workspace Owner (admin) |
Administrator |
Can create, modify, or delete workspaces or folders; moderate participation (modify or delete the entries of others); design entries and workflows; and can perform Participant tasks. |
|
All Users group |
Participant |
Can create and modify entries, plus perform the Visitor tasks. |
|
Visitor |
Has read-only and comment-only access. |
|
|
All Applications group |
Visitor |
Has read-only and comment-only access. For information about application groups, see |
When you create a new global workspace under the main Global Workspace, the new global workspace by default inherits the access control settings of the main Global Workspace, as listed above. After you create a new global workspace, you can configure different access control settings for it.
-
Select the new global workspace, then click .
-
Select in the Inheritance box.

-
Click to activate the Access Control table:

-
Adjust the access control settings for the new global workspace as needed, as described in
Controlling User Access
in the Novell Teaming 2.1 Advanced User Guide.