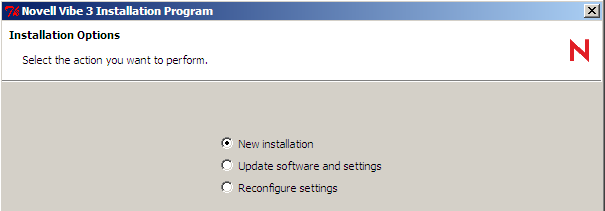
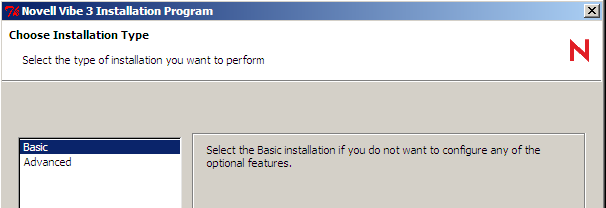
4.2 Windows: Installing and Setting Up a Basic Vibe Site
You should already have reviewed Section 3.0, Planning a Basic Vibe Installation and filled out the Basic Vibe Installation Summary Sheet. The following sections step you through the process of installing and starting Novell Vibe on Windows.
4.2.1 Performing Pre-Installation Tasks on Windows
Verifying System Requirements
Make sure that the Windows server where you plan to install Vibe meets the system requirements listed in Section 2.1, Vibe Server Requirements.
Stopping an Existing Web Server
If a Web server is currently running on the Vibe server, stop it, and preferably disable it.
For example, to stop and disable the Internet Information Services (IIS) Web server:
-
On the Windows desktop, click .
-
Right-click , then click .
-
In the drop-down list, select .
-
Click , then click .
Setting Environment Variables
Make sure that the JAVA_HOME environment variable is set to the path where you installed the JDK and that the Windows PATH environment variable includes the path to your database server.
-
Right-click , then click .
-
On the tab, click .
-
Set the JAVA_HOME environment variable:
-
In the box, click .
-
In the field, specify JAVA_HOME.
-
In the field, specify the path where you installed the JDK.
-
Click to add the JAVA_HOME environment variable to the list of system variables, then click again to save the setting and return to the tab.
-
-
Check the PATH environment variable:
-
On the tab, click .
-
In the list, locate the PATH environment variable.
-
If the path includes your database server software directory, click .
or
If the path does not include your database server software directory, add the directory, then click .
-
Copying Executable and Library Files
During the initial installation of Vibe, Vibe fails to copy certain .exe and .dll files from the apache-tomcat/bin/windows/architecture directory into the apache-tomcat/bin/windows directory. You must manually perform this process.
-
Navigate to the following directory on the Vibe server:
apache-tomcat/bin/windows/architectureFor example, if you are running a 64-bit server, navigate to the apache-tomcat/bin/windows/x64 directory.
-
Copy the .exe and .dll files in the directory.
-
Paste the .exe and .dll files that you copied in Step 2 into the following directory on the Vibe server:
apache-tomcat/bin/windows
4.2.2 Running the Windows Vibe Installation Program
-
Log in to the Windows server as a user with Administrator rights.
-
In Windows Explorer, browse to the directory where you downloaded and extracted the Vibe software.
-
Make sure that there is a license-key.xml file in the directory.
The Vibe installation program does not start without a license file, and it has a different name when you download it.
For more information about licensing, see Section 6.0, Updating Your Vibe License.
-
Double-click the installer-teaming.exe file to start the Vibe installation program.
-
Accept the License Agreement, then click .

-
Click to accept the default of .

-
Click to accept the default of .
-
Use the information that you have gathered on the Basic Vibe Installation Summary Sheet to provide the information that the Vibe installation program prompts you for:
- Installation Locations
- Default Locale for Novell Vibe
- Network Information
- Database Selection
- Database Type
- JDBC URL
- Credentials
- Setup
- Encryption Algorithm
- Java JDK Location
- Outbound E-Mail Configuration
- Protocol
- Host, Port, and Time Zone
- Username, Password, and Authentication
- Allow Sending E-Mail to All Users
- Inbound E-Mail Configuration
The installation program stores the information it gathers in the installer.xml file in the same directory where you started the installation program.
-
After you have provided all the requested information, click to begin the Vibe installation.
-
When the installation is completed, click to exit the Vibe installation program.
Information about the installation process is written to the installer.log file in the same directory where you ran the Installation program. If a problem arises during the installation, the installer.log file provides information that can help you resolve the problem.
-
Continue with one of the following sections, depending on how you want to run the Vibe software:
4.2.3 Running Vibe as a Windows Service
Configuring Vibe as a Windows Service
The Vibe installation program created a service.bat file for configuring Vibe to run as a Windows service.
-
In a Command Prompt window, change to the following directory:
c:\Program Files\Novell\Teaming\apache-tomcat\bin\windows
-
In the windows directory, copy the files from the appropriate subdirectory.
The following subdirectories exist: x86, x64, ia64.
If you are unsure which subdirectory is appropriate for your server, use the readme.txt file located in the c:\Program Files\Novell\Teaming\apache-tomcat\bin\windows directory as a reference.
-
Paste the files into the c:\Program Files\Novell\Teaming\apache-tomcat\bin directory.
-
(Conditional) If Vibe is running on a supported 64-bit Windows operating system and you have a 64-bit JDK, complete the following steps:
-
Change to the c:\Program Files\Novell\Teaming\apache-tomcat\bin\windows\x64 directory.
-
Copy any 64-bit .exe files and paste them into the c:\Program Files\Novell\Teaming\apache-tomcat\bin directory, overwriting any existing files.
-
-
Use the following command to configure Vibe as a Windows service:
service.bat install Teaming
This creates a service named Apache Tomcat Teaming.
Starting Vibe as a Windows Service
-
On the Windows desktop, click .
-
Right-click , then click .
Configuring the Vibe Service to Start Automatically on Reboot
When you run Vibe as a Windows service, you can configure Vibe to start automatically each time you reboot the Windows server.
-
On the Windows desktop, click .
-
Right-click , then click .
-
In the drop-down list, select , then click .
Restarting the Vibe Service
You need to restart Vibe whenever you use the Vibe installation program to make configuration changes, as described in Section 10.0, Performing an Advanced Vibe Installation.
-
On the Windows desktop, click .
-
Right-click , then click .
-
Close the Services window.
Stopping the Vibe Service
-
On the Windows desktop, click .
-
Right-click , then click .
-
Close the Services window.
4.2.4 Running Vibe as a Windows Application
Starting Vibe as an Application
The Vibe installation program created a startup.bat file for starting Vibe.
-
In a Command Prompt window, change to the following directory:
c:\Program Files\Novell\Teaming\apache-tomcat\bin
-
Run the startup.bat file to start Vibe as an application.
Stopping Vibe as an Application
-
In a Command Prompt window, change to the following directory:
c:\Program Files\Novell\Teaming\apache-tomcat\bin
-
Run the shutdown.bat file to stop the Vibe application.
4.2.5 Uninstalling Vibe
If you move the Vibe site to a different server, you can delete the Vibe files from the original server to reclaim disk space. The default Vibe file locations are:
|
Vibe Software |
c:\Program Files\Novell\Teaming |
|
Vibe File Repository and Lucene Index |
c:\Novell\Teaming |
|
MS SQL Database |
c:\Program Files\Microsoft SQL Server\MSSQL\Data |
For a complete list of your Vibe files, check the installer.xml file in the directory where you originally ran the Vibe Installation program.