3.2 Configuring ZENworks Appliance
After importing the ZENworks Appliance image to your virtual machine, review the following sections to configure ZENworks Appliance:
After ZENworks Appliance is configured, you can log in to ZENworks Appliance and use the ZENworks Control Center management console to access the ZENworks 10 Asset Management capabilities. For more information, see Management Capabilities in the ZENworks 10 Asset Management Getting Started Guide.
3.2.1 Configuring the Preinstalled SLES 10 SP2
-
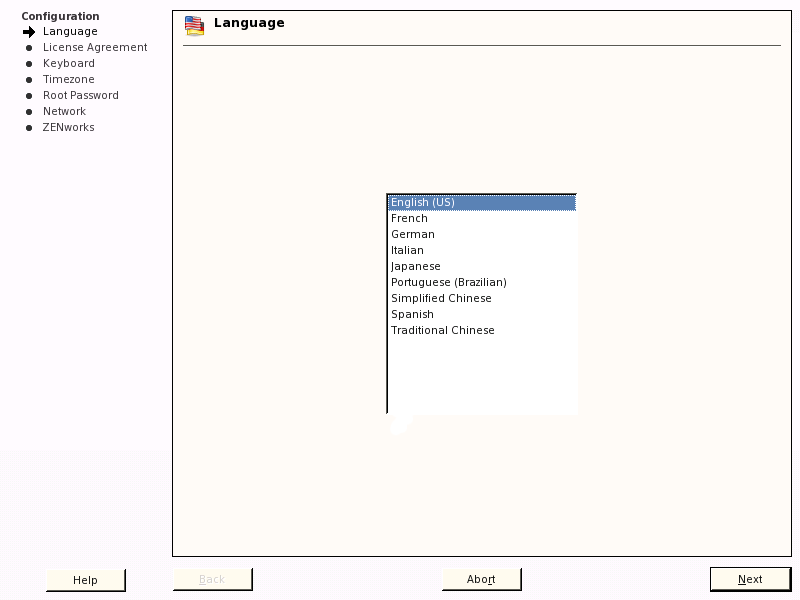
On the Language page of the Configuration Wizard, select the language in which you want the wizard to continue, then click .

-
On the License Agreement page, accept the , then click .
-
On the Keyboard page, configure the keyboard layout, then click .
-
On the Timezone page, configure the time zone and clock settings to be used in your system, then click .
-
On the Root Password page, specify the root password.
-
On the Network Configuration page, select > > , then configure the following network information for ZENworks Appliance:
-
Host name and server name
The server must have a static IP address or a permanently leased DHCP address.
-
IP address for your machine (for a static IP address)
-
Subnet mask (for a static IP address)
-
Default gateway (for a static IP address)
-
-
Click .
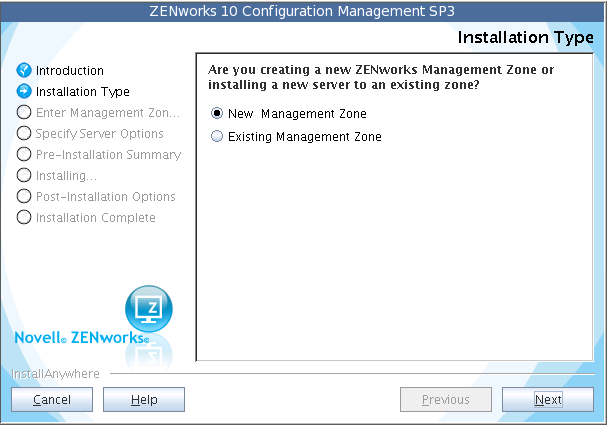
The ZENworks 10 Configuration Management Wizard is displayed. This wizard might take a few seconds to launch.
-
Continue with Section 3.2.2, Configuring the Preinstalled ZENworks Server.
3.2.2 Configuring the Preinstalled ZENworks Server
-
(Conditional) If you have configured ZENworks Appliance with a static IP address, ping that IP address from another machine to test the connectivity.
-
Complete the ZENworks 10 Configuration Management Wizard by using information from Table 3-1, Configuration Information to fill in the fields:

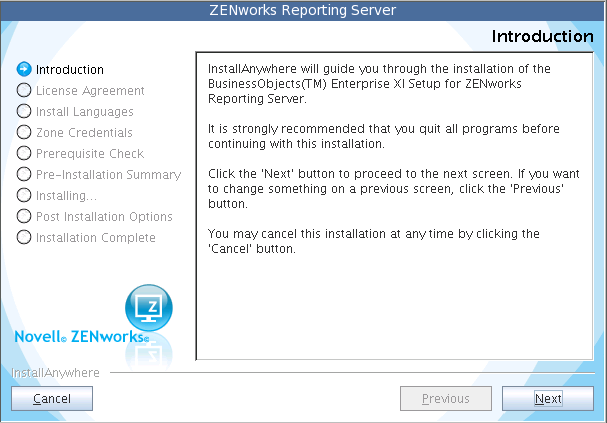
When the configuration finishes, the ZENworks Reporting Server Wizard is automatically displayed. This wizard might take a few seconds to launch.

-
Do one of the following:
-
If you want to create ZENworks reports, and if you have a database other than the external Oracle database installed, click to configure the ZENworks Reporting Server.
For more information on how to configure the ZENworks Reporting Server, see Configuring the ZENworks Reporting Server.
-
If you want to create ZENworks reports, and if you have an external Oracle database installed, continue with Step 4.
-
If you do not want to create ZENworks reports, click .
HINT:You can configure the ZENworks Reporting Server at a later time. For more information on how to configure the ZENworks Reporting Server at a later time, see Manually Launching the ZENworks Reporting Server Wizard.
-
-
(Conditional) If you want to create ZENworks reports, and if you have an external Oracle database installed, do the following:
-
Click to cancel the ZENworks Reporting Server configuration.
You are prompted to provide the credentials to log in to ZENworks Appliance.
-
Log in to ZENworks Appliance as a root user.
-
Use the Net Configuration Assistant to install and configure the Oracle client to the same Oracle database used by ZENworks 10 Configuration Management.
For more information on how to install and configure the Oracle client, see
Installing and Configuring the Oracle Client
in the ZENworks 10 Asset Management Reporting Server Installation Guide. -
Manually launch the ZENworks Reporting Server Wizard to configure the ZENworks Reporting Server.
For more information on how to manually launch the ZENworks Reporting Server Wizard and configure the ZENworks Reporting Server, see Manually Launching the ZENworks Reporting Server Wizard.
-
NOTE:
-
During Appliance migration, if there is more data to be migrated than the appliance’s capacity, you have to cancel the ZENworks Configuration wizard on Application Migration and can launch it manually by executing the /usr/share/zamInstaller/setup.sh -M command on the terminal.
-
If you have cancelled the ZENworks Configuration wizard on Appliance, you can launch it manually by executing the /usr/share/zamInstaller/setup.sh -C command on the terminal.
3.2.3 Configuration Information for ZENworks 10 Configuration Management on ZENworks Appliance
The information you need is listed in the order of the configuration flow of the ZENworks 10 Configuration Management Wizard.
Table 3-1 Configuration Information
|
Wizard Page |
Details |
|---|---|
|
Management Zone |
New Zone: If you are deploying to the first server in the zone, you need to know what name you want for the Management Zone and what you want to use for the zone’s password, which is used for logging in to ZENworks Control Center. The zone name has a 20-character limit and should be a unique name. We recommend the zone name to contain minimum six characters. The zone name can contain only the following special characters: - (dash) _ (underscore) . (period). The zone administrator password must contain at least six characters and is limited to a maximum of 255 characters. The password can contain only one instance of the $ character. By default, the login username is Administrator. After completing the deployment, you can use ZENworks Control Center to add other administrator names that can be used to log in to the Management Zone. During the deployment of the second (or subsequent) Primary Server, the server by default uses the ports used by the first Primary Server. If the ports are in use on the second Primary Server, you are asked to specify another port. which port you specify because you need to use it in the URL for accessing ZENworks Control Center. Existing Zone: If you are deploying to an existing Management Zone, you need to know the following information:
|
|
Database Information |
For ZENworks 10 Asset Management, a database must be installed. The database options are displayed only during the first server installation in the zone. However, you can run the installation program specifically to install or repair a database (see You have the following database options:
IMPORTANT:For external databases, the server hosting the database must have time synchronization with each of the Primary Servers in the Management Zone. |
|
Database information |
For the external database options (, , and ), you need to know the information listed below. Defaults are provided for some of this information, which can be changed as necessary.
|
|
Database access |
For the external database options (, and ), you need to know the information listed below. Defaults are provided for some of this information, which can be changed as necessary.
|
|
SSL configuration (shown only for the first server installed in the Management Zone) |
In order to enable SSL communications, an SSL certificate must be added to the ZENworks server. Select whether to use an internal or external certificate authority (CA). For subsequent deployments of Primary Servers to the Management Zone, the CA established by the first server’s deployment is used for the zone. The buttons restore the paths to those that were displayed when you first accessed this page. |
|
Signed SSL certificate and private key |
To enter a trusted CA-signed certificate and private key, click to browse for and select the certificate and key files, or specify paths to the signed certificate to be used for this server (), and the private key associated with the signed certificate (). For subsequent deployments of Primary Servers to the zone, the CA established for the zone by the first server’s deployment is used. For information on creating external certificates to select, see For information on creating external certificates for deploying to a server using a silent installation, see |
|
Root certificate (optional) |
To enter a trusted CA root certificate, click to browse for and select it, or specify the path to the CA’s public X.509 certificate (). |
|
License key for ZENworks Configuration Management, ZENworks Asset Management, and ZENworks Asset Inventory |
By default, the check box is selected for all the ZENworks 10 products listed on the page. The products include:
If you choose to retain the default settings, all the products are installed with a 60-day trial license. Additionally, you can choose to do any of the following:
|
|
License key for ZENworks Patch Management |
The ZENworks 10 Patch Management SP3 software is automatically installed. However, the product is activated for patch downloads only if the following conditions are met:
You can activate the subscription service later through ZENworks Control Center. For more information, see the ZENworks 10 Asset Management System Administration Reference. If you specify the license key, you must additionally specify the company name and the e-mail address. If you do not want to install ZENworks 10 Patch Management SP3, manually deselect the check box and do not specify the license key for the product. The product is automatically installed; however, it is deactivated. |
|
Pre-installation summary |
To make changes to any information entered up to this point, click . After you click , the configuration begins. |
|
ZENworks System Status Utility |
Allows you to launch a ZENworks services heartbeat check prior to closing the configuration program. Results are posted in the installation log. |
3.2.4 Configuring the Preinstalled ZENworks Reporting Server
Configuring the ZENworks Reporting Server enables you to create ZENworks reports that contain details from a large volume of inventory, packaging, and other device or bundle information. You can create new reports, edit existing reports, delete reports, or schedule reports. You can create folders to organize and store reports based on your own criteria. For more information on ZENworks reports, see ZENworks 10 Asset Management System Reporting Reference.
You can configure only one ZENworks Reporting Server in a Management Zone. If a Management Zone already has a Primary Server that has the ZENworks Reporting Server, you can use that server for ZENworks Appliance or you can configure the ZENworks Reporting Server on ZENworks Appliance.
To configure the ZENworks Reporting Server on ZENworks Appliance, review the following sections:
Manually Launching the ZENworks Reporting Server Wizard
If you canceled the ZENworks Reporting Server configuration while configuring ZENworks Appliance (in Step 3), you must manually launch the ZENworks Reporting Server Wizard.
-
Make sure that port 5005 is free by running the following command:
netstat -ant | grep LISTEN | grep 5005
If port 5005 is not included in the list of busy ports, continue with Step 2.
If port 5005 is included in the list of busy ports, see the troubleshooting scenario The ZENworks Reporting Server Wizard fails to launch manually on a ZENworks Appliance that has ZENworks 10 Asset Management SP3 configured to an external Oracle database.
-
On ZENworks Appliance, open a terminal and run the following commands in the order listed:
. /etc/profile
su --shell=/bin/bash -c /var/adm/zenworks/zrs-config.sh zenworks
The ZENworks Reporting Server services begin.
-
Run the following command:
/usr/share/ZRSConfiguration/setup.sh --zrs-config-only
The ZENworks Reporting Server Wizard is launched.
For more information on how to configure the ZENworks Reporting Server, see Configuring the ZENworks Reporting Server in the ZENworks 10 Asset Management Reporting Server Installation Guide.
Configuring the ZENworks Reporting Server
-
In the ZENworks Reporting Server Wizard, read the introductory text, then click .

-
(Conditional) If the ZENworks Reporting Server has already been configured in your zone, you are prompted to decommission the existing ZENworks Reporting Server.
To use the existing ZENworks Reporting Server, click to cancel the ZENworks Reporting Server configuration.
To configure the ZENworks Reporting Server on ZENworks Appliance, click .
The existing ZENworks Reporting Server is decommissioned and the ZENworks Reporting Server configuration begins on ZENworks Appliance. The ZENworks Reporting Server configuration requires no user interaction.
For more information on how to decommission the existing ZENworks Reporting Server, see
Decommissioning an Existing Instance of ZENworks Reporting Server
in the ZENworks 10 Asset Management Reporting Server Installation Guide. -
After the configuration is complete, click .