
  |
This section contains the following information:
When you installed ZfD 3.2 Preboot Services component on a Windows server, the PXE-on-Disk creation program was also installed and registered. Use the following procedure to create a PXE-on-Disk diskette from your Windows NT or Windows 2000 server.
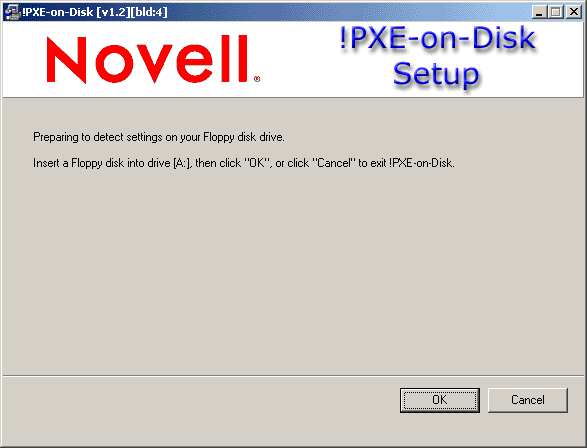
From the Windows desktop, click Start > Programs > ZEN Preboot Services > PXE-on-Disk to display the PXE-on-Disk Setup window.

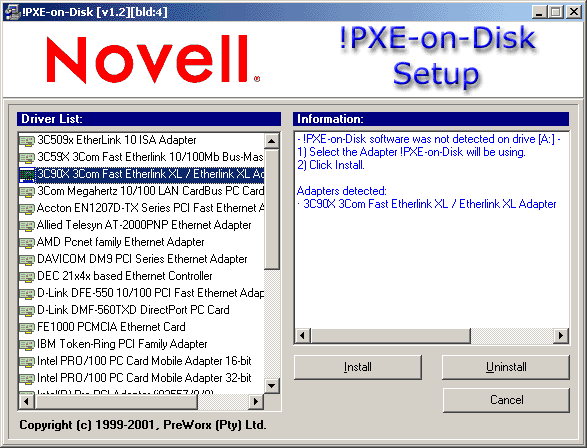
Click OK to display the Driver and Information lists for PXE-compatible network adapters.

Note that the network adapter (or adapters) installed on your server is detected and the specifications are listed in the Information list box of the Setup window. Some driver types may be duplicated. For example, Accton En1207d is the same as SMC 1211TX.
From the Driver List, select the name of the network adapter driver (or its nearest equivalent) that is installed on the client workstation you want to connect to the PXE server.
Click Install to start creating a PXE-on-Disk diskette.
When the installation is complete, the diskette contains appropriate PXE-on-Disk information for the intended client workstation.
Click Close to complete the creation of the PXE-on-Disk diskette.
For more information about setting up PXE-on-Disk in a Windows 2000 environment, see Automatic Workstation in the ZENworks for Desktops 3.2 Lab Guide at the ZfD 3.2 documentation Web site.
The ZfD 3.2 installation program does not copy PXE-on-Disk files to a NetWare server. Use the following the following procedure to create a PXE-on-Disk diskette.
Copy the PXE-on-Disk folder from the Program CD to the hard disk of a Windows workstation.
Because the PXE-on-Disk program depends on the definition of a specific NIC driver, it will be to your advantage to create the diskette on a workstation with the same network adapter driver as the workstation(s) where you plan to use PXE-on-Disk.
From the new PXE-on-Disk folder of the Windows workstation, run PXEBUILDER.EXE to display the PXE-on-Disk Setup window.

Click OK to display the Driver and Information lists for PXE-compatible network adapters.

Note that the network adapter of machine you are using is detected and its specifications listed in the Information list box of the Setup window.
From the Driver List, select the name of the network adapter driver (or its nearest equivalent) that is installed on the client workstation you want to connect to the PXE server.
Note that some driver types may be duplicated. For example, Accton En1207d is the same as SMC 1211TX.
Click Install to start creating a PXE-on-Disk diskette.
When the installation is complete, the diskette contains appropriate PXE-on-Disk information for the intended client workstation.
Click Close to complete the creation of the PXE-on-Disk diskette.
  |