3.2 Configuring Intel AMT Devices in Enterprise Mode
To prepare to manage power for Enterprise Mode AMT devices, you must do the following tasks:
-
Section 3.2.1, Configuring the ZENworks Primary Server for Intel AMT Management
-
Section 3.2.2, Configuring the Intel AMT Device with the ZENworks CA Hash
-
Section 3.2.3, Adding the Intel ME Credential of the AMT Device to the Credential Vault
-
Section 3.2.7, Changing the Zone Certificate of the Primary Server
3.2.1 Configuring the ZENworks Primary Server for Intel AMT Management
In order to provision the Intel AMT enabled devices for Enterprise Mode, the AMT technology mandates that the Provisioning Server must have a server certificate with a unique Intel AMT OID and an OU that traces to a certificate authority (CA) whose root certificate hash is stored in the Intel AMT enabled device.
-
To generate the Intel AMT Management Certificate for a ZENworks Server that uses an internal certificate authority, run the zman (iamt-create-mgmtcert | icmc) command at the command prompt.
or
To generate the Intel AMT Management Certificate for a ZENworks Server that uses an external certificate authority, perform the following steps:
-
Create the certificate signing request (CSR) by running the following command:
zman (iamt-create-csr | icc) [isCA] [Type] (-c|--country=country) (-s|--state=state) (-o|--organization=organization) [-u|--orgunit=Organization Unit] [-n|--commonname=Common Name] (-d|--destination-folder=Destination Folder)
Use one of the following values:
-
isCA= true for Intel AMT Management if it can mint certificates for Intel AMT devices.
-
isCA= false for Intel AMT Management if it cannot mint certificates for Intel AMT devices.
-
-
Use the generated CSR to get the Intel AMT Management Certificate signed by the external CA.
-
Ensure that the following properties are set for the certificate:
-
OID = 2.16.840.1.113741.1.2.1
-
OU = Intel Client Setup Certificate
-
-
Import the Intel AMT Management Certificate into the ZENworks certificate trust store by running the following command:
zman (iamt-create-mgmtcert|icmc) [-p|--certpath=Intel AMT Provisioning/Management Certificate (DER format) Path]
-
-
To obtain the ZENworks CA hash, run the zman [iamt-root-certificate-hash | irch] command at ZENworks Server command prompt.
The ZENworks CA hash is displayed in two formats, MD5 and SHA1. However, you should only use the SHA1 thumbprint hash format. The SHA1 thumbprint hash is displayed as a string of 40 alphanumeric characters with a colon after every two digits. For example, 1F:0E:1C:88:A0:88:B5:6A:E8:82:6D:28:01:D4:2F:B4:6F:8D:16:77
-
Continue with Configuring the Intel AMT Device with the ZENworks CA Hash.
3.2.2 Configuring the Intel AMT Device with the ZENworks CA Hash
You can choose to configure the Intel AMT device with the ZENworks CA hash in one of the following ways:
Specifying the ZENworks CA Hash in the MEBx Menu of the Intel AMT Device
-
Power on the device. When you are prompted, press the Ctrl and P keys to display the Intel Management Engine BIOS Extension menu (MEBx).
To get detailed information on configuring the MEBx menu:
-
Dell devices: See
Intel Management Engine BIOS Extension (MEBx).
-
Other devices: Refer to the product documentation available at the vendor site.
-
-
In the field, specify the Intel AMT password.
-
(Optional) To change the password, select the field and specify the new password in the field.
-
Select and specify the name for the Intel AMT device. The host name of the AMT device should resolve through DNS.
-
Select , enable DHCP, then specify the domain name.
-
Select field and press Enter.
-
Ensure that is selected and press Enter.
-
Select to display the Intel Setup and Configuration Page.
-
Select and specify the IP address and port number (9971) of the Provisioning ZENworks Server.
-
Select to display the Intel Remote Configuration page. Ensure that is enabled.
-
Select and press the Insert key to add a new hash. Specify the hash name.
-
Specify the hash certificate that you obtained in Section 3.2.1, Configuring the ZENworks Primary Server for Intel AMT Management. You must specify the characters in the same sequence as the generated hash, but in groups of four alphanumeric characters separated by a hyphen.For example, if the generated certificated is 1F:0E:1C:88:A0:88:B5:6A:E8:82:6D:28:01:D4:2F:B4:6F:8D:16:77, then you must specify the hash certificate as 1F0E-1C88-A088-B56A-E882-6D28-01D4-2FB4-6F8D-1677.
-
Select and specify the fully qualified domain name of the Provisioning ZENworks Server.
-
Select and specify the DNS suffix.
-
Select to return to the Intel Setup and Configuration page.
-
Select to return to the Intel AMT Configuration page.
-
Select to return to the Main Menu.
-
In the Main Menu, select .
-
When prompted, press Y to save the Intel AMT Configuration.
-
Continue with Section 3.2.3, Adding the Intel ME Credential of the AMT Device to the Credential Vault.
Specifying the ZENworks CA Hash by Using a Bootable USB Device
-
(Conditional) If the device is not bootable, run the following command to make the USB device bootable: format <drive_name> /FS:FAT /V:AMT_USB
-
Locate the USBFile.exe utility in the following location: \Windows\Intel_Manageability_Configuration\Configuration\ConfigurationServer\Bin\ConfigScripts.
If the USBFile.exe is not available, download the file from the latest
Intel AMT Software Development Kit
. -
Run the Intel Utility (USBFile.exe) to generate a USB file named setup.bin.
USBFile.exe -create setup.bin <current_MEBx_Password> <new_MEBx_password> -dns <domain_name> -fqdn <prov_server_fqdn> -ztc 1 -hash <zcm_CA_certtificate_path> <friendly_name>
-
Copy the generated setup.bin file to a USB device.
-
Boot the Intel AMT enabled device with the USB device.
-
Continue with Adding the Intel ME Credential of the AMT Device to the Credential Vault.
3.2.3 Adding the Intel ME Credential of the AMT Device to the Credential Vault
You can check the online Help for more information on how to add a credential to the Credential Vault.
-
In ZENworks Control Center, click .
-
Click .
-
Click .
-
Specify the credential name.
-
Specify the login name as admin.
-
Specify the password that you set on the device in Step 2.
-
Re-enter the password.
-
Continue with Provisioning the AMT Devices.
3.2.4 Provisioning the AMT Devices
You must provision a device to establish a mutual trust between the device and the Management Console.
Provisioning AMT Devices with the Device Certificate and a Private Key
-
In the ZENworks Control Center, click .
-
Click .
-
Click the link to view all the discovered Intel AMT devices.
The validity of the discovered Intel AMT devices is twelve hours, after which you need to rediscover the device.
-
Select the Intel AMT devices that you want to provision, then click .

-
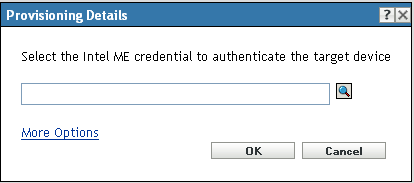
In the Provisioning Details dialog box, browse for and select the appropriate Intel ME credential of the target device.
-
Click .
-
Deploy the ZENworks Adaptive Agent to the devices so that you can manage them.
For more information on how to deploy the ZENworks Adaptive Agent, see
ZENworks Adaptive Agent Deployment
in the ZENworks 11 SP2 Discovery, Deployment, and Retirement Reference. -
Continue with Section 3.2.5, Reconciling the AMT Devices.
Provisioning AMT Devices with an External Certificate
-
In the ZENworks Control Center, click .
-
Click.
-
Click the link to view all the discovered Intel AMT devices.
The validity of the discovered Intel AMT devices is one day, after which you need to rediscover the device.
-
Select the Intel AMT device that you want to provision, then click .
-
Provide the provisioning details:
-
Browse for and select the appropriate Intel ME credential of the target device.
-
Click .
-
Select the check box.
-
Browse for and select the private key file for the targeted Intel AMT device, then click .
-
Browse for and select the certificate file for the targeted Intel AMT device, then click .
-
-
Click .
-
Deploy the ZENworks Adaptive Agent to the devices so that you can manage them.
For more information on how to deploy the ZENworks Adaptive Agent, see
ZENworks Adaptive Agent Deployment
in the ZENworks 11 SP2 Discovery, Deployment, and Retirement Reference. -
Continue with Reconciling the AMT Devices.
3.2.5 Reconciling the AMT Devices
The devices must be inventoried for the reconciliation to take place. By default, the AMT devices are reconciled every 24 hours. However, you can choose to configure a schedule for reconciling the devices:
-
In ZENworks Control Center, click .
-
In the Management Zone Settings panel, click to display the Out-of-band Inventory Reconciliation page.
-
(Conditional) To immediately start the reconciliation process, click .
-
In the field, select one of the following schedule types:
-
No Schedule
-
Date Specific
-
Recurring
For more information on the various schedule types, click on the page.
-
-
Click , then click .
3.2.6 Unprovisioning the AMT Devices
You can unprovision a provisioned Intel AMT device.
-
In ZENworks Control Center, click .
-
Click.
-
Click the link to view all the discovered/provisioned Intel AMT devices.
-
Select the Intel AMT devices that you want to unprovision, then click .

-
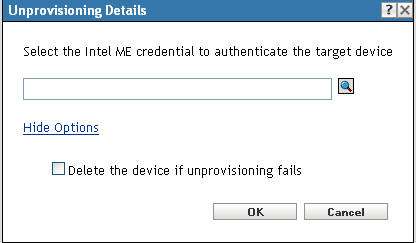
Provide the details:
-
Browse for and select the appropriate Intel ME credential of the target device.
-
Select the check box, if unprovisioning fails and you want to delete the Intel AMT device.
-
-
Click .
3.2.7 Changing the Zone Certificate of the Primary Server
Before you change the zone certificate of the Primary Server, unprovision all the provisioned Intel AMT devices, then run the novell-zenworks-configure -c SSL -Z command to change the zone certificate. After changing the zone certificate, provision the Intel AMT devices.
-
Clean the Intel AMT Management certificates by running the following command:
zman (iamt-delete-mgmtcert | idmc)
-
Restart the Novell ZENworks Server and Novell ZENworks Loader services by running the following commands:
/etc/init.d/novell-zenserver start
/etc/init.d/novell-zenloader start
-
Create the Intel AMT Management certificate by running the following command:
zman (iamt-create-mgmtcert | icmc)
-
Rediscover all the AMT devices.
For more information on how to discover a device, see
Device Discovery
in the ZENworks 11 SP2 Discovery, Deployment, and Retirement Reference. -
Provision the Intel AMT devices.
For more information on how to provision an Intel AMT device, see Provisioning the AMT Devices.
For more information on how to change the zone certificate, see Changing the Zone Certificates from Internal to External in the ZENworks 11 SP2 System Administration Reference.