17.7 Editing Policies
You can edit an existing policy to change its description, add or remove assignments, add or remove the policy from existing policy groups, change configuration settings, and more.
Following sections describes how you can edit different types of policies:
17.7.1 Editing Epiphany, Evolution, Firefox, and NLD Policies
You can edit, include, or remove lockdown settings, configuration settings, and system requirements of the application policies. Epiphany, Evolution, Firefox, Novell Linux Desktop, and SUSE Linux Enterprise Desktop policies are the application policies.
-
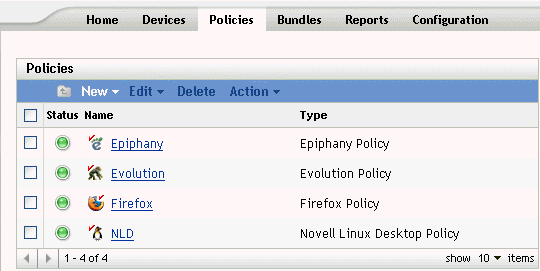
In the ZENworks Control Center, click the tab.
-
Click the policy's name to display the Summary page, then make the desired configuration changes.
If you do not want to edit any item on the Summary page, skip to Step 3.
Use the Summary page to view detailed information about the selected policy. This page provides general information about the policy, lists the individual devices that are assigned to the policy, displays an event log, shows upcoming events, and lists the groups that the policy belongs to.
You can also use this page to edit the policy's description, add or remove assignments for the policy, and change other configuration settings, as described below.
-
Review the information in the General section, then make the desired configuration changes (you can edit only the Revision and Description options in this section).
Policy type: Displays the policy type (Novell Linux Desktop Policy, Firefox Policy, and so forth).
Revision: Displays the policy's revision number. To change the revision number, click Increment Revision.
Number of errors not acknowledged: Displays the number of errors not acknowledged.
Number of warnings not acknowledged: A warning is anything that does not cause the application of the policy to fail, but indicates minor problems. The number displayed indicates the number of unacknowledged warnings, which display in the Event Log section below.
GUID: Lists the selected object's GUID (global unique identifier), a randomly generated string that provides a unique identifier for the policy. You cannot edit the object’s GUID.
Description: Displays the selected object's description, if one was provided when the policy was created. The description provides a short description of the policy's purpose.
Click to change the description, if necessary.
-
Review the information in the section, then make the desired configuration changes.
The section lists the devices, device groups, and device folders to which the selected policy is assigned. You can also view the folder to which the device belongs and the schedule. You can click the device object name to view information about that device object.
You can also use the following options:
Advanced: Click to display the Edit Assignments page to display a list of the devices that are assigned to the selected policy, the folder that contains each device, and each device's schedule. You can use the Edit Assignments page to edit certain settings, such as the schedule.
Add: Click to launch the Assign Policy Wizard to select the devices to be assigned to the selected policy. For more information, see Section 17.4, Assigning Policies.
Remove: Select the device by selecting the check box next to the appropriate device name, then click to remove the device's assignment from this policy.
-
Review the information in the section, then make the desired changes.
The section lists all unacknowledged errors and warnings.
The column displays an icon indicating each item's status. Position the mouse pointer over each icon to display a short message describing the status of the item.
To acknowledge an error or warning, click its name in the column, then click in the Message Detail Information dialog box that displays. You can also click , select the check box next to the appropriate event, then click (a check mark displays on the right side of the column to indicate that the item has been acknowledged).
-
Review the information in the section.
The section lists events scheduled for the selected policy. You can click the calendar icon to display a calendar to view events for the desired date. You can also use the arrows to view events for the previous or next day, week, or month.
-
Review the information in the section, then make the desired configuration changes.
The section lists the groups that contain the selected policy.
You can also use the following options:
Advanced: Click to display the Edit Groups page to display a list of the groups that contain the selected policy. You can click to open the Select Groups dialog box to add the selected policy to existing groups. You can also remove a group by selecting the check box next to the Name column, then clicking to remove.
Add: Click to open the Select Groups dialog box, then click the blue arrow in the column to select the desired group and display its name in the list box.
Remove: Select the check box next to the appropriate group name, then click to remove the selected policy from the group.
-
-
Click the tab, then make the desired configuration changes. For more information about the available options, see the section about the appropriate policy in Section 16.0, Creating Policies.
-
To edit the system requirements of a policy, see Section 17.8, Editing System Requirements.
-
Click to save any changes you have made.
-
-
After a policy is modified, the field of the policy, which is available under the section of the Summary page, must be incremented for the updated policy to be applied to associated devices. If the policy revision is not incremented, the changes made to the policy are not applied on the device.
17.7.2 Editing Generic GNOME Policies
-
In the ZENworks Control Center, click the tab.
-
Click the policy's name to display the Summary page, then make the desired configuration changes.
If you do not want to edit any item on the Summary page, skip to Step 3.
Use the Summary page to view detailed information about the selected policy. This page provides general information about the policy, lists the individual devices that are assigned to the policy, displays an event log, shows upcoming events, and lists the groups that the policy belongs to.
You can also use this page to edit the policy's description, add or remove assignments for the policy, and change other configuration settings, as described below.
-
Review the information in the section, then make the desired configuration changes (you can edit only the Revision and Description options in this section).
Policy type: Displays the policy type as Generic GNOME policy.
Revision: Displays the policy's revision number. To change the revision number, click .
Number of errors not acknowledged: Displays the number of errors that are not acknowledged.
Number of warnings not acknowledged: A warning is anything that does not cause the application of the policy to fail, but indicates minor problems. The number displayed indicates the number of unacknowledged warnings, which display in the Event Log section below.
GUID: Lists the selected object's GUID (global unique identifier), a randomly generated string that provides a unique identifier for the policy. You cannot edit the object's GUID.
Description: Displays the selected object's description, if one was provided when the policy was created. The description provides a short description of the policy's purpose. This description displays in the ZENworks Control Center interface.
Click to change the description, if necessary.
-
Review the information in the section, then make the desired configuration changes.
The section lists the devices, device groups and device folders to which the selected policy is assigned. You can also view the folder to which the device belongs and the schedule. You can click the device object name to view information about that device object.
You can also use the following options:
Advanced: Click to display the Edit Assignments page, which includes a list of the devices that are assigned to the selected policy, the folder that contains each device, and each device’s schedule. You can use the Edit Assignments page to edit certain settings, such as the schedule.
Add: Click to launch the Assign Policy Wizard to select the devices to be assigned to the selected policy. For more information, see Section 17.4, Assigning Policies.
Remove: Select the device by clicking the check box next to the appropriate device name, then click to remove the device's assignment from this policy.
-
Review the information in the section, then make the desired changes.
The section lists all unacknowledged errors and warnings.
The column displays an icon indicating each item's status. Position the mouse pointer over each icon to display a short message describing the status of the item.
To acknowledge an error or warning, click its name in the column, then click in the Message Detail Information dialog box that displays. You can also click , select the check box next to the appropriate event, then click (a check mark displays on the right side of the column to indicate that the item has been acknowledged).
-
Review the information in the section.
The section lists events scheduled for the selected policy. You can click the calendar icon to display a calendar to view events for the desired date. You can also use the arrows to view events for the previous or next day, week, or month.
-
Review the information in the Groups section, then make the desired configuration changes.
The section lists the groups that contain the selected policy.
You can also use the following options:
Advanced: Click to display the Edit Groups page, which includes a list of the groups that contain the selected policy. You can click to open the Select Groups dialog box to add the selected policy to existing groups. You can also remove a group by selecting the check box next to the Name column, then clicking to remove.
Add: Click to open the Select Groups dialog box, then click the blue arrow in the Select column to select the desired group and display its name in the Selected list box.
Remove: Select the check box next to the appropriate group name, then click to remove the selected policy from the group.
-
-
Click the tab, then make the desired configuration changes.
-
You can add a new key or directory by selecting the directory under which you want to add the new key or directory. You can use the menu to add a new key or directory.
If you want to configure more application keys using the same policy, the e option is more appropriate. You can configure the device, test it, and then import the settings to update the policy.
You can import from the same device that was used to create the original policy or you can import from any other device. When you import settings, you have additional options, such as the following:
Add the new imported settings that are not present in the policy: Adds only those GConf settings that are not part of existing policy settings. This is selected by default. Use this option to update the policy by including more directories and keys.
Override the settings that are already present in the policy with the imported settings: Overrides the existing settings with the imported policy settings. Use this option to use the newly imported settings instead of the ones configured in the policy.
Remove settings from the policy that are not present among the imported settings: Removes those policy settings that are not present in the imported settings. Use this feature to discard any additional settings that might be present in the original policy and that you do not want as a part of the updated policy.
-
Edit the minimum system requirements according to your preferences. To edit the system requirements of the Generic GNOME policy, see Section 17.8, Editing System Requirements.
-
Click to save any changes you have made.
-
-
After a policy is modified, the field of the policy (under the section of the Summary page), must be incremented for the updated policy to be applied to associated devices. If the policy revision is not incremented, the changes made to the policy are not applied on the device.
17.7.3 Editing Remote Execute Policies
-
In the ZENworks Control Center, click the tab.
-
Click the policy's name to display the Summary page, then make the desired configuration changes.
If you do not want to edit any item on the Summary page, skip to Step 3.
Use the Summary page to view detailed information about the selected policy. This page provides general information about the policy, lists the individual devices that are assigned to the policy, displays an event log, shows upcoming events, and lists the groups that the policy belongs to.
You can also use this page to edit the policy's description, add or remove assignments for the policy, and change other configuration settings, as described below.
-
Review the information in the section, then make the desired configuration changes (you can edit only the and options in this section).
Policy type: Displays the policy type as Remote Execute policy.
Revision: Displays the policy's revision number. To change the revision number, click .
Number of errors not acknowledged: Displays the number of unacknowledged errors.
Number of warnings not acknowledged: A warning is anything that does not cause the application of the policy to fail, but indicates minor problems. The number displayed indicates the number of unacknowledged warnings, which display in the Event Log section below.
GUID: Lists the selected object's GUID (global unique identifier), a randomly generated string that provides a unique identifier for the policy. You cannot edit the object's GUID.
Description: Displays the selected object's description, if one was provided when the policy was created. The description provides a short description of the policy's purpose. This description displays in the ZENworks Control Center interface.
Click to change the description, if necessary.
-
Review the information in the section, then make the desired configuration changes.
The section lists the devices, device groups and device folders to which the selected policy is assigned. You can also view the folder to which the device belongs and the schedule. You can click the device object name to view information about that device object.
You can also use the following options:
Advanced: Click to display the Edit Assignments page, which includes a list of the devices that are assigned to the selected policy, the folder that contains each device, and each device’s schedule. You can use the Edit Assignments page to edit certain settings, such as the schedule.
Add: Click to launch the Assign Policy Wizard to select the devices to be assigned to the selected policy. For more information, see Section 17.4, Assigning Policies.
Remove: Select the device by selecting the check box next to the appropriate device name, then click to remove the device’s assignment from this policy.
-
Review the information in the section, then make the desired changes.
The section lists all unacknowledged errors and warnings.
The column displays an icon indicating each item's status. Position the mouse pointer over each icon to display a short message describing the status of the item.
To acknowledge an error or warning, click its name in the column, then click in the Message Detail Information dialog box that displays. You can also click , select the check box next to the appropriate event, then click (a check mark displays on the right side of the column to indicate that the item has been acknowledged).
-
Review the information in the section.
The section lists events scheduled for the selected policy. You can click the calendar icon to display a calendar to view events for the desired date. You can also use the arrows to view events for the previous or next day, week, or month.
-
Review the information in the section, then make the desired configuration changes.
The section lists the groups that contain the selected policy.
You can also use the following options:
Advanced: Click to display the Edit Groups page, which includes a list of the groups that contain the selected policy. You can click to open the Select Groups dialog box to add the selected policy to existing groups. You can also remove a group by selecting the check box next to the Name column, then clicking .
Add: Click to open the Select Groups dialog box, then click the blue arrow in the column to select the desired group and display its name in the list box.
Remove: Select the check box next to the appropriate group name, then click to remove the selected policy from the group.
-
-
Click the tab, then make the desired configuration changes. For more information about the available options, see Section 16.6, Remote Execute Policy.
You can add system requirements to a policy. For more information, see Section 17.8, Editing System Requirements.
-
Click to save any changes you have made.
-
-
After a policy is modified the field of the policy (available under the section of the Summary page), must be incremented for the updated policy to be applied to associated devices. If the policy revision is not incremented, the changes made to the policy are not applied on the device.
17.7.4 Editing Text File Policies
-
In the ZENworks Control Center, click the tab.
-
Click the policy's name to display the Summary page, then make the desired configuration changes.
If you do not want to edit any item on the Summary page, skip to Step 3.
Use the Summary page to view detailed information about the selected policy. This page provides general information about the policy, lists the individual devices that are assigned to the policy, displays an event log, shows upcoming events, and lists the groups that the policy belongs to.
You can also use this page to edit the policy's description, add or remove assignments for the policy, and change other configuration settings, as described below.
-
Review the information in the section, then make the desired configuration changes (you can edit only the and options in this section).
Policy type: Displays the policy type as Text File policy.
Revision: Displays the policy's revision number. To change the revision number, click .
Number of errors not acknowledged: Displays the number of unacknowledged errors.
Number of warnings not acknowledged: A warning is anything that does not cause the application of the policy to fail, but indicates minor problems. The number displayed indicates the number of unacknowledged warnings, which display in the Event Log section below.
GUID: Lists the selected object's GUID (global unique identifier), a randomly generated string that provides a unique identifier for the policy. You cannot edit the object's GUID.
Description: Displays the selected object's description, if one was provided when the policy was created. The description provides a short description of the policy's purpose. This description displays in the ZENworks Control Center interface.
Click to change the description, if necessary.
-
Review the information in the section, then make the desired configuration changes.
The section lists the devices, device groups and device folders to which the selected policy is assigned. You can also view the folder to which the device belongs and the schedule. You can click the device object name to view information about that device object.
You can also use the following options:
Advanced: Click to display the Edit Assignments page, which includes a list of the devices that are assigned to the selected policy, the folder that contains each device, and each device's schedule. You can use the Edit Assignments page to edit certain settings, such as the schedule.
Add: Click to launch the Assign Policy Wizard to select the devices to be assigned to the selected policy. For more information, see Section 17.4, Assigning Policies.
Remove: Select the device by selecting the check box next to the appropriate device name, then click to remove the device’s assignment from this policy.
-
Review the information in the section, then make the desired changes.
The section lists all unacknowledged errors and warnings.
The column displays an icon indicating each item's status. Position the mouse pointer over each icon to display a short message describing the status of the item.
To acknowledge an error or warning, click its name in the column, then click in the Message Detail Information dialog box that displays. You can also click , select the check box next to the appropriate event, then click (a check mark displays on the right side of the Date column to indicate that the item has been acknowledged).
-
Review the information in the section.
The section lists events scheduled for the selected policy. You can click the calendar icon to display a calendar to view events for the desired date. You can also use the arrows to view events for the previous or next day, week, or month.
-
Review the information in the section, then make the desired configuration changes.
The section lists the groups that contain the selected policy.
You can also use the following options:
Advanced: Click to display the Edit Groups page to display a list of the groups that contain the selected policy. You can click to open the Select Groups dialog box to add the selected policy to existing groups. You can also remove a group by selecting the check box next to the column, then clicking to remove.
Add: Click to open the Select Groups dialog box, then click the blue arrow in the column to select the desired group and display its name in the list box.
Remove: Select the check box next to the appropriate group name, then click to remove the selected policy from the group.
-
-
Click the Details page. This page lets you perform the following actions:
You can add system requirements to a policy. For more information, see Section 17.8, Editing System Requirements.
-
Click to save any changes you have made.
-
-
After a policy is modified, the field of the policy (available under the section of the Summary page) must be incremented for the updated policy to be applied to associated devices. If the policy revision is not incremented, the changes made to the policy are not applied on the device.
17.7.5 Viewing Policy Enforcement Status
You can view the status of a policy by looking at the icon located next to each policy. The following table describes each color code and its description:
To view more information about a warning or error, click the policy to review the event log.