2.2 Using Folders to Organize Your Mailbox
Use folders to store and organize your items. For example, you can group all items related to a particular task or subject together.
2.2.1 Understanding Folders
The Folder List displays the folders that are relative to the folder you are currently in. The following are context-sensitive Folder Lists:
-
Calendar: Displays a list of all calendars. From here you can select to display the contents of a calendar in the main calendar. In addition, you can change the color of a calendar.
-
Contacts: Displays a list of all personal address books. By default, the main Contacts folder is the Frequent Contacts address book.
-
Documents: Displays a list of your document libraries. By default, the main Documents folder is your default document library.
Click the ![]() and
and ![]() arrows to expand and collapse folders.
arrows to expand and collapse folders.
For information about the individual folders you might have in your Folder List, see Section 1.6, Exploring the Folder List.
You can organize items in your folders by moving them. When you move an item into a folder, it is taken from one location and placed in another.
You can store unfinished items in a predefined folder called Work In Progress (see Saving an Unfinished Email). You can also make folders public by sharing them (see Using Shared Folders). You can create rules to automatically sort items to different folders (see Section 8.3, Creating a Rule).
2.2.2 Modifying the Folder List
-
On the main WebAccess page, click on the toolbar.

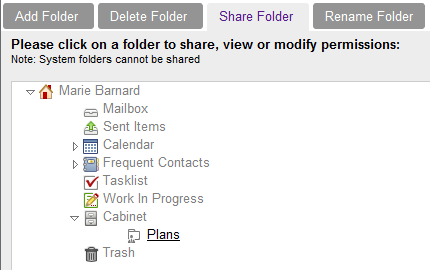
In the Manage Folders window, you can create, delete, and share folders.
2.2.3 Deleting Folders
-
Right-click the folder you want to delete, then click .
-
Click .
You cannot delete the Calendar, Mailbox, Sent Items, Tasklist, Contacts, Cabinet, Work In Progress, or Trash folders. You can delete the Junk Mail folder only if Junk Mail Handling has been disabled.
2.2.4 Creating a Personal Folder
-
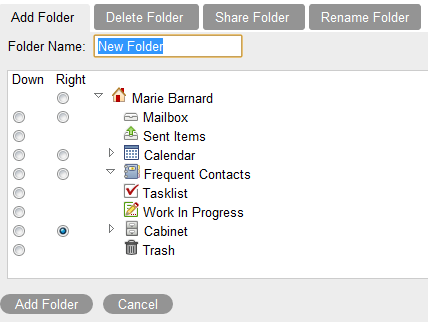
On the main WebAccess page, click on the toolbar.
-
Select the place in the Folder List where you want to add the folder. By default, a new folder is added as the first folder in the Cabinet.
For example, to add a folder at the same level as the Mailbox folder, click the button next to the Mailbox folder. To add a folder to the Mailbox folder, click the button next to the Mailbox folder.
-
Type a name for your new folder in the field.
-
Click .
2.2.5 Renaming a Folder
In some cases you might want to rename a folder to more accurately reflect the contents of a folder or to correct a spelling error. In WebAccess new folders can be created but names of existing folders cannot be changed. You can change folder names in the GroupWise Windows client.
For more information on managing folders, see Section 2.2.1, Understanding Folders.
2.2.6 Moving an Item to Another Folder
-
Locate the item in the Item List.
-
Double-click the item to open it, then click .
-
Click the folder where you want to move the item.
If you are moving the item to a folder in the Cabinet, you might need to click the
 icon next to the Cabinet to display the Cabinet folders.
2.2.7 Understanding Find Results Folders
A Find Results folder is a folder that displays the results of a query. When the folder is opened, GroupWise examines the search criteria defined for the folder, searches for everything specified, then displays everything it finds in the Item List. You can act on items in a Find Results folder the same way you act on items in any folder, such as opening, forwarding, printing, copying, moving, or deleting them, but the original item remains stored in the folder where the search found it. This means that if you move or delete an item from a Find Results folder, the item is deleted from the Item List, but not from the original location. The next time you open the Find Results folder, the search is performed again and the item is once again displayed.
Although you cannot create new Find Results folders in WebAccess, you can use folders you created in the GroupWise Windows client. However, to ensure that you are viewing the most recent information in the folder and not a cached copy, you should click in the toolbar before opening a Find Results folder.

