Setting Up a Basic GroupWise System
Follow the setup instructions for the platform where you are creating your basic GroupWise system:
- Setting Up a Basic GroupWise System on NetWare or Windows
- Setting Up a Basic GroupWise System on Linux
Setting Up a Basic GroupWise System on NetWare or Windows
You should have already reviewed Planning Your Basic GroupWise System and filled out the worksheet.
The following sections step you through the GroupWise Installation Advisor and GroupWise Setup Advisor. The Installation Advisor installs the GroupWise software. It then launches the Setup Advisor to create your domain and post office, set up the GroupWise agents, and set up the GroupWise Windows client (if desired) on your local machine.
- Starting the GroupWise Installation Advisor on Windows
- Installing the GroupWise Software
- Providing System Information
- Creating Your Basic GroupWise System
- Installing and Starting the GroupWise Agents on NetWare or Windows
- Setting Up and Running the GroupWise Windows Client on Your Local Machine
- Installing the GroupWise Administrator Snap-Ins to Additional Windows Locations
Starting the GroupWise Installation Advisor on Windows
To start the GroupWise Installation Advisor:
-
At a Windows 98/NT/2000 workstation that has the Novell ClientTM installed, log in as an Admin equivalent to the eDirectory tree in which you are installing GroupWise.
The GroupWise Setup Advisor, which is launched by the Installation Advisor, requires the Novell Client in order to create GroupWise objects in eDirectory. If necessary, you can download the Novell Client from the Novell Product Downloads site.
-
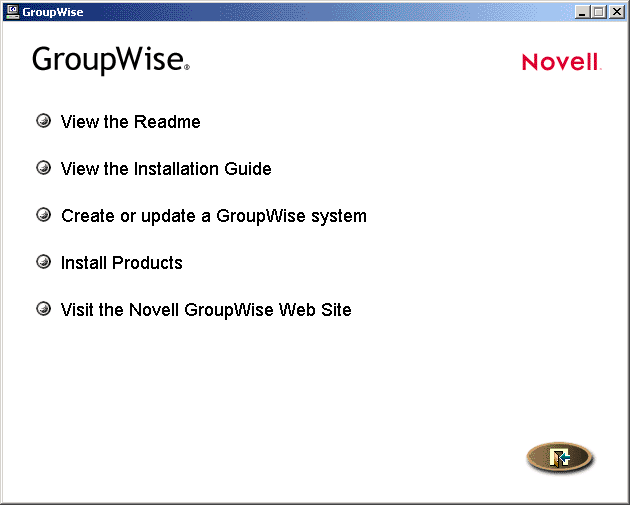
Run setup.exe at the root of the GroupWise 6.5 Administrator CD to display the GroupWise Installation main page.
-
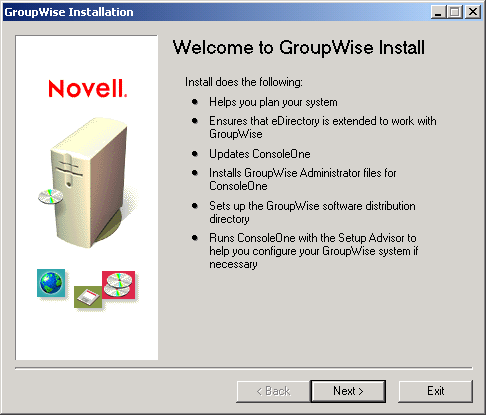
Click Create or Update a GroupWise System, then click Yes to accept the license agreement and display the Welcome to GroupWise Install page.
-
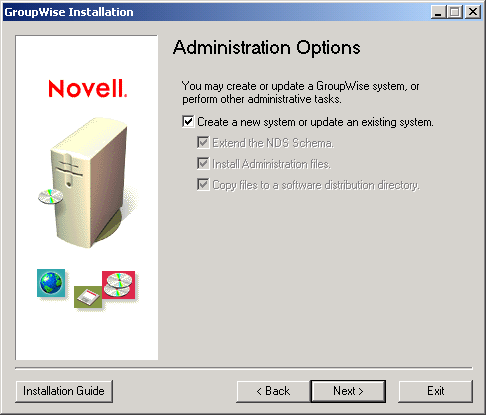
Click Next until you reach the Administration Options page.
-
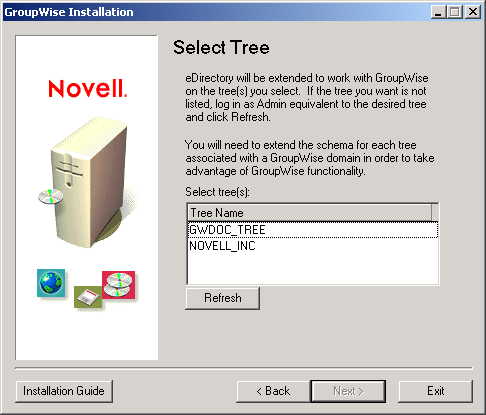
Make sure that Create a New System or Update an Existing System is selected, then click Next to display the Select Tree page.
-
Continue with Installing the GroupWise Software.
Installing the GroupWise Software
The Installation Advisor extends the eDirectory schema for the selected tree and then installs GroupWise software to the ConsoleOne location and software distribution directory.
To extend the schema and install the software:
-
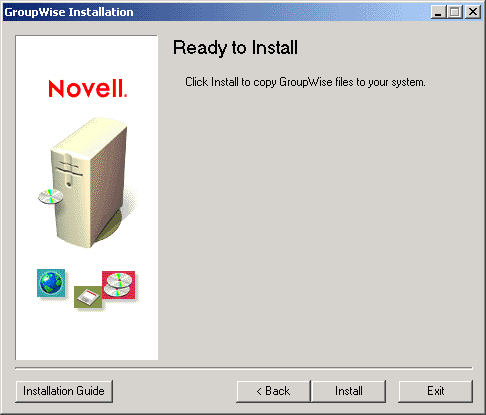
In the Select Tree page, select the tree whose schema you want to extend (worksheet item 1), click Next, then enter the information from your worksheet (item 2 through item 5) until you reach the Ready to Install page.
-
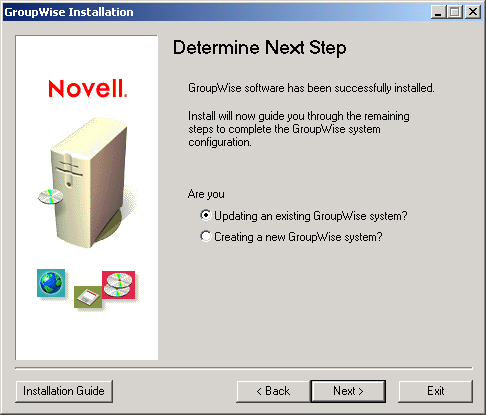
Click Install, then follow the prompts until you reach the Determine Next Step page.
-
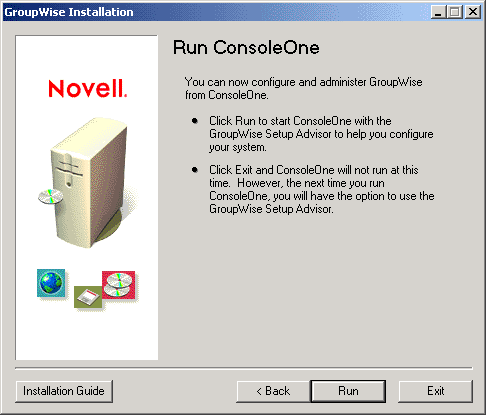
Click Creating a New GroupWise System, then click Next to display the Run ConsoleOne page.
-
Continue with Providing System Information.
Providing System Information
The Installation Advisor launches ConsoleOne with the GroupWise Setup Advisor active. Use your worksheet to provide the Setup Advisor with the information it needs to create your GroupWise system.
-
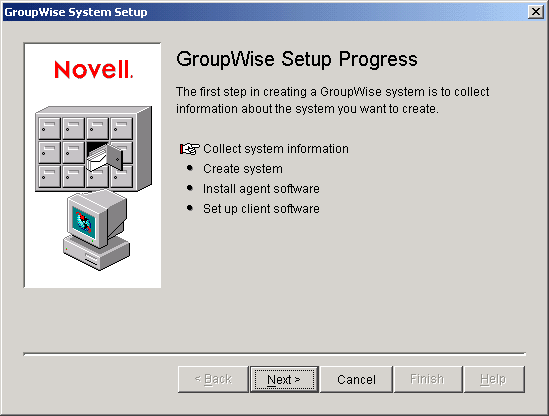
On the Run ConsoleOne page, click Run to start ConsoleOne and the GroupWise Setup Advisor. The GroupWise Setup Progress: Collect System Information page is displayed.
-
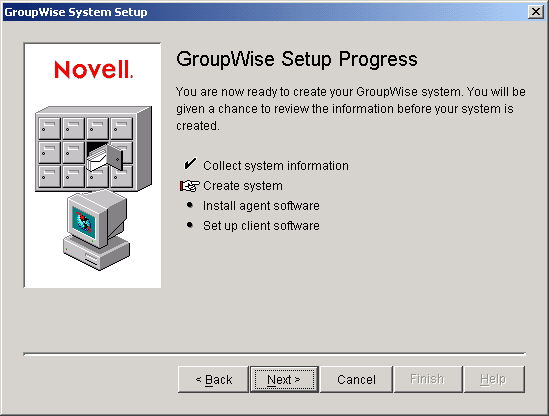
Click Next, then enter the information from your worksheet (item 6 through item 20) until you reach the GroupWise Setup Progress: Create System page.
-
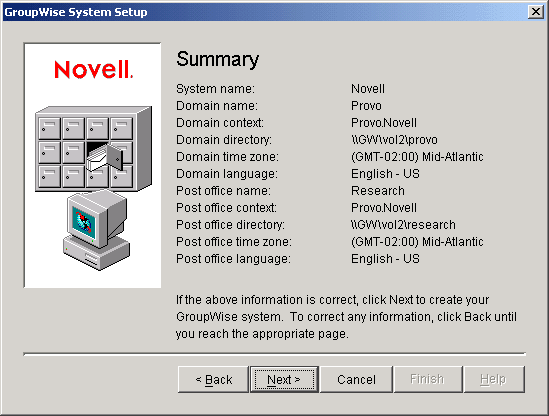
Click Next to display a summary of the information you entered.
-
Continue with the Creating Your Basic GroupWise System.
Creating Your Basic GroupWise System
After you have verified that the information you entered is correct, you are ready for the Setup Advisor to create your system.
-
On the Summary page, click Next.
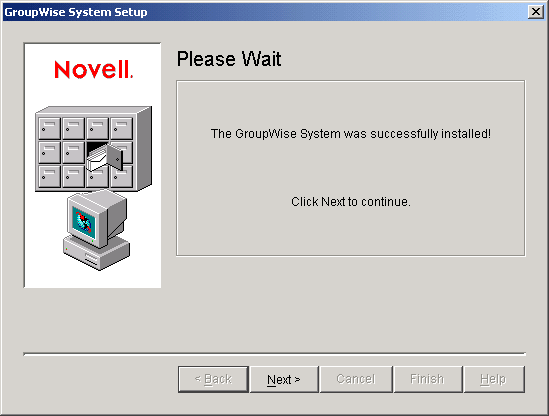
The Setup Advisor creates the GroupWise system using the information you provided, then displays the following page:
-
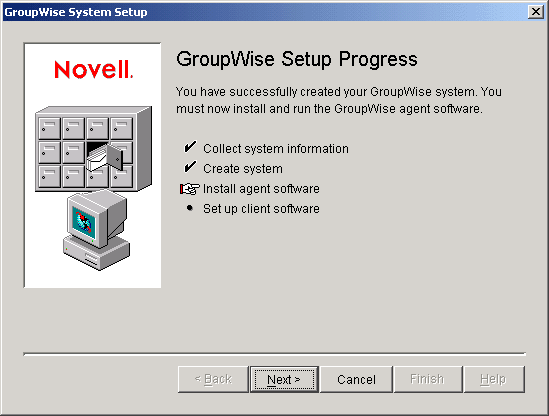
Click Next to display the GroupWise Setup Progress: Install Agent Software page.
-
Continue with Installing and Starting the GroupWise Agents on NetWare or Windows.
Installing and Starting the GroupWise Agents on NetWare or Windows
At this point, the Setup Advisor has created eDirectory objects and network server directories for your GroupWise system. You now need to install and start the MTA and POA on your NetWare or Windows server.
-
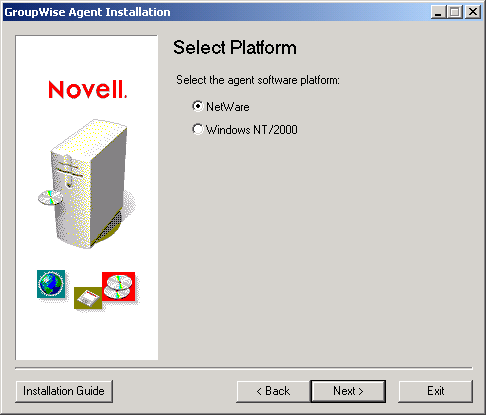
On the GroupWise Setup Progress: Install Agent Software page, click Next to have the Setup Advisor launch the Agent Installation program and display the Select Platform page.
-
If you are installing the NetWare agents (worksheet item 21), continue with Installing and Starting the NetWare Agents.
or
If you are installing the Windows agents (worksheet item 21), skip to Installing and Starting the Windows Agents.
Installing and Starting the NetWare Agents
-
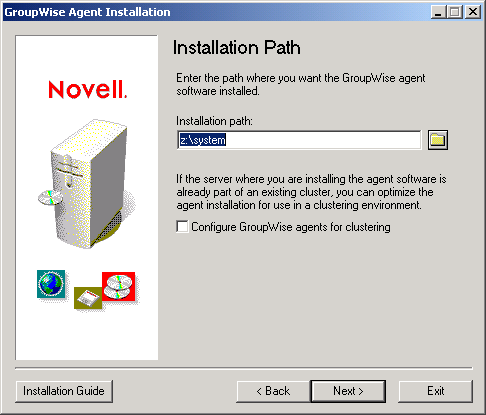
On the Select Platform page, select NetWare as the platform, then click Next to display the Installation Path page.
-
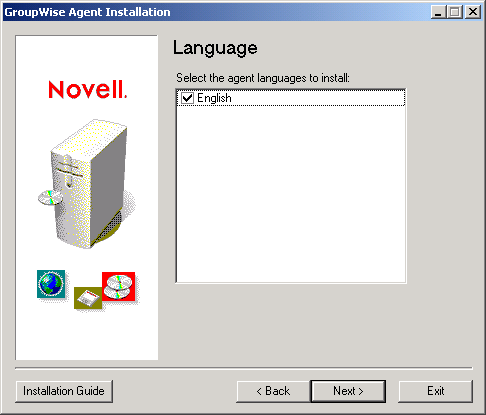
Select the directory where you want to install the agents (worksheet item 22), then click Next to display the Language page.
-
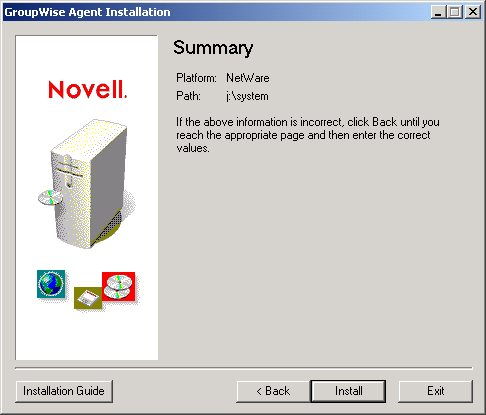
Select the languages you want to install (worksheet item 23), then click Next to display the Summary page.
-
Click Install to install the agents.
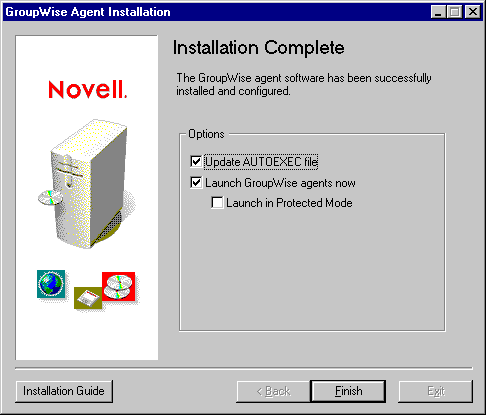
The Installation Complete page appears when the files have been installed.
-
Select from the following options:
Update AUTOEXEC File: Select this option to reference the grpwise.ncf file from the server's autoexec.ncf file so that the GroupWise agents are automatically loaded whenever the server is started.
Launch GroupWise Agents Now: Select this option to have the Installation Advisor start the GroupWise agents for you immediately. You should only do this if the MTA and POA are on the same server as the domain and post office directories. If you want the agents to run in protected mode, select Launch in Protected Mode.
-
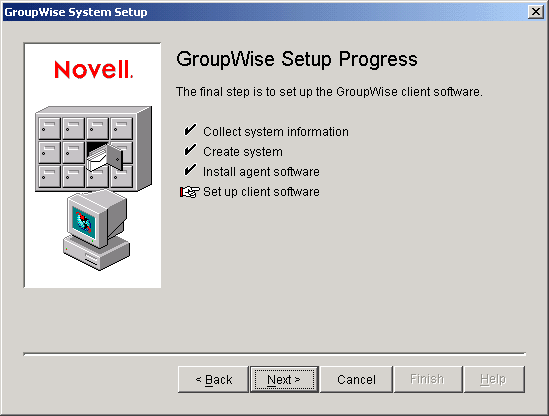
Click Finish to return to the Setup Advisor. The GroupWise Setup Progress: Set Up Client Software page is displayed.
-
If you have already started the GroupWise agents (because they are on the same server as the domain and post office directories), skip to Setting Up and Running the GroupWise Windows Client on Your Local Machine.
or
Continue with Step 8 below to configure the agents to access the server where their directories have been created.
-
Use a text editor to modify the agents' startup files.
The load command in the grpwise.ncf file includes a startup switch that points the agents to their startup files. The startup files include configuration information the agents need to function properly. When the MTA is not on the same server as the domain directory and post office directory, you need to edit the MTA startup file to include the MTA's eDirectory distinguished name. When the POA is not on the same server as the post office, you need to edit the POA startup file to include the POA's eDirectory distinguished name.
The startup files are located in the agent installation directory you specified in Step 2. The MTA startup file is named domain.mta, where domain is the first 8 letters of the domain name (for example, provo.mta). The POA startup file is named post_office.poa, where post_office is the first 8 letters of the post office name (for example, research.poa).
The /dn-distinguished_object_name startup switch is located in Section 1 of the startup file. Delete the semicolon (;) at the beginning of the line and replace the distinguished_object_name variable with the distinguished name of the MTA or POA. For example, if the MTA is for a domain named Provo that is located in a container named Novell, you would enter:
/dn-mta.provo.novell
-
At the server's console, enter grpwise.ncf to start the agents.
-
Now that you have the NetWare agents installed and running, skip to Setting Up and Running the GroupWise Windows Client on Your Local Machine.
Installing and Starting the Windows Agents
To install the Windows agents, you must run the Agent Installation program at the Windows server where you are installing the agents.
-
If you are already running the Agent Installation program at the Windows server where you are installing the agents, skip to Step 6.
or
Click Exit to close the Agent Installation program that was launched automatically by the Setup Advisor, go to the Windows server where you want to install the agents, then continue with Step 2 below.
-
Make sure you are logged in as an Admin equivalent and have network access to the software distribution directory (or GroupWise 6.5 Administrator CD), domain directory, and post office directory.
-
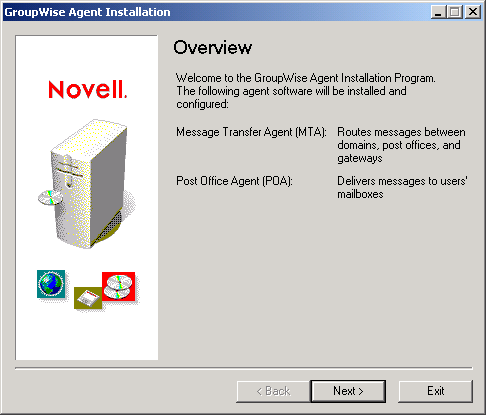
Start the Agent Installation program (install.exe in the agents subdirectory), then click Yes to accept the license agreement and display the Overview page.
-
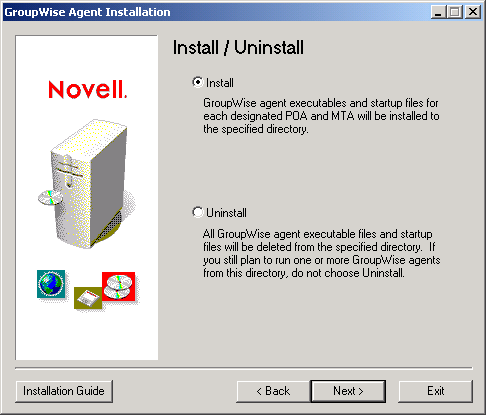
Click Next to display the Install/Uninstall page
-
Click Install, then click Next to display the Select Platform page.

-
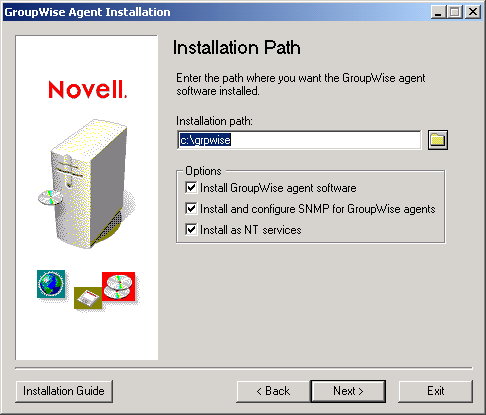
Click Windows, then click Next to display the Installation Path page.
-
Enter the path to the directory where you want the agents installed (worksheet item 22), select the installation options you want (worksheet item 24), then click Next to display the Language page.

-
Select the languages you want to install (worksheet item 23), then click Next.
If you are not running the Agent Installation program on the same server as the GroupWise Setup Advisor, the Domains/Post Offices page is displayed. Continue with Step 9.
If you are running the Agent Installation program on the same server as the GroupWise Setup Advisor, the Setup Advisor passes the domain and post office information to the Agent Installation program so you are not prompted for it again. Skip to Step 13.
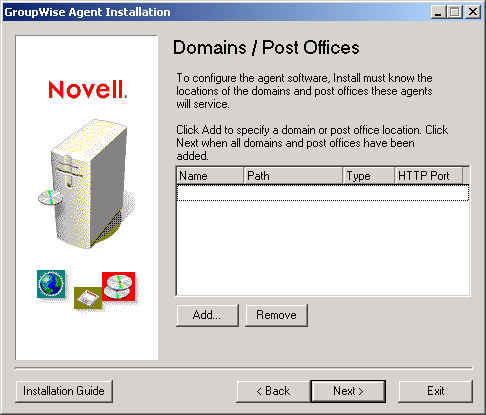
The MTA and POA must know the location of the domain and post office directories.
-
To specify the location of your domain, click Add, select Domain, specify the domain name, specify the path to the domain directory, then click OK.
The location you specify for the domain directory is stored in the MTA startup file. When you start the MTA, it reads the startup file to find the location of the domain directory. The MTA then reads the domain database (wpdomain.db) in the domain directory for all configuration information it needs to run.
The MTA startup file is located in the agent installation directory you specified in Step 7. The startup file is named domain.mta, where domain is the first 8 letters of the domain name (for example, provo.mta).
-
To specify the location of your post office, click Add, select Post Office, specify the post office name, specify the path to the post office directory, then click OK.
The location you specify for the post office directory is stored in the POA startup file. When you start the POA, it reads the startup file to find the location of the post office directory. The POA then reads the post office database (wphost.db file) in the post office directory for all configuration information it needs to run.
The POA startup file is located in the agent installation directory you specified in Step 7. The startup file is named post_office.poa, where post_office is the first 8 letters of the post office name (for example, research.poa).
-
Click Next.
-
If you are installing the agents as Window services, the Windows Service Information page is displayed. Fill in the service information (worksheet item 25), then click Next to display the Summary page.
or
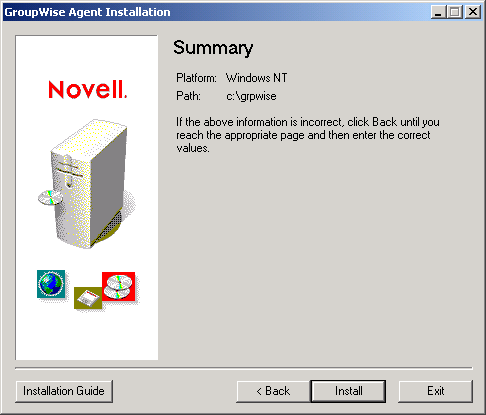
If you are not installing the agents as services, the Summary page is displayed.
-
Click Install to install the agents.
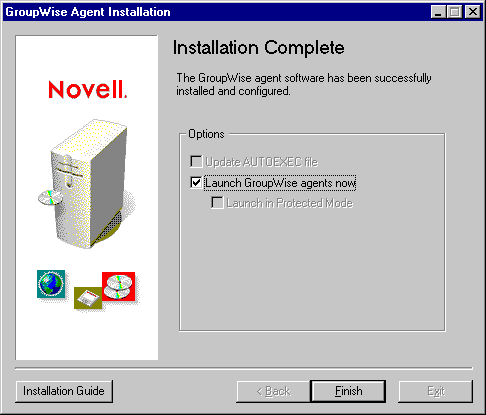
The Installation Complete page appears when the files have been installed.
-
Select from the following options:
Update the AUTOEXEC File: This option does not apply to the Windows agents, so it is dimmed.
Launch GroupWise Agents Now: This option applies only if you installed the agents as Windows applications, rather than services. Select this option to start the GroupWise agents as applications.
-
Click Finish, then return to the workstation where the Setup Advisor is running (if necessary). The GroupWise Setup Progress: Set Up Client Software page is displayed.

-
Now that you have the Windows agents installed and running, continue with Setting Up and Running the GroupWise Windows Client on Your Local Machine.
Setting Up and Running the GroupWise Windows Client on Your Local Machine
To set up the GroupWise Windows client on your local machine:
-
In the Setup Advisor, click Next to launch the GroupWise Windows client Setup program, then follow the prompts.
-
When setup is finished, double-click the GroupWise shortcut on your desktop to start the GroupWise Windows client.
Because the GroupWise client can get the location of your post office from eDirectory, and because you do not yet have a password on your mailbox, the GroupWise client starts without prompting you for post office and password information.
If the GroupWise client cannot get the location of your post office from eDirectory or cannot access the post office, the GroupWise Startup page appears. You should make sure you are logged in through your own eDirectory user account and not through an Admin account, and your current eDirectory tree is the tree in which the post office is located. By default, the GroupWise client logs in to GroupWise as the user who is logged in at the workstation. If you are not logged in as yourself, you might receive a "user not found" error; specify your GroupWise user ID in the User ID field and click OK to log in.
-
Get started with the GroupWise client by completing the following tasks:
Setting A Mailbox Password: After you are logged in and using GroupWise, one of the first things you should do is set a password on your mailbox so that other users can't access it. For information about setting a password, see Help in the GroupWise client.
Sending Messages and Scheduling Appointments: You can send messages to or schedule appointments with any users you have added to the post office. To test your system, you might want to send a message to yourself. As soon as users set up the GroupWise clients on their workstations, as described in Setting Up the GroupWise Windows Client, they will also be able to send messages and schedule appointments.
Using Document Management Services (Optional): GroupWise Document Management Services (DMS) lets you store documents in GroupWise libraries. Library documents can be shared with other users, versioned, and searched for within the library. The Setup Advisor created a library under the post office directory. For information about using Document Management Services, see Help in the GroupWise client.
-
Continue with Installing the GroupWise Administrator Snap-Ins to Additional Windows Locations.
or
If you have installed all the administrative software you need, skip to What's Next
Installing the GroupWise Administrator Snap-Ins to Additional Windows Locations
As part of creating your basic GroupWise system, the GroupWise Administrator snap-ins to ConsoleOne were installed in one location (worksheet item 3). If ConsoleOne is installed in multiple locations and if you want to be able to administer GroupWise from those locations, you need to install the GroupWise snap-ins to each ConsoleOne installation.
-
Go to the Windows workstation or server where you want to install the GroupWise snap-ins to ConsoleOne.
-
Make sure you are logged in as an Admin equivalent and have network access to the software distribution directory (or GroupWise 6.5 Administrator CD) and the domain directory.
-
Start the Installation Advisor (setup.exe), then click Install Products > GroupWise Administration > Install GroupWise Administration.
-
Accept the License Agreement, then provide the information requested by the Installation Advisor just as you did the first time you installed the GroupWise snap-ins.
-
Repeat Step 1 through Step 4 for each location where you want to install the GroupWise snap-ins.
-
Skip to What's Next.
Setting Up a Basic GroupWise System on Linux
You should have already reviewed Planning Your Basic GroupWise System and filled out the worksheet.
The following sections step you through the GroupWise Installation Advisor and GroupWise Setup Advisor on Linux. The Installation Advisor installs the GroupWise software on your Linux server. It then launches the Setup Advisor in ConsoleOne to create your domain and post office and set up the GroupWise agents.
- Starting the GroupWise Installation Advisor on Linux
- Installing the GroupWise Software
- Selecting a Linux Mount Directory
- Using ConsoleOne to Create Your Basic GroupWise System
- Installing and Starting the GroupWise Linux Agents
- Setting Up and Running the GroupWise Cross-Platform Client on Your Local Machine
- Installing the GroupWise Administrator Snap-Ins to Additional Linux Locations
If you are new to Linux, you might want to review "Useful Linux Commands for Administering a GroupWise System" in GroupWise 6.5 Troubleshooting 2: Solutions to Common Problems before beginning to set up your GroupWise system on Linux.
Starting the GroupWise Installation Advisor on Linux
-
Make sure that ConsoleOne is installed on your Linux server.
ConsoleOne is installed in /usr/ConsoleOne/bin. If ConsoleOne and eDirectory have not yet been installed on your system, see Novell eDirectory.
-
Open a new terminal window, then enter the following command:
xhost + localhost
When creating your basic GroupWise system, you must run the GroupWise Installation Advisor in an environment where the X Window System is running and where your DISPLAY environment variable is set correctly.
-
In the same window, become root by entering su and the root password.
-
Change to the root of the GroupWise 6.5 for Linux Administrator CD.
-
Start the GroupWise Installation Advisor:
./install
-
Select the language in which you want to run the Installation Advisor and install software, then click OK.
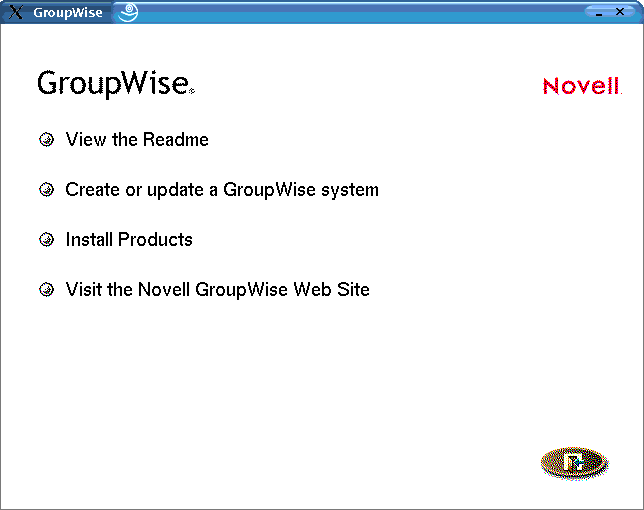
If the X Window System is not installed or if your DISPLAY environment variable is not set correctly, a text-based Installation Advisor starts instead of the interface illustrated above. You cannot create a GroupWise system in the text-based Installation Advisor. It is designed for installing individual GroupWise components, not for creating a GroupWise system. If necessary, move to a Linux machine where the X Window System is running in order to run the GroupWise Setup Advisor to create your basic GroupWise system.
-
Continue with Installing the GroupWise Software.
Installing the GroupWise Software
-
Click Create or Update a GroupWise System.
-
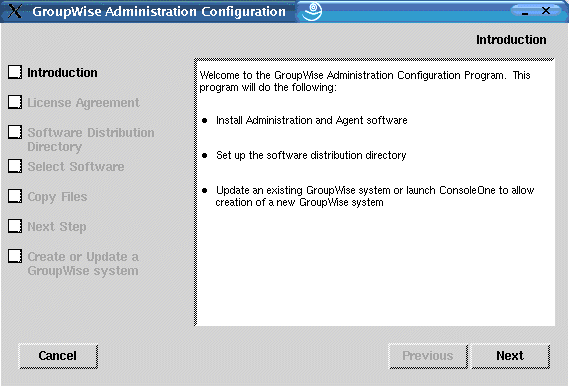
Review what the Installation Advisor accomplishes for you, then click Next.
The list on the left details the steps the Installation Advisor performs for you.
-
Accept the License Agreement, then click Next.
-
Specify or browse to and select the software distribution directory (worksheet item 4), then click Next.
-
Select the software components you want to copy into the software distribution directory (worksheet item 5), then click Next.
The Installation Advisor automatically installs the GroupWise agent software to the bin and lib subdirectories of /opt/novell/groupwise/agents. It also installs the GroupWise Administrator snap-ins to ConsoleOne under /usr/ConsoleOne. After installing the standard components, the Installation Advisor copies the selected software components into your software distribution directory.
-
When the copying is complete, click Next.
-
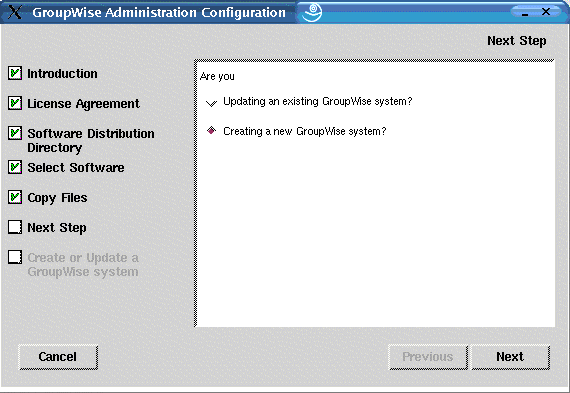
Select Creating a New GroupWise System, then click Next.
You use the New System utility in ConsoleOne to create your basic GroupWise system.
-
Review the instructions for accessing the New System utility in ConsoleOne, then click OK.
-
Continue with Selecting a Linux Mount Directory
Selecting a Linux Mount Directory
The first time you start ConsoleOne with the GroupWise Administrator snap-ins installed, you are prompted to specify a Linux mount directory under which you create mount points. Typically, Linux servers and workstations use /mnt for this purpose. In the future as your system grows, this information helps ConsoleOne resolve the UNC paths of GroupWise database locations into Linux paths. Although the mount directory information is not used when you are creating your basic GroupWise system, it is gathered at this time for later reference.
GroupWise databases can be located on Linux servers, NetWare servers, or Windows servers. In the Linux mount directory, you will eventually create mount points that have the same names as the servers that are mounted to those mount points. You will need to do this for each server where a domain or post office is located that you want to access from ConsoleOne. The following table illustrates the correspondence between UNC paths and mount points for GroupWise database locations on Linux, NetWare, and Windows, assuming the typical mount directory of /mnt:
IMPORTANT: Although NetWare and Windows are not case-sensitive operating systems, the case of characters in pathnames becomes significant when the directory structure is mounted to a Linux server or workstation.
-
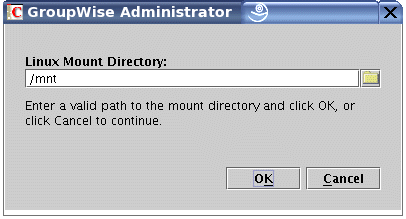
In the Installation Advisor, click Run to start ConsoleOne and display the Linux Mount Directory dialog box.
-
Browse to and select the Linux mount directory, then click OK.
A typical Linux mount directory is /mnt.
In the future, you and other GroupWise administrators might have different mounts points depending on the workstation or server where ConsoleOne is being run. To change the mount directory later in ConsoleOne, click Tools > GroupWise System Operations > System Preferences > Linux Settings. The mount directory information is stored in a user-specific preferences file (.consoleone/SnapinPrefs.ser in each GroupWise administrator's home directory).
-
Continue with Using ConsoleOne to Create Your Basic GroupWise System.
Using ConsoleOne to Create Your Basic GroupWise System
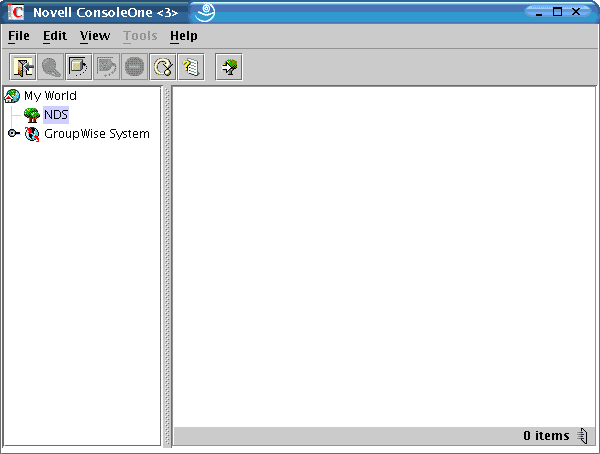
On Linux, ConsoleOne does not automatically authenticate to any eDirectory trees when it starts, so the NDS object is not immediately expandable.
-
In ConsoleOne, select NDS, then click File > Authenticate.
-
Fill in the following fields:
Login Name: Provide a Novell eDirectory username that has rights to create eDirectory objects.
Password: Provide the password for the username.
Tree: Type or select the eDirectory tree where you want to create GroupWise objects.
If the eDirectory tree is located on a Windows server, you might need to specify the IP address of the server instead of the tree name.
Context: Provide the full context of the User object associated with the username you provided.
-
Click Login.
-
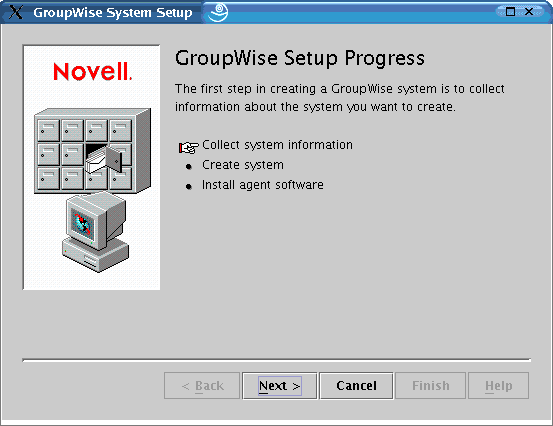
Under the NDS object, select the tree where you want to create the GroupWise system, then click Tools > GroupWise Utilities > New System.
-
Follow the prompts to provide the information you planned using the Basic GroupWise System Worksheet.
-
After creating your basic GroupWise system, click Next to continue.
-
Click Next to install the POA and MTA software.
-
Continue with Installing and Starting the GroupWise Linux Agents.
Installing and Starting the GroupWise Linux Agents
At this point, the Setup Advisor has created eDirectory objects and network server directories associated with your GroupWise system. You now need to install and start the MTA and POA on your Linux server.
Installing the Linux Agents
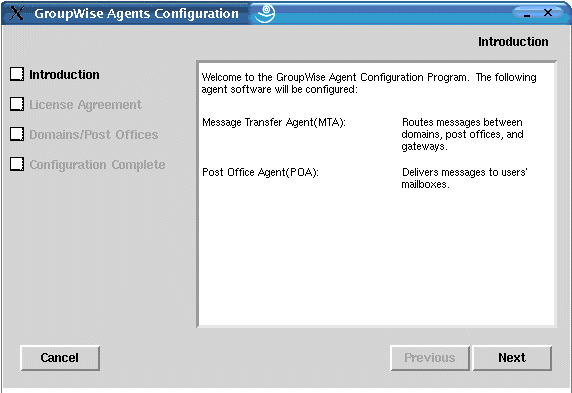
The Setup Advisor starts the Agent Configuration program for you.
-
Review the Introduction, then click Next.
-
Accept the License Agreement, then click Next.
On the Configuration Complete page, Launch GroupWise Agents on System Startup is selected by default.
-
If you do not want the agents to start automatically when the server restarts, deselect Launch GroupWise Agents on System Startup.
-
Click Exit to complete the configuration.
-
Continue with Starting the Linux Agents for the First Time.
Starting the Linux Agents for the First Time
-
In a terminal window, become root by entering su and the root password.
-
Change to the GroupWise agent bin directory.
cd /opt/novell/groupwise/agents/bin
-
Enter the following command to start the MTA:
Syntax:
./gwmta --show --home domain_directory &Example:
./gwmta --show --home /gwsystem/domlnx &The --show startup switch starts the MTA with an agent console interface similar to that provided for the NetWare and Windows MTAs. This user interface requires that the X Window System and OpenMotif be running on the Linux server.
The --home startup switch specifies the domain directory and is required to start the MTA.
The ampersand (&) causes the MTA to run in the background, so that the terminal window you started it in is again available for use.
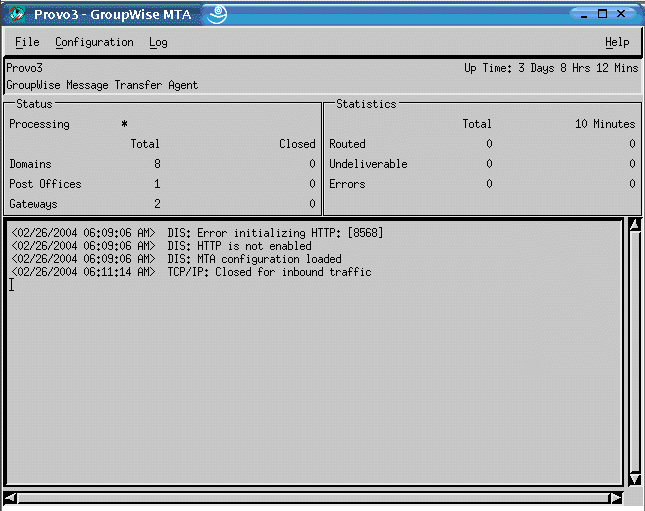
The status messages displayed on the MTA agent console are also written to the MTA log file (mmddmta.nnn) in the /var/log/novell/groupwise/domain.mta directory. The log file name includes the month and day when it was created, along with an incrementing extension to accommodate multiple log files on the same day.
In ConsoleOne, you can see that the domain database has been updated by the MTA because the Version field on the Domain object shows 6.5 when the update is complete.
-
Wait until the domain has been updated before you start the POA.
-
Use the following command to start the POA:
Syntax:
./gwpoa --show --home post_office_directory &Example:
./gwpoa --show --home /gwsystem/polnx &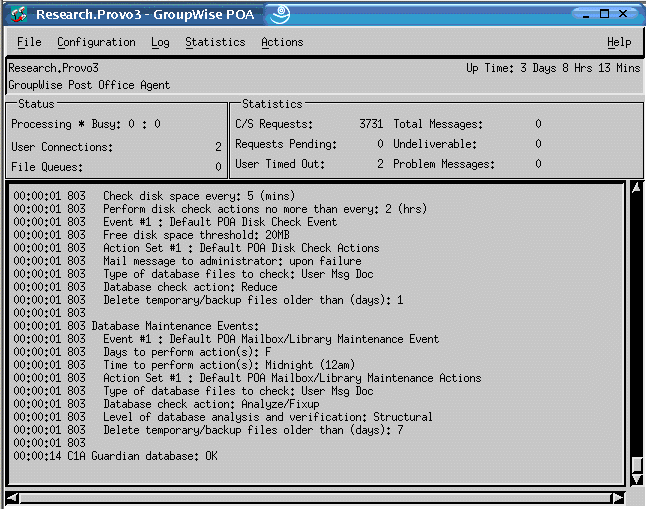
The status messages displayed on the POA agent console are also written to the POA log file (mmddpoa.nnn) in the /var/log/novell/groupwise/post_office.poa directory. The log file name includes the month and day when it was created, along with an incrementing extension to accommodate multiple log files on the same day.
In ConsoleOne, you can see that the post office database has been updated by the POA because the Version field on the Post Office object shows 6.5 when the update is complete.
After the post office database has been updated, you can install the GroupWise Cross-Platform client and connect to the post office.
-
If you want to finish setting up your basic GroupWise system, continue with Setting Up and Running the GroupWise Cross-Platform Client on Your Local Machine.
or
If you want to learn more about managing the GroupWise agents on Linux, skip to the following sections in Installing GroupWise Agents:
Setting Up and Running the GroupWise Cross-Platform Client on Your Local Machine
On Linux, the Create or Update a GroupWise System option in the Setup Advisor does not include installation of the GroupWise Cross-Platform client.
-
On the GroupWise Installation main page, click Install Products > Install GroupWise Client.
-
When the Cross-Platform client files have been copied, click OK.
To start the Cross-Platform client:
-
Change to the client installation directory:
cd /opt/novell/groupwise/client/bin
-
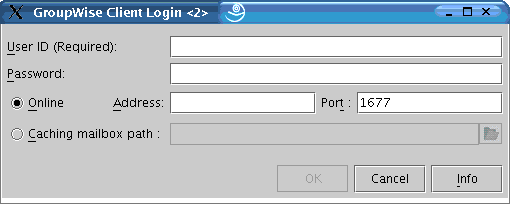
Enter the following command:
./groupwise
-
Specify your GroupWise user ID, password, and the required information about the server where the POA is running (worksheet item 18), then click OK.
For your convenience, the Installation Advisor created a shortcut for the Cross-Platform client on your desktop to simplify this process.
-
Get started with the GroupWise Cross-Platform client by completing the following tasks:
Setting A Mailbox Password: After you are logged in and using GroupWise, one of the first things you should do is set a password on your mailbox so that other users cannot access it. For information about setting a password, see Help in the GroupWise client.
Sending Messages and Scheduling Appointments: You can send messages to or schedule appointments with any users that you have added to the post office. To test your system, you might want to send a message to yourself. As soon as users set up the GroupWise clients on their workstations, as described in Setting Up the GroupWise Cross-Platform Client, they will also be able to send messages and schedule appointments.
-
Continue with Installing the GroupWise Administrator Snap-Ins to Additional Linux Locations.
or
If you have installed all the administrative software you need, skip to What's Next.
Installing the GroupWise Administrator Snap-Ins to Additional Linux Locations
As part of creating your basic GroupWise system, the GroupWise Administrator snap-ins to ConsoleOne were installed in one location (worksheet item 3). If ConsoleOne is installed in multiple locations and if you want to be able to administer GroupWise from those locations, you need to install the GroupWise snap-ins to each ConsoleOne installation.
-
Go to the Linux workstation or server where you want to install the GroupWise snap-ins to ConsoleOne.
-
Make sure you are logged in as root and have network access to the software distribution directory (or GroupWise 6.5 for Linux Administrator CD) and the domain directory.
-
Start the Installation Advisor (install at the root of the CD), then click Install Products > GroupWise Administration > Install GroupWise Administration.
-
When the installation is complete, select Configure GroupWise Administration.
-
Accept the License Agreement, then provide the information requested by the Installation Advisor just as you did the first time you installed the GroupWise snap-ins.
-
Repeat Step 1 through Step 5 for each location where you want to install the GroupWise snap-ins.
-
Continue with What's Next.