6.4 Setting Up GroupWise Monitor
Follow the instructions for the platform where you are setting up GroupWise Monitor:
IMPORTANT:If you are installing GroupWise Monitor on SUSE Linux Enterprise Server 10, refer to TID 3248145 in the Novell Support Knowledgebase for installation instructions. The TID is written for WebAccess, but the same principles apply to Monitor.
If you are installing GroupWise Monitor in a clustered server environment, see the GroupWise 7 Interoperability Guide before you install Monitor.
6.4.1 Windows: Setting Up GroupWise Monitor
-
At a Windows server that meets the requirements listed in Section 2.1, GroupWise Administration Requirements, log in as an Admin equivalent to the eDirectory tree in which you are installing Monitor.
-
If you want to monitor non-HTTP-enabled agents (such as earlier versions of any GroupWise agent), install the SNMP service for Windows.
This enables the Monitor Agent to use SNMP in addition to HTTP.
-
Make sure no GroupWise agents are currently running on the Windows server where you plan to install the Monitor Agent.
-
Insert the GroupWise 7 Administrator for NetWare/Windows CD into the CD drive to start the GroupWise Installation program, then click . If the Installation program does not start automatically, run setup.exe from the root of the CD.
or
If you have already copied the Monitor software to a software distribution directory, run admin\monitor\setup.exe to start the Monitor Installation program.
-
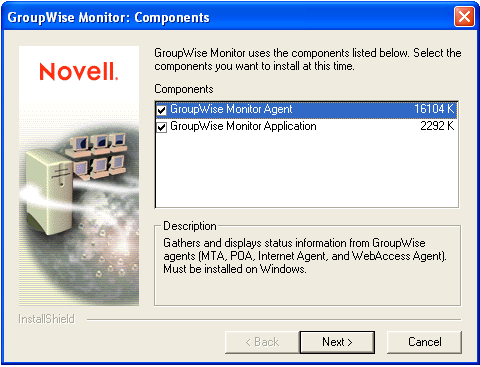
Click to accept the license agreement and display the GroupWise Monitor: Components dialog box.
-
Follow the prompts to provide information about Monitor Agent configuration, using the following information from the GroupWise Monitor Installation Worksheet.
-
Follow the prompts to provide information about Monitor Application configuration, using the following information from the GroupWise Monitor Installation Worksheet.
- Item 8: Web Server
- Item 9: Web Server Path
- Item 10: Novell Root Directory
- Item 11: Java Servlet Engine
- Item 12: Default Language
- Item 13: eDirectory Object Configuration
On Windows, the Monitor Installation program can start the Monitor Agent for you and the Monitor Agent server console displays on the Windows server.
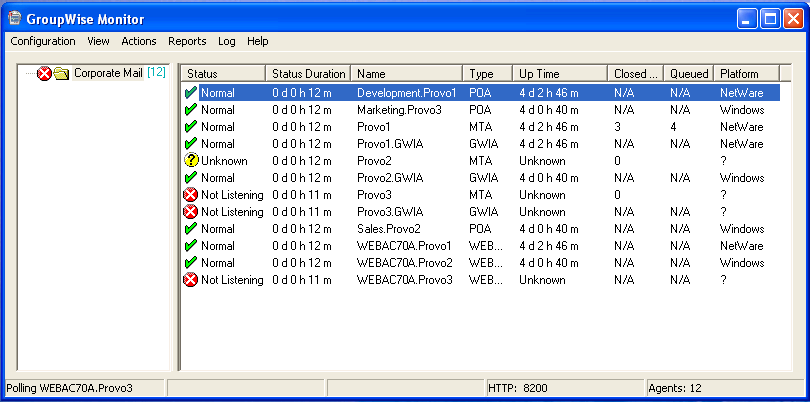
If the Monitor Agent does not start successfully, see Starting the Windows GroupWise Agents
After installation is complete, you might need to perform some additional steps, as described in Section 6.4.3, Completing Optional Post-Installation Tasks.
6.4.2 Linux: Setting Up GroupWise Monitor
Complete the following tasks to install GroupWise Monitor on Linux:
IMPORTANT:If you plan to install GroupWise Monitor in a clustered server environment, see the GroupWise 7 Interoperability Guide before you install Monitor.
Installing the Linux Monitor Agent
-
Make sure that LDAP is running on your eDirectory server and that it is configured to accept login from the Monitor Agent Installation program (worksheet item 14)
The Monitor Installation program requires eDirectory access in order to create the Monitor objects in eDirectory. The Installation program uses LDAP to gain the required access.
-
At the Linux server where you want to install Monitor, open a new terminal window.
-
Become root by entering sux and the root password.
The sux command enables the X Window System, which is required for running the GUI GroupWise Installation program. If you are not using the X Window System, you can install GroupWise components individually, as described in Installing the GroupWise Agents Using the Text-Based Installation Program.
-
Change to the root of the GroupWise 7 Administrator for Linux CD.
-
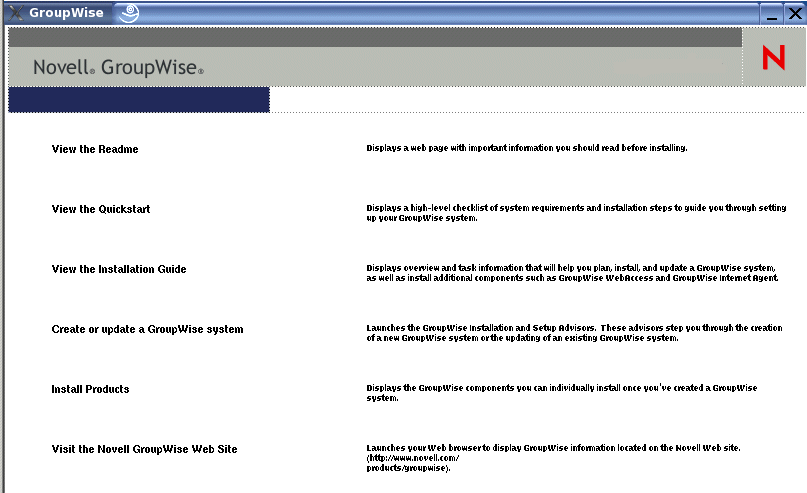
Start the GroupWise Installation program.
./install
-
Select the language in which you want to run the Installation program, then click .
NOTE:On Linux, all available languages are included in the same RPM, so all languages are always installed.
-
Click .
-
When the installation is complete, click .
The Monitor Agent software is installed to /opt/novell/groupwise/agents.
-
Continue with Configuring the Linux Monitor Agent.
Configuring the Linux Monitor Agent
-
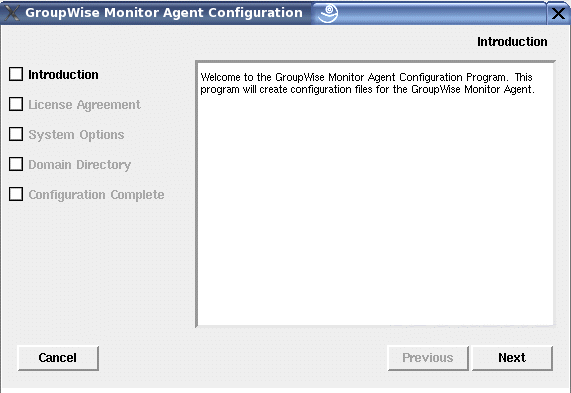
After the Monitor Agent files have been installed, click .
The Monitor Agent installation and configuration steps are separate so that you can install updated agent software without repeating the agent configuration steps.
-
Follow the prompts to configure the Monitor Agent, using the following information from the GroupWise Monitor Installation Worksheet.
On the Configuration Complete page, is selected by default.
-
Click to complete the installation.
-
Continue with Installing and Configuring the Monitor Application.
Installing and Configuring the Monitor Application
IMPORTANT:If you are installing GroupWise Monitor on SUSE Linux Enterprise Server 10, refer to TID 3248145 in the Novell Support Knowledgebase for installation instructions. The TID is written for WebAccess, but the same principles apply to Monitor.
-
After installing and configuring the Monitor Agent, if you want to use an existing Apache/Tomcat installation, click .
or
Click .
This installs a version of Apache and Tomcat specifically for use with GroupWise. Apache files are installed under /var/opt/novell/http and /etc/opt/novell/http. Tomcat files are installed under /var/opt/novell/tomcat4 and /etc/opt/novell/tomcat4.
NOTE:The option to install Apache and Tomcat along with the Monitor Application is not available if you are installing to Novell Open Enterprise Server Linux because Apache and Tomcat are already installed and configured correctly in that environment.
-
When the file copy is complete, click .
-
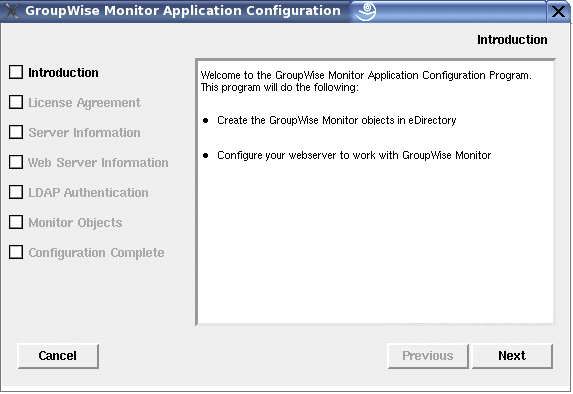
Click .
-
Follow the prompts to provide information about Monitor Application, using the following information from the GroupWise Monitor Installation Worksheet in the order listed.
-
Click to complete the configuration.
After installation is complete, you might need to perform some additional steps, as described in Section 6.4.3, Completing Optional Post-Installation Tasks.
-
Continue with Restarting the Web Server.
Restarting the Web Server
In order to load the Monitor Application, you must restart the Web server.
If you installed the Novell version of Apache and Tomcat along with the Monitor Application, follow the instructions below to start your Web server. If you did not install the Novell versions of Apache and Tomcat along with the Monitor Application, restart Apache and Tomcat as you usually would.
-
Make sure you are logged in as root.
-
If you have other instances of Apache and Tomcat running on this server, bring them down before you start the new versions you just installed.
-
Change to the /etc/init.d directory.
-
Start Tomcat.
./novell-tomcat4 start
-
Wait until Tomcat is all the way up.
-
Start Apache.
./novell-httpd start
-
Continue with Starting the Linux Monitor Agent as a Daemon.
Starting the Linux Monitor Agent as a Daemon
NOTE:Unlike the other GroupWise agents, you do not need to be logged in as root in order to start the Monitor Agent.
-
Make sure you know the path to a domain directory where a domain database (wpdomain.db) is located or the IP address of a server where the MTA is running.
-
Change to the GroupWise agent bin directory.
cd /opt/novell/groupwise/agents/bin
-
Use one of the following commands to start the Monitor Agent:
./gwmon --home /domain_directory &
./gwmon --ipa IP_address --ipp port_number &
The --home startup switch specifies a domain directory where the Monitor Agent can access a domain database.
The --ipa startup switch specifies the IP address of a server where an MTA is running, which is another way for the Monitor Agent to obtain information from a domain database. The --ipp startup switch specifies the port number of the MTA’s HTTP port on which the Monitor Agent communicates with the MTA.
The ampersand (&) causes the Monitor Agent to run in the background, so that the terminal window you started it in is again available for use.
A message indicates that the Monitor Agent is polling the domain you specified.
You can also start the Monitor Agent using its startup script (/etc/init.d/grpwise-ma).
The Monitor Agent does not have a --show switch. The Monitor log file (mmddmon.nnn) for status messages is located in the /var/log/novell/groupwise/gwmon directory. The log file name includes the month and day when it was created, along with an incrementing extension to accommodate multiple log files on the same day. The Monitor Agent can also be monitored from your Web browser.
If the Monitor Agent does not start successfully, see Starting the Linux GroupWise Agents as Daemons.
-
After installation is complete, you might need to perform some additional steps, as described in Section 6.4.3, Completing Optional Post-Installation Tasks.
-
After the Monitor Agent starts successfully, refer to the following sections in Section 7.0, Installing GroupWise Agents for additional information about managing the Monitor Agent on Linux:
-
For instructions on using the Monitor Web consoles, skip to Section 6.5, Using GroupWise Monitor.
6.4.3 Completing Optional Post-Installation Tasks
Depending on the configuration you have chosen for the Monitor Agent and Monitor Application, you might need to perform one of more of the following tasks after you have installed the Monitor software:
-
If you use a proxy service, follow the instructions in
Configuring Proxy Service Support for the Monitor Web Console
inMonitor
in the GroupWise 7 Administration Guide. -
If you are installing to the Apache Web Server for UNIX Solaris, continue with Completing the Monitor Installation on a UNIX Apache Web Server.
After completing any post-installation tasks that pertain to your Monitor configuration, skip to Section 6.5, Using GroupWise Monitor.
Completing the Monitor Installation on a UNIX Apache Web Server
The Monitor Installation program copies the following files to the location you specified:
-
gwmonitor.tar
-
gwmonitordocs.tar
-
gwmonitorjars.tar
-
gwmonitorservlets.tar
-
index.html
-
web.xml
To complete the installation and configuration process:
-
Using the tar -xvf command, extract the following tar files to the specified locations:
-
gwmonitor.tar: Extract to the root of the UNIX server. A /novell directory is created for the files.
-
gwmonitordocs.tar: Extract to the Tomcat Monitor document root directory (for example, /usr/local/tomcat4/webapps/gwmon).
-
gwmonitorservlets.tar: Extract to the Tomcat Monitor classes directory (for example, /usr/local/tomcat4/webapps/gwmon/WEB-INF/classes).
-
gwmonitorjars.tar: Extract to the Tomcat Monitor lib directory (for example, /usr/local/tomcat4/webapps/gwmon/WEB-INF/lib).
-
-
Copy the web.xml file to the Tomcat webapps/gwmon/WEB-INF directory.
-
Modify the gwmonitor.cfg file, located in the /novell/gwmonitor directory at the root of the UNIX server, to change the Templates.path setting to point to the templates.
For example, change the following line in webacc.cfg:
Templates.path=/java/servlets/com/novell/gwmonitor/templates
to
Templates.path=/usr/local/tomcat4/webapps/gwmon/WEB-INF/classes/ com/novell/gwmonitor/templates -
In the gwmonitor.cfg file, verify that the paths for the following settings point to valid directories. Typically, these directories reside in the /novell/gwmonitor directory, but you can relocate them if desired. Refer to the comments in the gwmonitor.cfg file for explanations of each of these settings.
Log.path=/novell/gwmonitor/logs
Security.Timeout.path=/novell/gwmonitor/users
-
Copy the index.html file to the Tomcat Monitor document root directory (for example, /usr/local/tomcat4/webapps/gwmon).
For the convenience of your users, you can link to the Monitor file from your current default home page.