2.4 Installing the Handheld Clients
ZENworks Handheld Management provides IP clients for Windows CE and Palm OS devices that can make TCP/IP connections, a RIM BlackBerry Client, and Desktop Synchronization software for handheld devices that use Palm HotSync or Microsoft ActiveSync to synchronize.
The following sections contain additional information:
2.4.1 Installing the Windows CE IP Client
ZENworks Handheld Management provides an IP client for Windows CE that can make TCP/IP connections.
The Windows CE IP client supports multiple types of Windows CE devices. ZENworks Handheld Management provides a wizard that creates CAB files for all supported devices. The appropriate CAB file must then be installed on the device.
When running the wizard, you are prompted for the name of the computer (or IP address) of the ZENworks Handheld Management Server or the computer with the ZENworks Handheld Management Access Point installed.
The computer name or IP address is built into the CAB file so that when the CAB file is installed on the handheld device, it is ready to communicate.
NOTE:If Windows CE devices use Microsoft ActiveSync on a computer that has the ZENworks Handheld Management Access Point or Desktop Synchronization software installed, the appropriate CAB file is configured and automatically installed on the device when you synchronize the Windows CE device using ActiveSync. In this situation, the following procedure is not necessary. However, the automatic installation is not supported for the HP T5540 and Zebra PS2100T devices.
To create CAB files for the Windows CE IP client:
-
Insert the ZENworks 7 Handheld Management CD in the CD drive.
The installation program will autorun. If it does not, run winsetup.exe from the root of the CD.
-
Click .
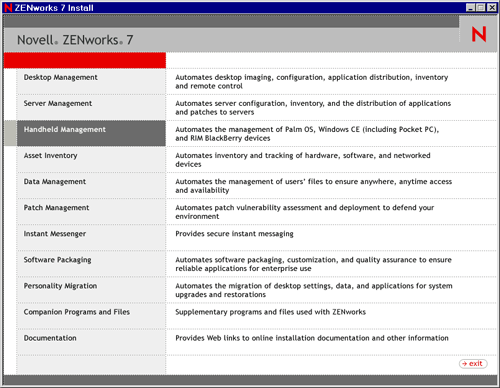
-
Click .
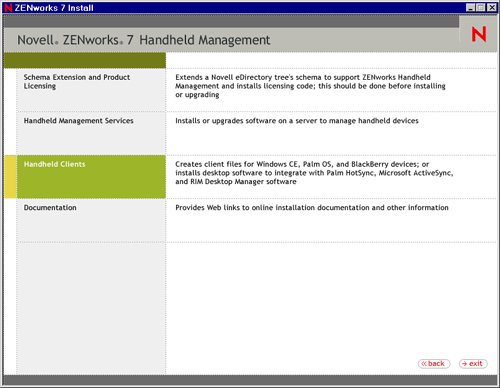
-
Click .
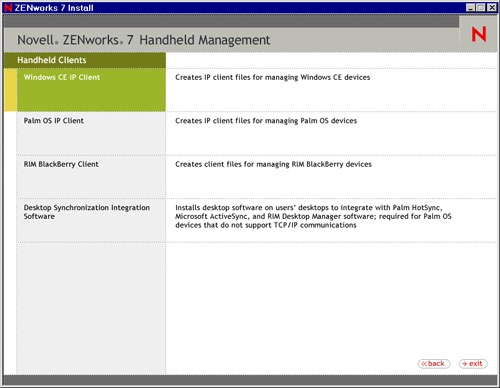
-
On the Welcome page, click .
-
Review the destination location where the installation program will install the Windows CE IP client (browse to a different location, if desired), then click .
-
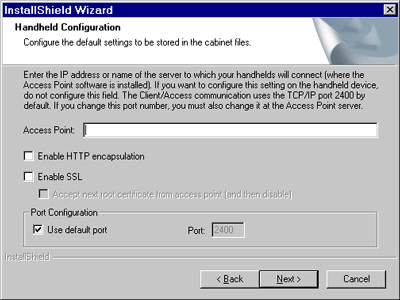
On the Handheld Configuration page, do the following:
-
In the Access Point text box, type the computer name or IP address of the server or computer to which your handheld devices will connect (where the ZENworks Handheld Management Access Point is installed).
You can leave this text box empty if you want to configure this setting on the handheld device.
If you are using an IP address to specify the location of the ZENworks Handheld Management Server or ZENworks Handheld Management Access Point computer, the IP address should remain constant (for example, it doesn’t change because of DHCP).
-
(Optional) Select the option.
-
(Optional) Select the option, then select the option, if desired.
You can also configure the ZENworks Handheld Management Access Point settings (HTTP, SSL, and ports) using the cfgip.exe program (in the /program files/novell/zfhap directory, by default). If you select the option using cfgip.exe, the root certificate is automatically downloaded. For this root certificate to be accepted, you must select the option.
-
(Optional) If you want to change the default port that ZENworks Handheld Management uses, deselect the option, then type the desired port number in the text box.
If you change the default port number, you must also change it at the computer where the IP conduit is installed.
-
Click .
-
-
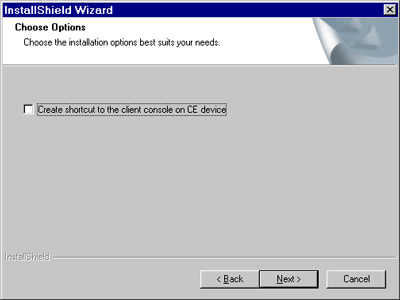
(Optional) Select the option, then click .
-
Review the information on the Start Copying Files page, then click .
The installation program copies the files to the destination location specified in Step 6.
-
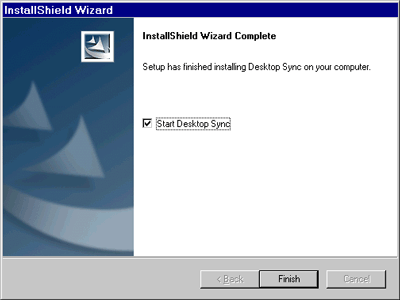
On the InstallShield Wizard Complete page, click .
The wizard creates CAB files for the following types of devices and copies them to the program files\novell\zenworks windows ce ipclient directory, by default:
Table 2-1 List of CAB files for the Handheld devices
NOTE:For Pocket PCs running Windows Mobile 2005 devices, in addition to the CAB file installation, you have to copy cesetup.cfg file to the root directory of the device.
To install the Windows CE IP client:
-
Find the CAB file appropriate for your device in the directory where the CAB files were created (program files\novell\zenworks windows ce ipclient, by default).
-
Copy the CAB file to the device, using the method most appropriate for your environment (for example, Microsoft ActiveSync).
-
After the CAB file is on the device, run it by clicking it.
The Windows CE IP client is installed on the handheld device.
2.4.2 Installing the Palm OS IP Client
If you have Palm OS devices that can make a TCP/IP connection, you can install the ZENworks Handheld Management Palm OS IP client on each device.
To install the Palm OS IP client:
-
Insert the ZENworks 7 Handheld Management CD in the CD drive.
The installation program will autorun. If it does not, run winsetup.exe from the root of the CD.
-
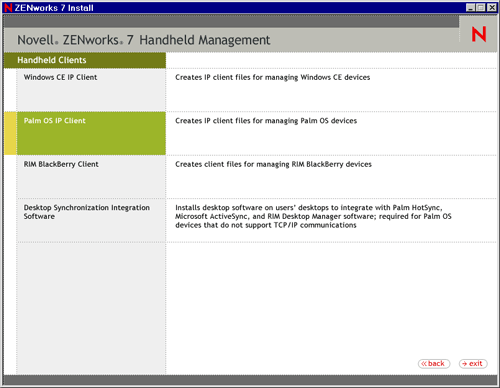
Click .

-
Click .

-
Click .
-
On the Welcome page, click .
-
Review the destination location where the installation program will install the Palm OS IP client (browse to a different location, if desired), click .
-
Review the information on the Start Copying Files page, then click .
The installation program copies the files to the destination location specified in the previous step.
-
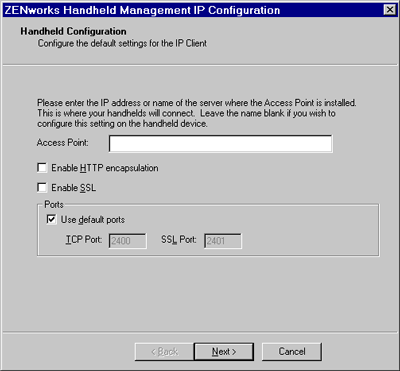
On the Handheld Configuration page, do the following:
-
On the Handheld Configuration page, type the computer name or IP address of the ZENworks Handheld Management Server (or the computer on which you installed the ZENworks Handheld Management Access Point).
If you are using an IP address to specify the location of the ZENworks Handheld Management Server (or ZENworks Handheld Management Access Point, if it is installed on a computer other than the server), the IP address of the computer should remain constant (for example, it doesn’t change because of DHCP).
-
(Optional) Select the option.
-
(Optional) Select the option.
-
(Optional) If you want to change the default ports that ZENworks Handheld Management use, deselect the option, then type the desired port number in the and text boxes.
If you change these port numbers, you must also change them at the computer where the ZENworks Handheld Management Access Point is installed (the ZENworks Handheld Management Server or the computer on which you installed the ZENworks Handheld Management Access Point).
-
Click .
-
-
On the Connections Options page, do the following:
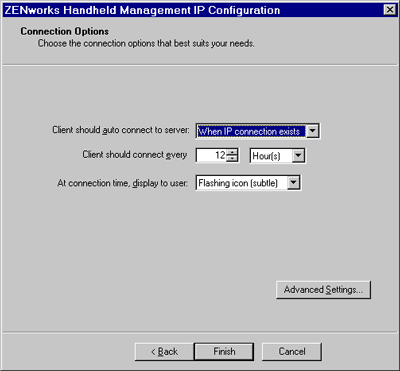
Client Should Auto Connect to Server: Select an option from the drop-down list:
-
Never: The Palm OS IP client never automatically connects. The user must manually connect the Palm OS IP client by clicking the icon on the Palm OS device, then clicking .
-
When IP Connection Exists: The Palm OS IP client automatically connects whenever an IP connection exists and it is time to connect.
For example, if the device is cradled using an Ethernet cradle, the device has Bluetooth* running on the device, or if the device dials up using a modem, and it is time to connect (as specified in the Client Should Connect Every option), the Palm OS IP client automatically connects.
-
Always: The Palm OS IP client tries to establish an IP connection and connect to the IP conduit automatically if it is time to connect.
Client Should Connect Every: Specify how often (in hours or minutes) the Palm OS IP client should connect.
At Connection Time, Display to User: Specify an option from the drop-down list:
-
Nothing (Just Connect): The Palm OS device user sees a visual indication that the Palm OS IP client has connected, but the user is not be prompted to do anything.
-
Flashing Icon (Subtle): A flashing icon displays on the Palm OS device when it is time to connect. The user can connect by clicking the icon and then clicking .
-
Dialog: A dialog box displays on the Palm OS device whenever it is time to connect. The user can connect by clicking .
-
Dialog With Timeout: A dialog box with a timeout value displays on the Palm OS device whenever it is time for the Palm OS IP client to connect. If the user does not respond by clicking or during the timeout period, the Palm OS IP client connects.
For example, if the device is cradled using an Ethernet cradle and you are away from your desk when it is time for the Palm OS IP client to connect, the Palm OS IP client waits until the timeout period has passed and then connects.
-
-
If desired, click , then fill in the fields:
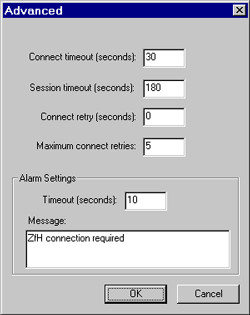
Connection Timeout (Seconds): The number of seconds you specify determines how long the Palm OS IP client tries to connect before it stops trying if a connection cannot be established.
Session Timeout (Seconds): The number of seconds you specify determines the length of time that the Palm OS IP client stays connected. If the session reaches the limit you specify, the Palm OS IP client session terminates.
For example, if you lose an IP connection, the Palm OS IP client session terminates after the number of seconds that you specify has passed.
Connect Retry (Seconds): Specify the number of seconds that you want the Palm OS IP client to wait after a failed connection before trying to connect again.
Maximum Connect Retries: Specify the maximum number of retry attempts you want the Palm OS IP client to attempt.
Timeout (Seconds): Specify the number of seconds you want to allow before closing the alarm dialog box before trying to make the connection.
Message: Type a message to be displayed on the Palm OS device when it is time for the Palm OS IP client to connect.
-
Click .
-
Click , then click again.
The wizard creates Palm OS IP client files and copy them to the program files\novell\zenworks palm ip client directory by default.
Rather than running the ZENworks Handheld Management installation program to install the Palm OS IP client, you can also copy the contents of the program files\novell\zfh palm ip client directory to a Palm OS device using the HotSync Manager Install Tool.
2.4.3 Installing the RIM BlackBerry Client
The ZENworks Handheld Management RIM BlackBerry client is the software that manages BlackBerry devices that use the BlackBerry wireless platform.
NOTE:If BlackBerry devices use RIM Desktop Manager on a computer that has the ZENworks Handheld Management Access Point or Desktop Synchronization software installed, ZENworks Handheld Management automatically creates the necessary installation files for the RIM BlackBerry client and adds them to the BlackBerry Application Loader. In this situation, the following procedure is not necessary.
To install the RIM BlackBerry client:
-
Insert the ZENworks 7 Handheld Management CD in the CD drive.
The installation program will autorun. If it does not, run winsetup.exe from the root of the CD.
-
Click .

-
Click .

-
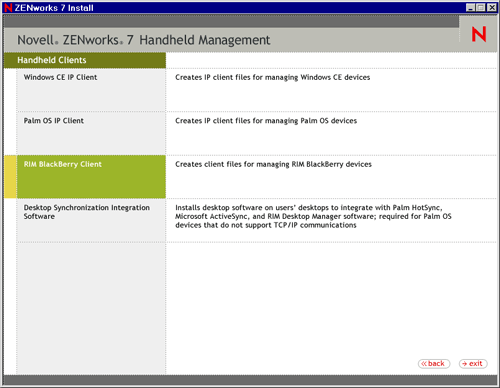
Click .
-
On the Welcome page, click .
-
Review the destination location where the installation program will install the RIM BlackBerry client (browse to a different location, if desired), then click .
-
Review the information on the Start Copying Files page, then click .
The RIM BlackBerry client files that are copied to the destination location include two client .dll files: one file for devices that use the Mobitex network and one file for devices that use the DataTAC network. The copied files also include the .alx installation file that is used by the BlackBerry Application Loader and the configuration application file.
NOTE:If your RIM Desktop Manager software is not at least version 2.1.3 (2.1 SP3), it might not recognize .alx files. If this is the case, you must use the BlackBerry Application Loader to copy the appropriate .ali file to your BlackBerry devices (zfhbbmtexclient.ali for the Mobitex network or zfhbbdtacclient.ali for the DataTAC network). The two .ali files are found in the \blackberryclient directory on the ZENworks Handheld Management CD.
-
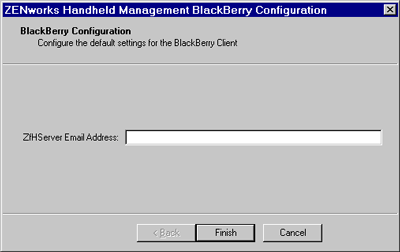
Type the ZENworks Handheld Management server’s e-mail address to be used by the BlackBerry client software that you specified during the Handheld Management Server installation (Step 28).
-
Click .
The installation program copies the RIM BlackBerry client files to the directory by default.
-
On the InstallShield Wizard Complete page, click to have ZENworks Handheld Management automatically add the necessary files to the BlackBerry Application Loader.
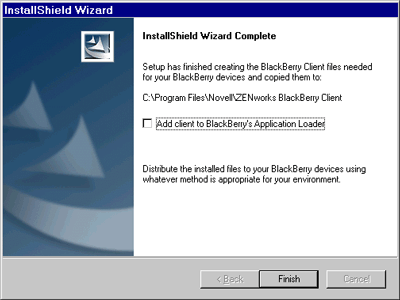
You should enable the option if you are running the BlackBerry Client installation wizard from the machine on which the BlackBerry device synchronizes
-
Click .
2.4.4 Installing the Java-Based BlackBerry Client
The ZENworks 7 Handheld Management Agent for Java BlackBerry Devices is the software that manages the Java-based BlackBerry devices that use the BlackBerry wireless platform.
To install ZENworks 7 Handheld Management Agent for Java BlackBerry Devices:
-
Download the agent for Java BlackBerry device available with TID 2972388 to a temporary directory on a machine having RIM BlackBerry Desktop Manager software installed. For more information on TID 2972388, see the Novell Support Knowledgebase.
-
Double-click the agent executable.
-
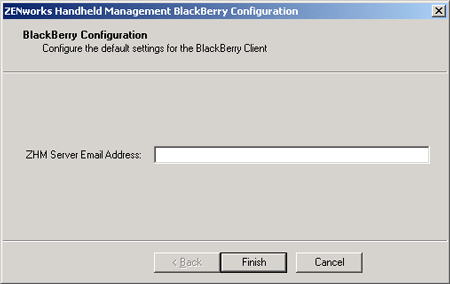
Type the ZENworks Handheld Management server’s e-mail address to be used by the BlackBerry client software that you specified during the Handheld Management Server installation (Step 28).
-
Click .
The installation program copies the ZENworks 7 Handheld Management Agent for Java BlackBerry Devices files to the RIM Desktop Manager’s installation directory.
2.4.5 Installing Desktop Synchronization Integration Software
You must install the ZENworks Handheld Management Desktop Synchronization Integration Software on users’ desktops if:
-
Handheld devices use Palm HotSync or Microsoft ActiveSync to synchronize and to connect to the network (no IP access).
-
You want to use ZENworks Handheld Management to distribute applications to BlackBerry devices that use RIM Desktop Manager software. ZENworks Handheld Management lets you distribute software to BlackBerry devices that are synchronized with a cradle; software distribution to BlackBerry devices using wireless synchronization is not supported.
-
You want to distribute applications to desktop computers where handheld devices synchronize (for example, installation programs that integrate with Microsoft ActiveSync or Palm HotSync).
IMPORTANT:When you install ZENworks Handheld Management Server or ZENworks Handheld Management Access Point using the installation program, the ZENworks Handheld Management Desktop Synchronization Integration Software is automatically installed on the same computer.
To install the Desktop Synchronization Integration Software:
-
Insert the ZENworks 7 Handheld Management CD in the CD drive on a user’s computer.
The installation program will autorun. If it does not, run winsetup.exe from the root of the CD.
-
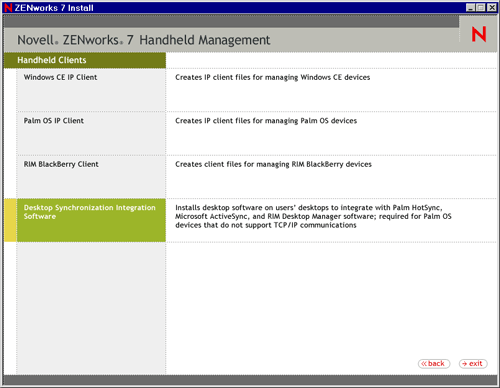
Click .

-
Click .

-
Click .
-
(Conditional) The Choose Options page is displayed only when you want to reinstall, upgrade, or uninstall the Desktop Synchronization Integration Software.
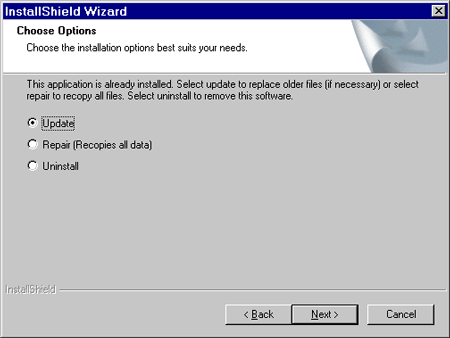
Select any of the following options:
-
Update: Upgrades the Desktop Synchronization Integration Software from ZENworks 6.5 Handheld Management to ZENworks 7 Handheld Management.
-
Repair (Recopies all data): Recopies the Desktop Synchronization Integration Software.
-
Uninstall: Uninstalls the Desktop Synchronization Integration Software.
-
-
On the Welcome page, click .
NOTE:This page is displayed only during the new install of ZENworks Desktop Synchronization Integration Software.
-
(Optional) The option is selected by default. Retain the selection if you want the installation program to verify that the machine meets the installation requirements for the ZENworks 7 Desktop Synchronization Integration Software.
NOTE:This page is displayed only during the new install of ZENworks Desktop Synchronization Integration Software.
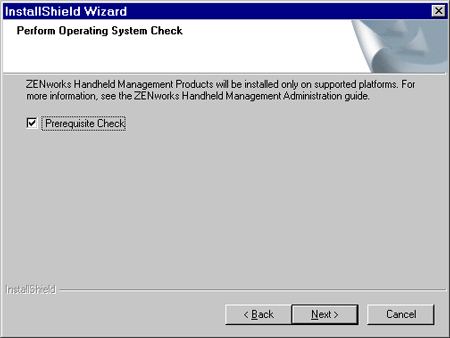
The installation program checks the version of the machine’s operating system. If the operating system and support/service packs are not the correct version, the installation displays a warning and does not continue until the required software is installed and detected or until you deselect the option.
-
Read the license agreement, then click if you agree with the terms of the license agreement.
If you do not agree with the terms of the license agreement, do not install the software.
NOTE:This page is displayed only during the new install of ZENworks Desktop Synchronization Integration Software.
-
Review the destination location where the installation program will install the Desktop Synchronization Integration Software (browse to a different location, if desired), then click .
NOTE:This page is displayed only during the new install of ZENworks Desktop Synchronization Integration Software.
-
Type the username and company information, then click .
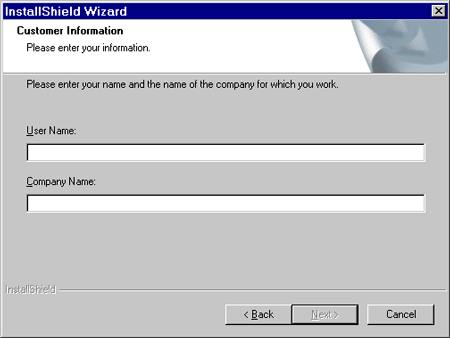
NOTE:This page is displayed only during the new install of ZENworks Desktop Synchronization Integration Software.
-
Ensure that the components that you want to install are selected, then click .
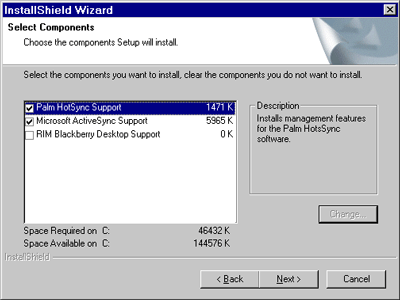
-
Type the DNS name or IP address of the computer where the ZENworks Handheld Management Server is installed, then click .
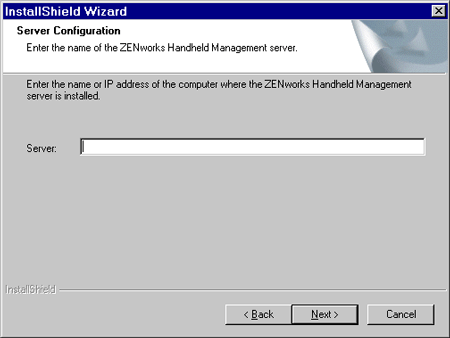
NOTE:This page is displayed only during the new install of ZENworks Desktop Synchronization Integration Software.
If you are using an IP address, the IP address of the computer where the ZENworks Handheld Management Server is installed should remain constant (for example, it doesn’t change because of DHCP).
If you are using a DNS or computer name, be sure your handheld devices can resolve the name if the devices are being cradled and using a third-party synchronization package.
-
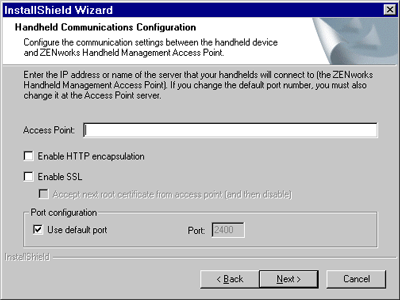
On the Handheld Communications Configuration page, do the following:
-
Type the name or IP address of the computer where the ZENworks Handheld Management Access Point is installed (the ZENworks Handheld Management Server or the computer on which you installed the ZENworks Handheld Management Access Point).
If you are using an IP address to specify the location of the computer that the ZENworks Handheld Management Access Point is installed on, the IP address should remain constant (for example, it doesn’t change because of DHCP).
If you are using a DNS or computer name, be sure your handheld devices can resolve the name if the devices are being cradled and using a third-party synchronization package.
-
(Optional) Select the option.
-
(Optional) Select the option, then select the from the option, if desired.
You can also configure the ZENworks Handheld Management Access Point settings (HTTP, SSL, and ports) using the cfgip.exe program (in the /program files/novell/zfhap directory, by default). If you select the Publish Root Certificate for Client Download option using cfgip.exe, the root certificate is automatically downloaded. In order for this root certificate to be accepted, you must select the Accept Next Root Certificate from Access Point (And Then Disable) option.
-
(Optional) If you want to change the default port that ZENworks Handheld Management uses, deselect the option, then type the desired port number in the text box.
If you change this port number, you must also change the port number at the computer where the ZENworks Handheld Management Access Point is installed (the ZENworks Handheld Management Server or the computer on which you installed the ZENworks Handheld Management Access Point).
-
Click .
-
-
Review the information in the Start Copying Files page, then click .
The installation program copies the files to the destination location specified in Step 9.
-
After the files are copied, ensure that the option is selected, then click .
