Using the NWCONFIG Utility
To create an NSS volume, do the following:
-
Enter nwconfig at the server console.
NSS loads automatically with NWCONFIG.
Select NSS Disk Options.
Select Storage and assign free space to NSS. See Configure NSS Using NWCONFIG for instructions.
Select NSS Volume Options > Create to create a storage group. See Configure NSS Using NWCONFIG for instructions.
Select Create > NSS Volume. See Configure NSS Using NWCONFIG for instructions.
Using the NSS Administration Menus
To create an NSS volume, do the following:
Increase the Size of an NSS Volume
Prerequisites
- To increase the size of a volume, a storage group must exist with no NSS volume attached to it. NSS must own the space to add to the volume you want to increase.
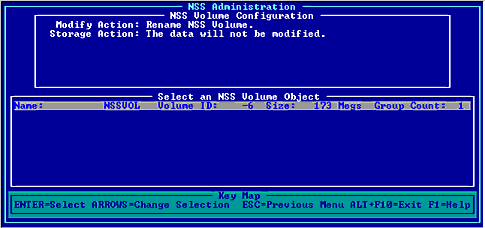
To increase the data capacity of your existing NSS volume, do the following: Enter nwconfig at the server console. NSS loads automatically with NWCONFIG. Select NSS Disk Options. Select NSS Volume Options. Authenticate to NDS by entering your full login name and password. Select Modify. Select Increase NSS Volume Size. Select an NSS volume. Select an available storage group. Select Yes to confirm your decision. To increase the data capacity of your existing NSS volume, do the following. This task lets you change the name of an existing NSS volume. To rename an NSS volume, do the following: Enter nwconfig at the server console. NSS loads automatically with NWCONFIG. Select NSS Disk Options. Select NSS Volume options. Authenticate to NDS by entering your full login and password. Select Modify. Select Rename NSS Volume. Select the NSS volume to rename. Enter the new name of the volume. Select Yes to confirm your choice. The NSS volume will be renamed in NDS. To rename an NSS volume, do the following: Load NSS. Open the NSS Administration menus. At the server console prompt, enter nss /menu to open the menus. From Configure, select Modify. Select Rename NSS Volume. The following screen appears. Figure 14
Select the NSS volume to rename. Enter the new name of the NSS volume. Select Yes to confirm your decision. The NSS volume will be renamed in NDS. In most cases, you will want to add your NSS volume to the NDS tree. NSS volumes are automatically added to the NDS tree if the following conditions are met. Otherwise, you must add your NSS volume to NDS using NWCONFIG, NWADMIN, or NETADMIN manually. This means if you chose to create your NSS volumes using the NSS Administration menus, you must still use NWCONFIG or NetWare Administrator to add the NSS volumes to NDS. The following items are instances where you may not want to add an NSS volume to NDS:
If you created your NSS volume using the NSS Administration menus, your new volume was not added to NDS automatically. To add the volume to NDS using NWCONFIG, first mount your volume and then do the following. At the server console, enter nwconfig. Select Directory options. Select Update mounted volumes into the directory. Log in to NDS. Select your NSS volume from the list provided. To add the volume to NDS using NetWare Administrator, first mount your volume, and then do the following. At a Windows client, log in to the Novell client. Change to Sys:\Public\winnt or win95. Double-click nwadminnt.exe or nwadmin95.exe. In NetWare Administrator, place the cursor where you want the NSS volume in the NDS tree. Right-click Create. At the New Object dialog box, select Volume and click OK. At the Create Volume box, do the following: To remove an NSS volume from the NDS tree, use NetWare Administrator.Using the NWCONFIG Utility
Using the NSS Administration Menus
Rename an NSS Volume
Using the NWCONFIG Utility
Using the NSS Administration Menus
Volume Configuration Table
NSS Volumes and NDS
Add an NSS Volume to NDS
Remove an NSS Volume from NDS