5.2 Configuring Exchange 2000/2003
NOTE:The Exchange System Manager interface is different in Windows 2000 and Windows 2003, but the same steps can be performed in both Windows versions.
5.2.1 Performing Basic Configuration for Exchange 2000/2003
-
Start Exchange System Manager.
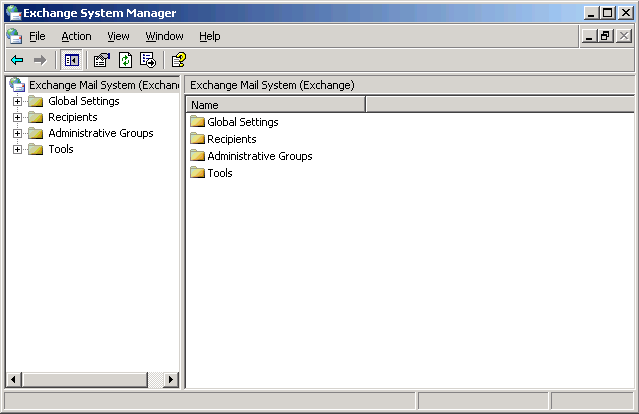
HINT:If you do not see the Administrative Groups object, right-click the Organization object, then click . Select and , then click .
-
Expand , then expand (or whatever your system’s administrative group is).
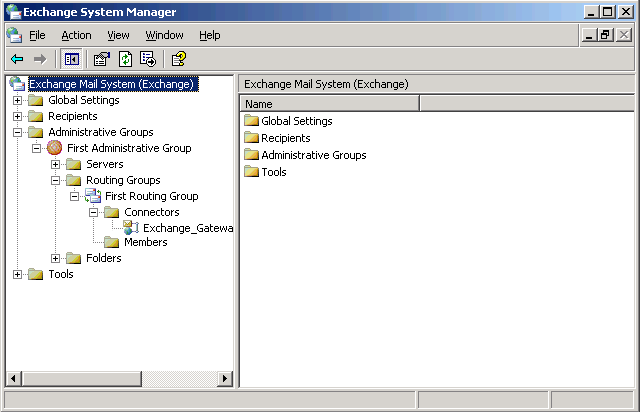
-
Expand , then expand (or whatever your system’s routing group is).
-
Expand , right-click the Gateway object, then click .
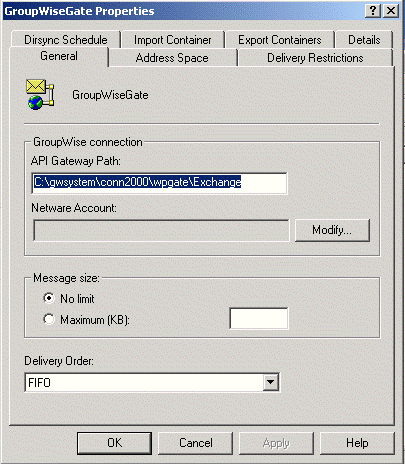
-
Click , specify the administrator username and password, then click .
-
Click .
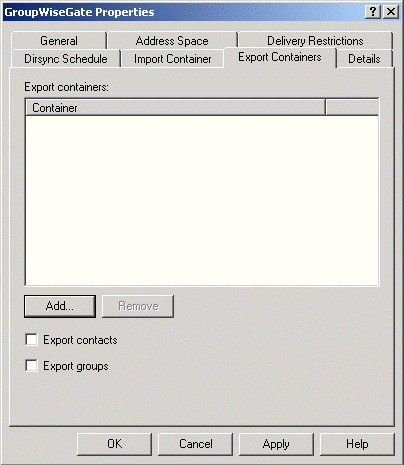
-
Click , select the container that contains Exchange users whose addresses and information you want to export to the GroupWise system (for example, the Users container), then click to add the export container to the list.
IMPORTANT:Directory synchronization and exchange cannot occur if you have not added any user containers to the Export Containers property page.
When GroupWise users are imported into the Exchange system, they are, by default, placed in a container named GroupWise at the root of Active Directory. You can use the /useimportcontainer gateway startup switch to place the users into the import container specified under .
-
Click again to return to the main Exchange System Manager window.

-
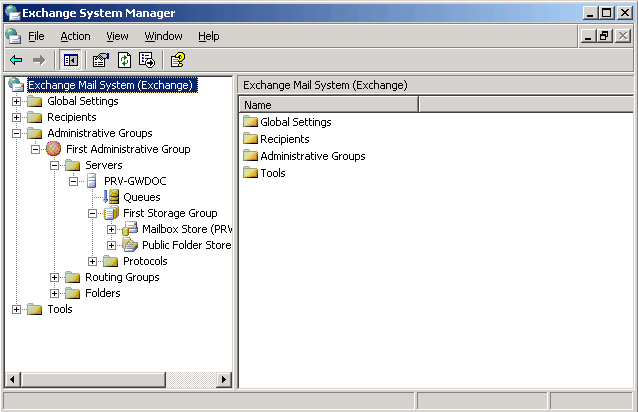
Expand , then expand the Server object for your server.
-
Expand (or whatever your system’s storage group is).
-
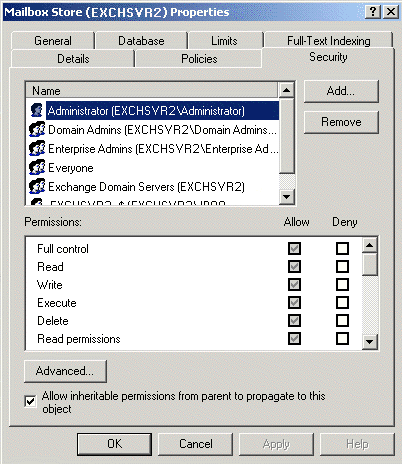
Right-click , click , then click .
-
Add the user to log in to the Exchange services and the Windows server (if the user has not been added already).
-
Scroll to the bottom of the Permissions list, grant the user and permissions, then click .
Make sure that the permissions are explicitly granted, not inherited through a parent security object. If necessary, click to verify the permissions.
-
Make sure that the Exchange services are running.
-
On the Control Panel, double-click .
-
Scroll down to check the status of the following services:
- Microsoft Exchange Event
- Microsoft Exchange IMAP4
- Microsoft Exchange Information Store
- Microsoft Exchange Management
- Microsoft Exchange MTA Stacks
- Microsoft Exchange POP3
- Microsoft Exchange Routing Engine
- Microsoft Exchange Site Replication Service
- Microsoft Exchange System Attendant
-
If any of the Microsoft Exchange services are not running, start them now.
Make sure that the field for each service is set to so that you do not need to start them manually in the future.
-
-
If you want to set up bidirectional Busy Search between the GroupWise and Exchange systems, continue with Setting Up Bidirectional Busy Search for Exchange 2000/2003.
or
If you want to customize the name of the non-GroupWise domain that represents the Exchange system, the external post office that represents the Exchange administrative group, or the format of GroupWise-type usernames for Exchange users, skip to Section 5.2.3, Customizing Addressing for Exchange 2000/2003.
or
Skip to Section 6.0, Configuring the GroupWise Side of the Exchange Gateway
5.2.2 Setting Up Bidirectional Busy Search for Exchange 2000/2003
After performing basic configuration of the Exchange Gateway, you can configure it so that both GroupWise users and Exchange users can perform Busy Searches on each other.
NOTE:Bidirectional busy search is not available for Exchange 5.5.
Setting Up the Microsoft Calendar Connector on Exchange 2000
Installing the Calendar Connector on Exchange 2000
For background information about the Exchange 2000 Calendar Connector, see the Microsoft article Exchange 2000 Service Pack 1 Calendar Connector.
-
Insert the Microsoft Exchange 2000 Service Pack 1 or later CD into the CD drive on the Exchange server.
-
Browse to the \english\exch2000\ent_spn\calcon\i386 directory on the CD, then run setup.exe.
-
When the Setup program appears, click .
-
Select , then click .
-
When the installation is complete, click .
-
Continue with Configuring the Calendar Connector on Exchange 2000.
Configuring the Calendar Connector on Exchange 2000
-
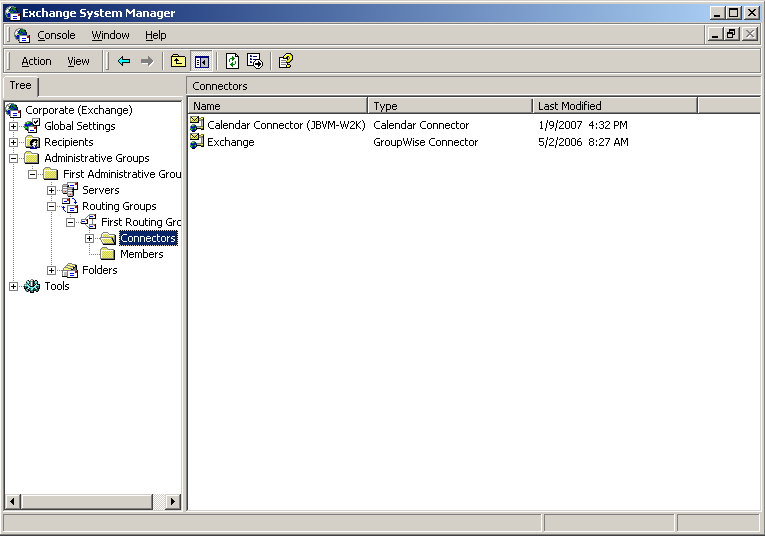
In Exchange System Manager, expand .
-
Right-click the Calendar Connector, then click .
-
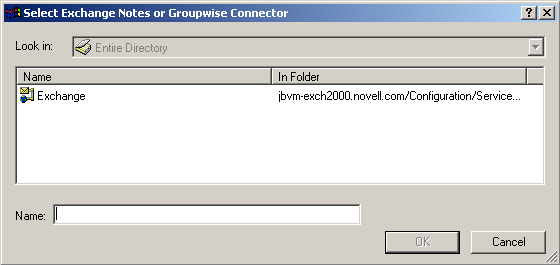
Under , click .
-
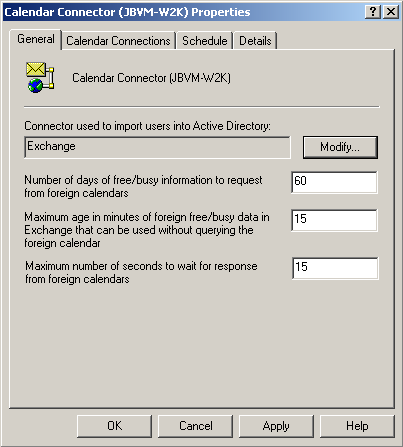
In the field, specify the name of the GroupWise Gateway for Microsoft Exchange connector, then click to display the Calendar Connector Properties dialog box.
-
Set to 0.
The 0-second setting causes a free/busy request to come through the gateway for every refresh. If you change to a larger number, Exchange caches free/busy requests for the specified number of minutes.
-
Set to 60.
The 60-second setting prevents the gateway from quitting too soon as it waits for responses.
You can customize these settings as needed for your Exchange system.
-
Click to save your settings.
-
Click .
-
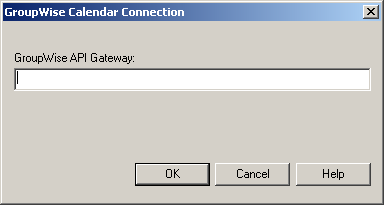
If there is not a Novell GroupWise type already listed, click , select , then click to display the GroupWise Calendar Connection dialog box.
-
In the field, specify domain.exchange_gateway, then click OK.
This provides the name of the Domain object and the name of the Exchange Gateway object.
-
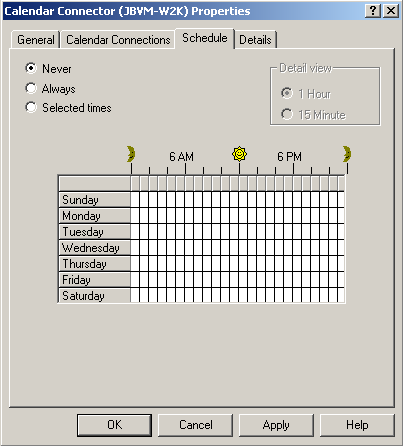
Click .
-
Select , then click .
Setting Up the Microsoft Calendar Connector on Exchange 2003
Installing the Calendar Connector on Exchange 2003
-
Insert the Microsoft Exchange 2003 CD into the CD drive on the Exchange server.
-
If the CD autoruns, ignore the installation page that appears.
-
Browse to the \setup\i386 directory on the CD, then run setup.exe.
-
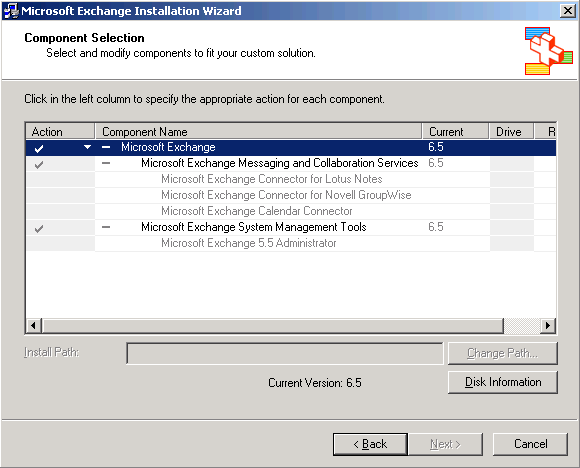
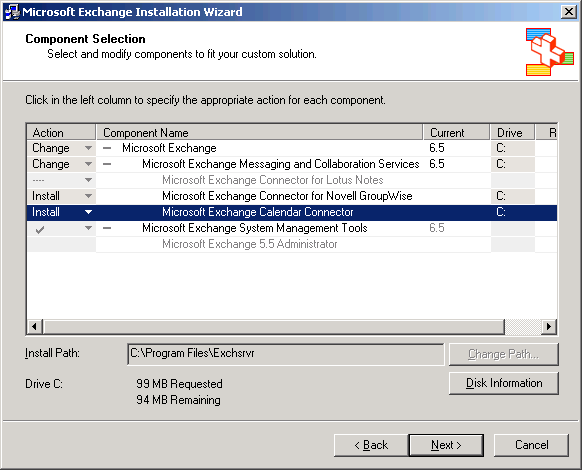
When the Installation Wizard appears, click .
-
Click the check mark in the column for Microsoft Exchange, then select from the drop-down list.
-
Click the check mark in the column for Microsoft Exchange Messaging and Collaboration Services, then select from the drop-down list.
-
Click in the column for Microsoft Exchange Connector for Novell GroupWise, then select .
-
Click in the column for Microsoft Exchange Calendar Connector, then select .
-
Continue with Deactivating the Microsoft Connector for Novell GroupWise.
Deactivating the Microsoft Connector for Novell GroupWise
The Exchange Gateway does not use the Connector for Novell GroupWise provided by Microsoft.
-
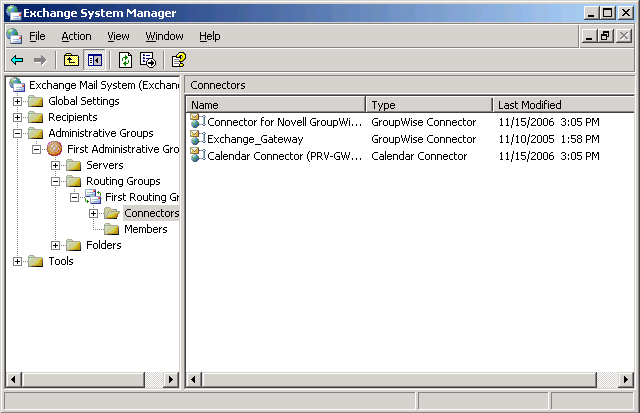
In Exchange System Manager, expand .
-
Right-click , then click .
-
In the field, specify a valid path in order to activate the other properties.
The Exchange Gateway does not use the Connector for Novell GroupWise provided by Microsoft, so any valid path is sufficient.
-
Click .
-
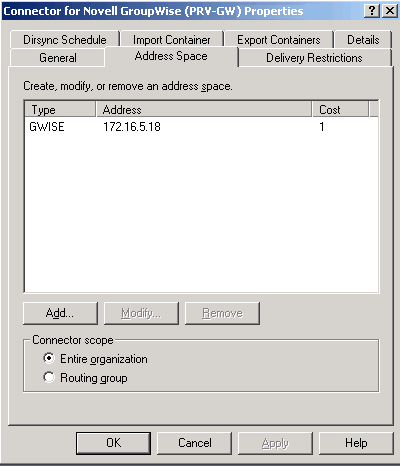
Select the GWISE address space, then click .
-
In the field, change the address space to NotUsed, then click .
The bidirectional configuration for Busy Search does not use the GWISE address space that is set up when you install the Exchange Gateway.
-
Continue with Configuring the Calendar Connector on Exchange 2003.
Configuring the Calendar Connector on Exchange 2003
-
In the list, right-click , then click .
-
Under , click .
-
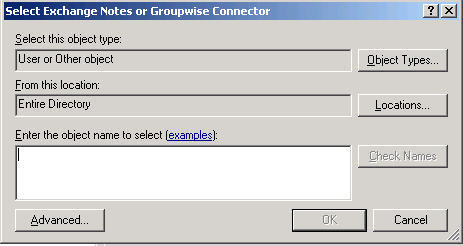
In the field, specify the name of the GroupWise Gateway for Microsoft Exchange connector.
-
Click to verify that you typed it correctly, then click to display the Calendar Connector Properties dialog box.
-
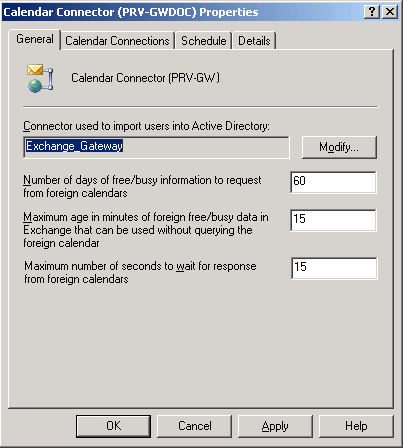
Set to 0.
The 0-second setting causes a free/busy request to come through the gateway for every refresh. If you change to a larger number, Exchange caches free/busy requests for the specified number of minutes.
-
Set to 60.
The 60-second setting prevents the gateway from quitting too soon as it waits for responses.
You can customize these settings as needed for your Exchange system.
-
Click to save your settings.
-
Click .
-
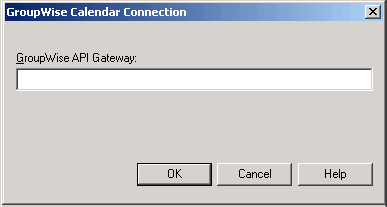
If there is not a Novell GroupWise type already listed, click , select , then click to display the GroupWise Calendar Connection dialog box.
-
In the field, specify domain.exchange_gateway, then click .
This provides the name of the Domain object and the name of the Exchange Gateway object.
-
Click .
-
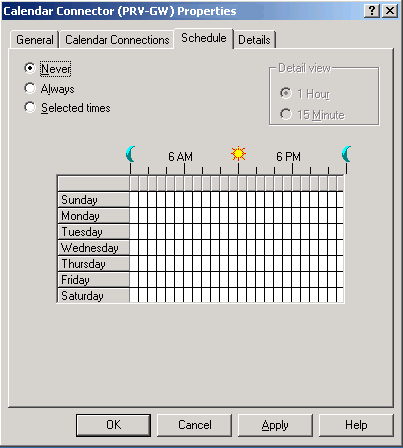
Select , then click .
-
Continue with Checking GroupWise-Related Windows Services.
Checking GroupWise-Related Windows Services
-
On the Windows desktop of the Exchange server, open the Control Panel.
-
Double-click , then double-click .
-
Right-click , then click .
-
If is set to , change it to .
The Microsoft Exchange Connector for Novell GroupWise is no longer needed and should not be started when the Windows server restarts.
-
If the Microsoft Exchange Connector for Novell GroupWise is currently running, click .
-
Click to save the new settings for the Microsoft Exchange Connector for Novell GroupWise.
-
In the list of services, make sure that the Microsoft Exchange Calendar Connector is running. If it is not:
-
Right-click , then click .
-
In the field, select .
-
Click , then click .
-
-
In the list of services, make sure that the Microsoft Exchange Router for Novell GroupWise is running. If it is not:
-
Right-click , then click .
-
In the field, select .
-
Click , then click .
-
-
Click to close the Services window.
-
If this is a new installation of the Exchange Gateway, skip to Testing the Bidirectional Busy Search.
or
If this is an update installation of the Exchange Gateway, continue with Resynchronizing Users.
Resynchronizing Users
If you are updating your Exchange Gateway with Support Pack 1, you need to resynchronize users. In order to ensure that the Address Books of both systems are synchronized and contain valid addresses, you delete the existing user information so that it is refreshed automatically with the new configuration that you have just set up.
-
Delete the GroupWise users that currently display in the Exchange Address Book.
-
Start Active Directory Users and Computers.
-
Expand the Exchange server object.
-
Click the GroupWise folder.
-
Delete all the users from the folder.
-
-
Delete the Exchange users that currently display in the GroupWise Address Book.
-
In the GroupWise View in ConsoleOne, select in the drop-down list at the top of the window.
-
Expand the External Domain object that contains the representation of your Exchange system.
-
Select an External Post Office object that represents an Exchange site or administrative group of your Exchange system to display the users in that post office.
-
Delete all the users, then delete the External Post Office object.
-
Repeat Step 2.c and Step 2.d for each External Post Office object.
-
Delete the External Domain object.
-
-
Make sure that directory synchronization is enabled.
-
Browse to and right-click the Exchange Gateway object, then click .
-
Click .
-
Make sure that is set to .
-
-
Start the Exchange Gateway, as described in Section 7.1, Starting the Exchange Gateway.
A fresh user synchronization automatically takes places between the two systems and bidirectional Busy Search is now available.
-
Continue with Testing the Bidirectional Busy Search.
Testing the Bidirectional Busy Search
-
Start Outlook.
-
Create a new meeting request for a GroupWise user.
-
Click in the new meeting re quest.
You should see the schedule of the GroupWise user.
-
Select a time, then send the meeting request to the GroupWise user.
-
In the GroupWise client of the user to whom you send the meeting request, accept the meeting request, then create an appointment for an Outlook user.
-
Click in the new appointment.
You should see the schedule of the Outlook user.
-
Select a time, then send the appointment to the Outlook user.
If you can perform these tasks, then bidirectional busy search is set up correctly.
-
If you want to customize the name of the non-GroupWise domain that represents the Exchange system, the external post office that represents the Exchange administrative group, or the format of GroupWise-type usernames for Exchange users, continue with Customizing Addressing for Exchange 2000/2003.
or
Skip to Section 6.0, Configuring the GroupWise Side of the Exchange Gateway.
5.2.3 Customizing Addressing for Exchange 2000/2003
-
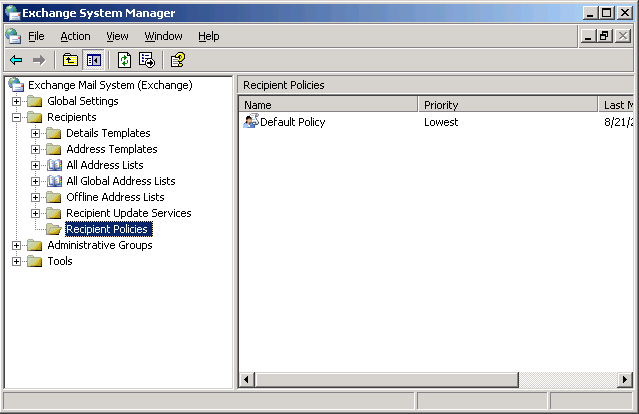
In Exchange System Manager, expand the container, then select the container.
-
Right-click the Default Policy object, click , then click the tab.
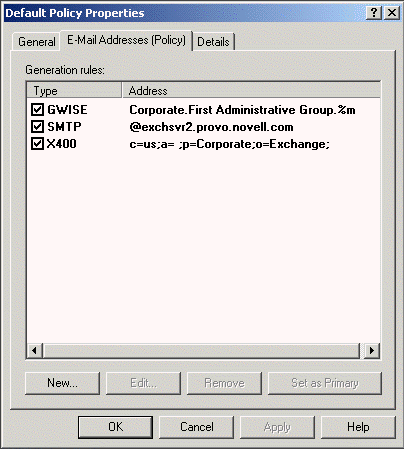
If no GroupWise-specific address type appears in the list, then the addressing components have not been installed on the server. See Section 4.4, Installing the Exchange Gateway Addressing Components.
-
Select (or your custom address type for GroupWise), then click Edit.
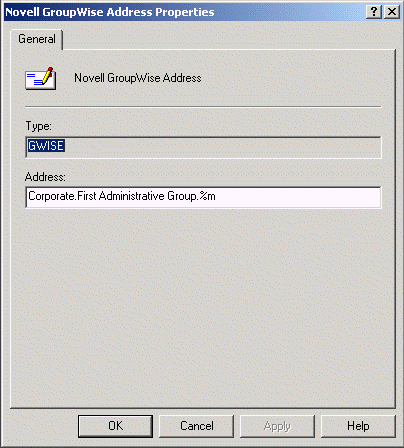
In the Address field, the three parts of a GroupWise address (domain, post office, and username) are separated by periods. The displayed default is Exchange_organization.Exchange_administrative_group.address_format_variable.
-
To change the name of the non-GroupWise domain that you want to represent your Exchange system, replace the Exchange organization with the domain name you want to use worksheet item 12).
-
To change the name of the external post office, replace the Exchange administrative group with the post office name you want to use (worksheet item 13).
-
To change the format of the GroupWise usernames that will be generated for Exchange users, replace %m with the desired address format (worksheet item 14).
-
Click .
-
Back on the Default Policy properties dialog box, click again to save the address format, then click to update all corresponding recipient e-mail addresses to the specified format.
-
Continue with Section 6.0, Configuring the GroupWise Side of the Exchange Gateway