In ConsoleOne, browse to the .Policies.IST.Corp.DA container.
NOTE: You may have already created a Workstation Policy Package and associated it to your workstation's container in Remote Management , or in Single-Site Inventory Collection . If so, open the existing Workstation Policy Package's properties and skip to Step 5.
Right-click the Policies.IST.Corp.DA container and select New > Policy Package.
In the Policy Package Wizard, select Workstation Package > click Next.
Keep the name Workstation Package > click Next > enable the Display Details After Creation check box > click Finish.
In the Properties of Workstation Package page, select Workstation Imaging Policy > click Properties.
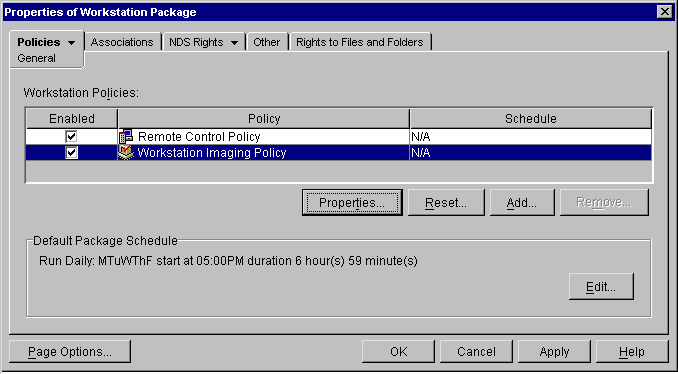
In the Properties of Workstation Package:Workstation Imaging Policy page, click the Image Selection tab > Add.
In the Use This Image field of the New Image Selection Rule dialog box, select the Windows 2000 Pro image object > in the When the Following Conditions are Met fields, select Hard Drive Size > less than (<) > 2048 > click OK.
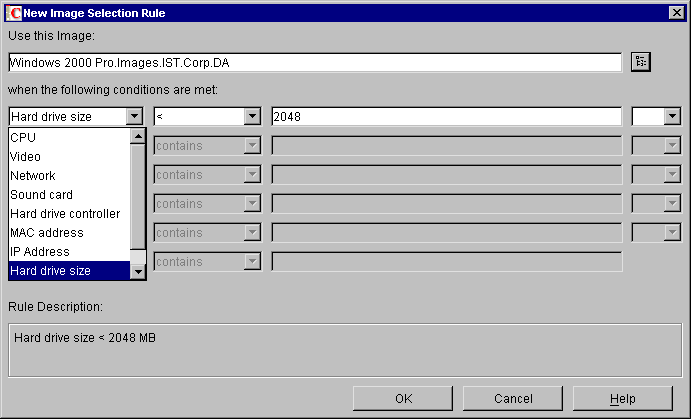
This rule in the imaging policy will cause the Windows 2000 Pro image object to be restored on any system with less than a 2 GB hard drive. See Image Selection Policy Tips for information on how to effectively use the other hardware criteria options.
In the Properties of Workstation Package:Workstation Imaging Policy page, click the Image Selection tab > Add.
In the Use This Image field of the New Image Selection Rule dialog box, select the W2KproConsoleOne image object > in the When the Following Conditions are Met fields, select Hard Drive Size > greater than or equal to (>=) > 2048 > click OK.
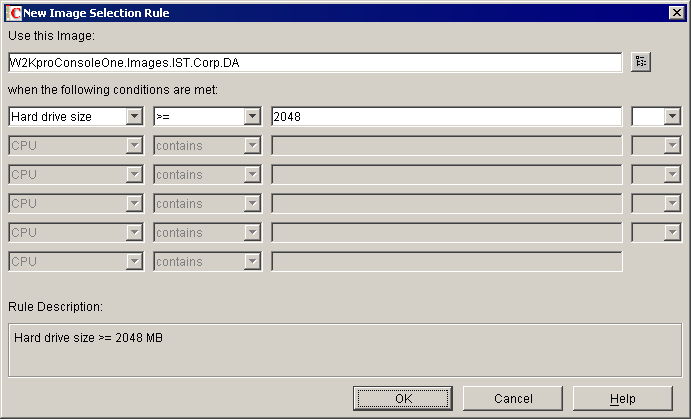
The rules you have created will now select a simple base image for workstations with smaller hard drives, and a base image plus an add-on image for workstations with larger hard drives.
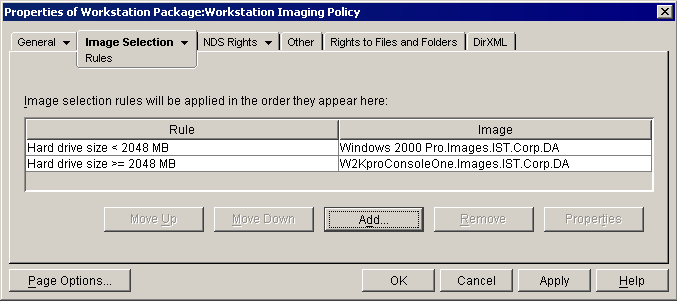
Click OK to save the changes to the imaging policy.
In the Properties of Workstation Package page, click the Associations tab. Ensure that the .Workstations.IST.Corp.DA container is listed. If it is not, add it to the list > click OK to save the changes to the Workstation Package.
NOTE: Because the Image Selection policy is part of a workstation package, it will only affect workstations that have previously been imported. Automatic imaging for non-imported workstations is covered in Scripted Imaging .
Use ConsoleOne to browse to the container .Workstations.IST.Corp.DA.
Double-click the workstation object that corresponds to the physical workstation for which you enabled automatic ZENworks Imaging in Updating to the Current Imaging Engine .
In the Properties page of the workstation object, click the ZENworks Imaging-Configuration tab > enable the Put an Image on this Workstation on Next Boot check box > disable the Use this Image Instead of the Effective Policy Image or Multicast Session check box > click OK.
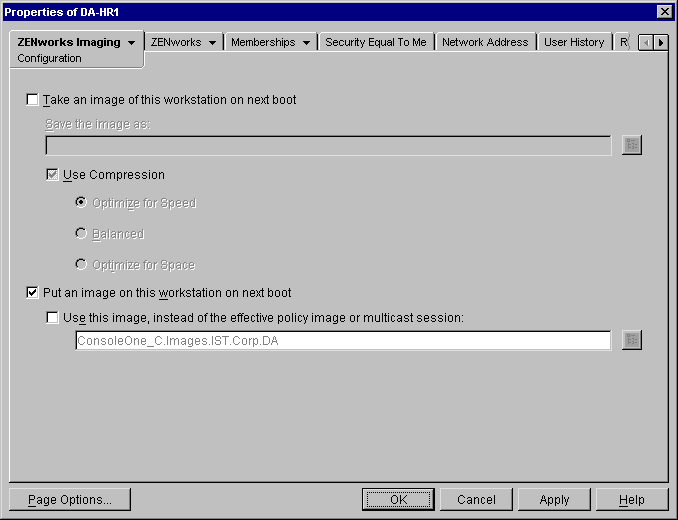
NOTE: The attributes you have just set for the Workstation object will re-image the workstation according to the effective Workstation Policy Package for this workstation.
Reboot your target workstation and allow the imaging session to complete > log in and verify that the workstation contains the correct data set from the image object selected by policy.